Garden Irrigation System
Background
I had a dream…. a dream of setting up an automated irrigation system to water my garden. But, a number of things had to happen before I could get started.
One of my requirements was that I wanted to collect rainwater and use that for irrigation when available, but the only place I could put water tanks was behind my garage.
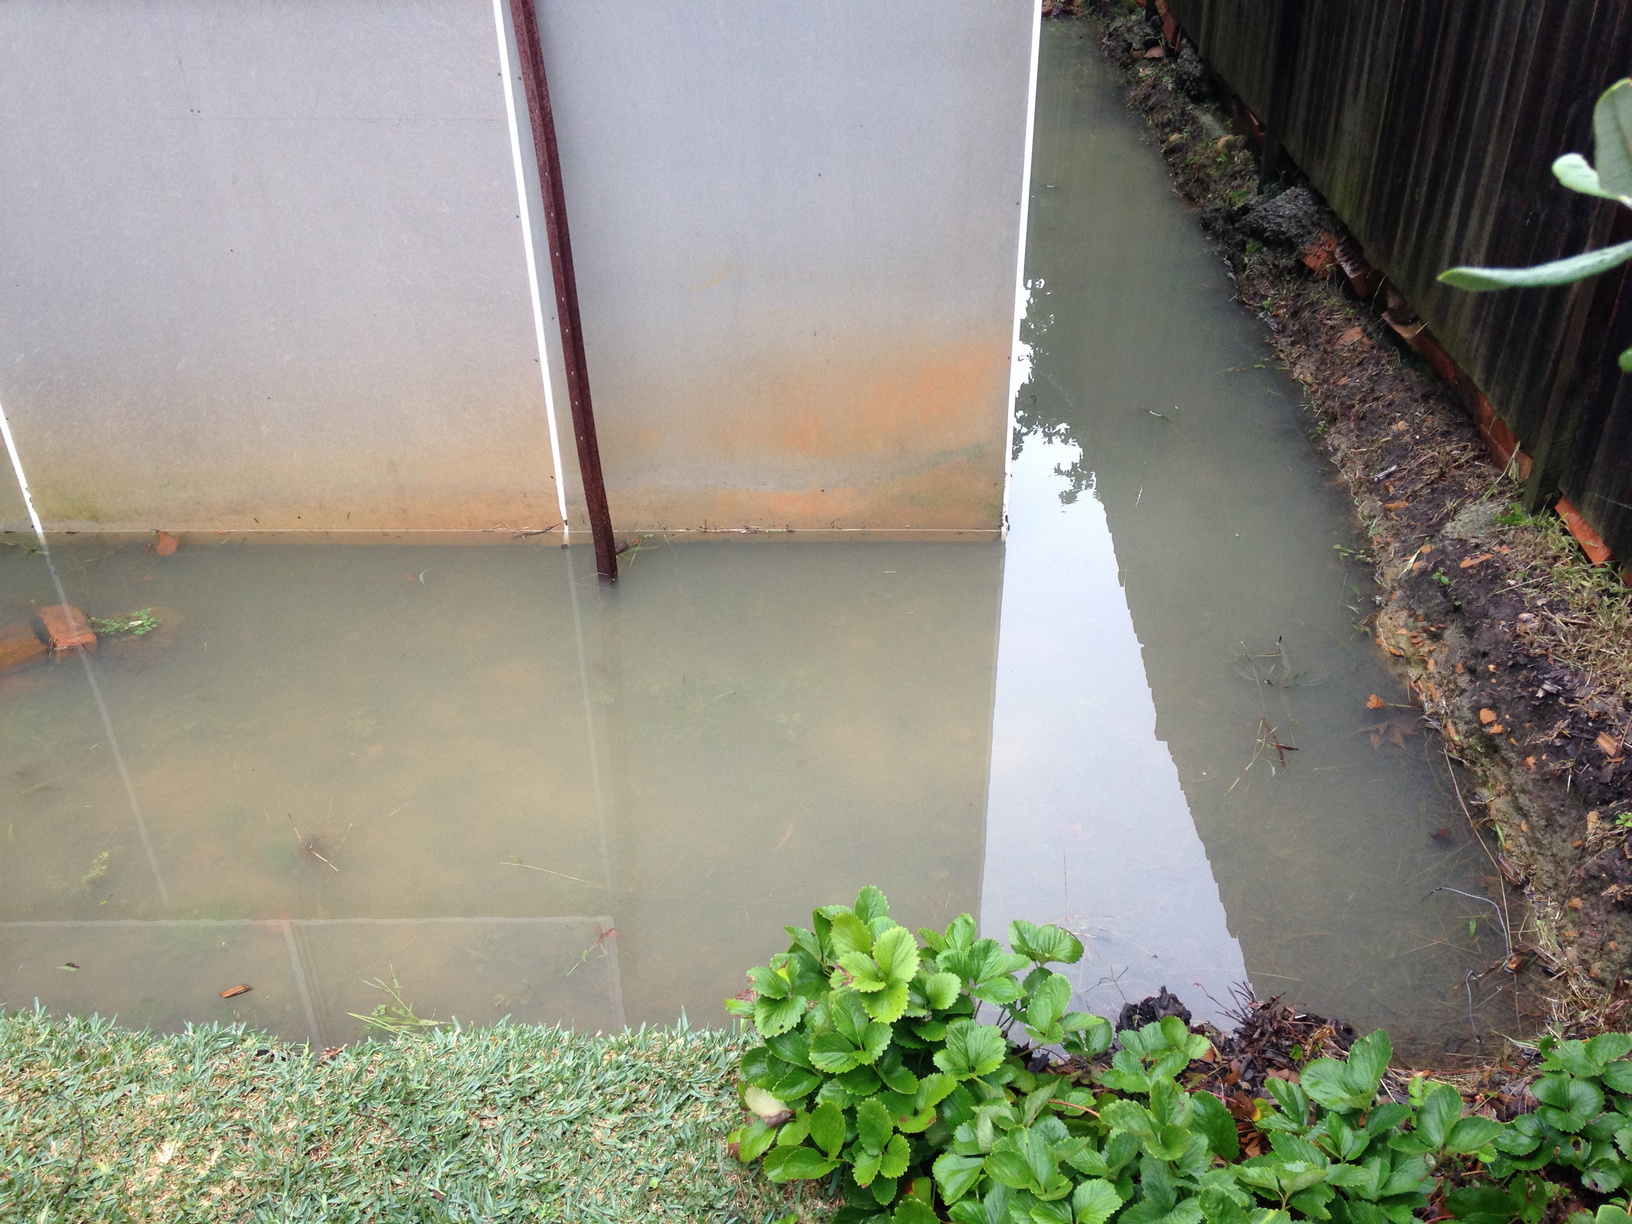
The double-garage and workshop (located at the back of the property, at the furthest point from the driveway) was in serious need of repairs. The back third of the garage/workshop was buried under almost a foot of dirt in parts. This meant that any time we had heavy rain, the garage would flood, as the outdoor ground level was well above the concrete slab on which the garage is laid. It didn’t help that the guttering around the garage had completely rusted through, so any rain would run directly down the side of the garage. There were also a number of holes in the walls, meaning that rodents could easily get in and make their homes in amongst the things I had stored in the garage.
 |
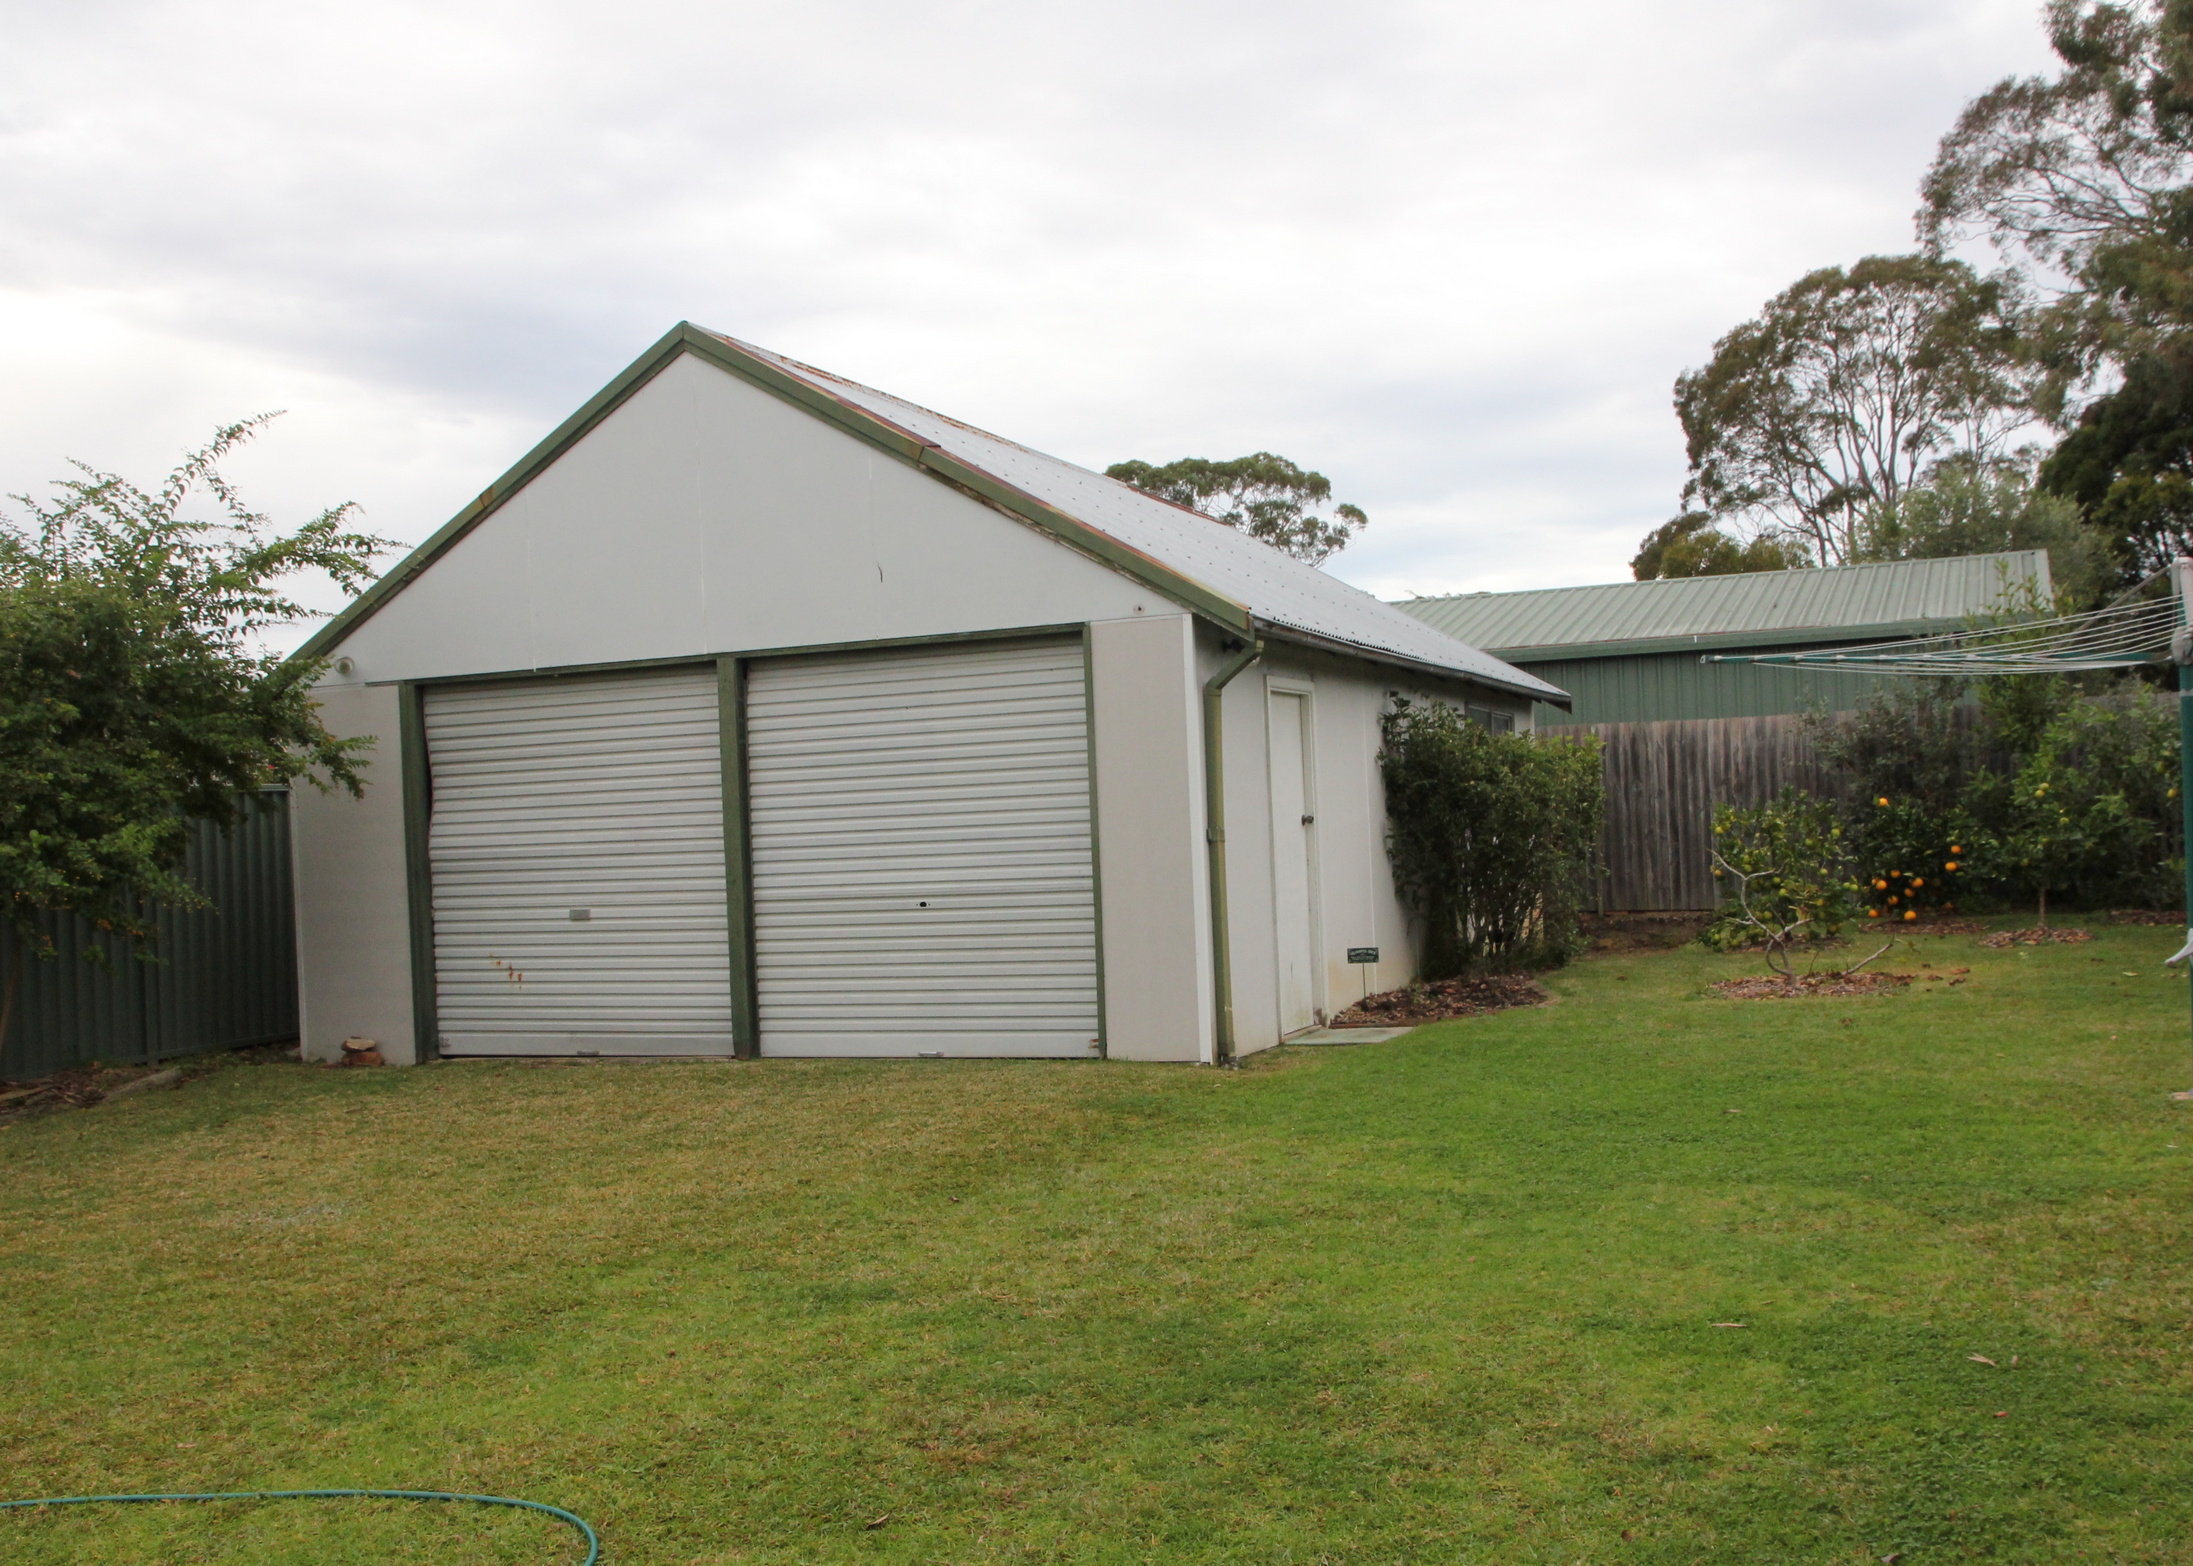
We excavated the back and sides of the garage and got a builder in to:
- Replace the roofing
- Replace the guttering
- Install proper drainage around the garage
- Re-clad the exterior
- Separate the double-garage from the workshop
- Add a door and window to the workshop area
- Replace the decrepit roller-doors to the garage with glass sliding doors
- Build a pergola outside the sliding doors
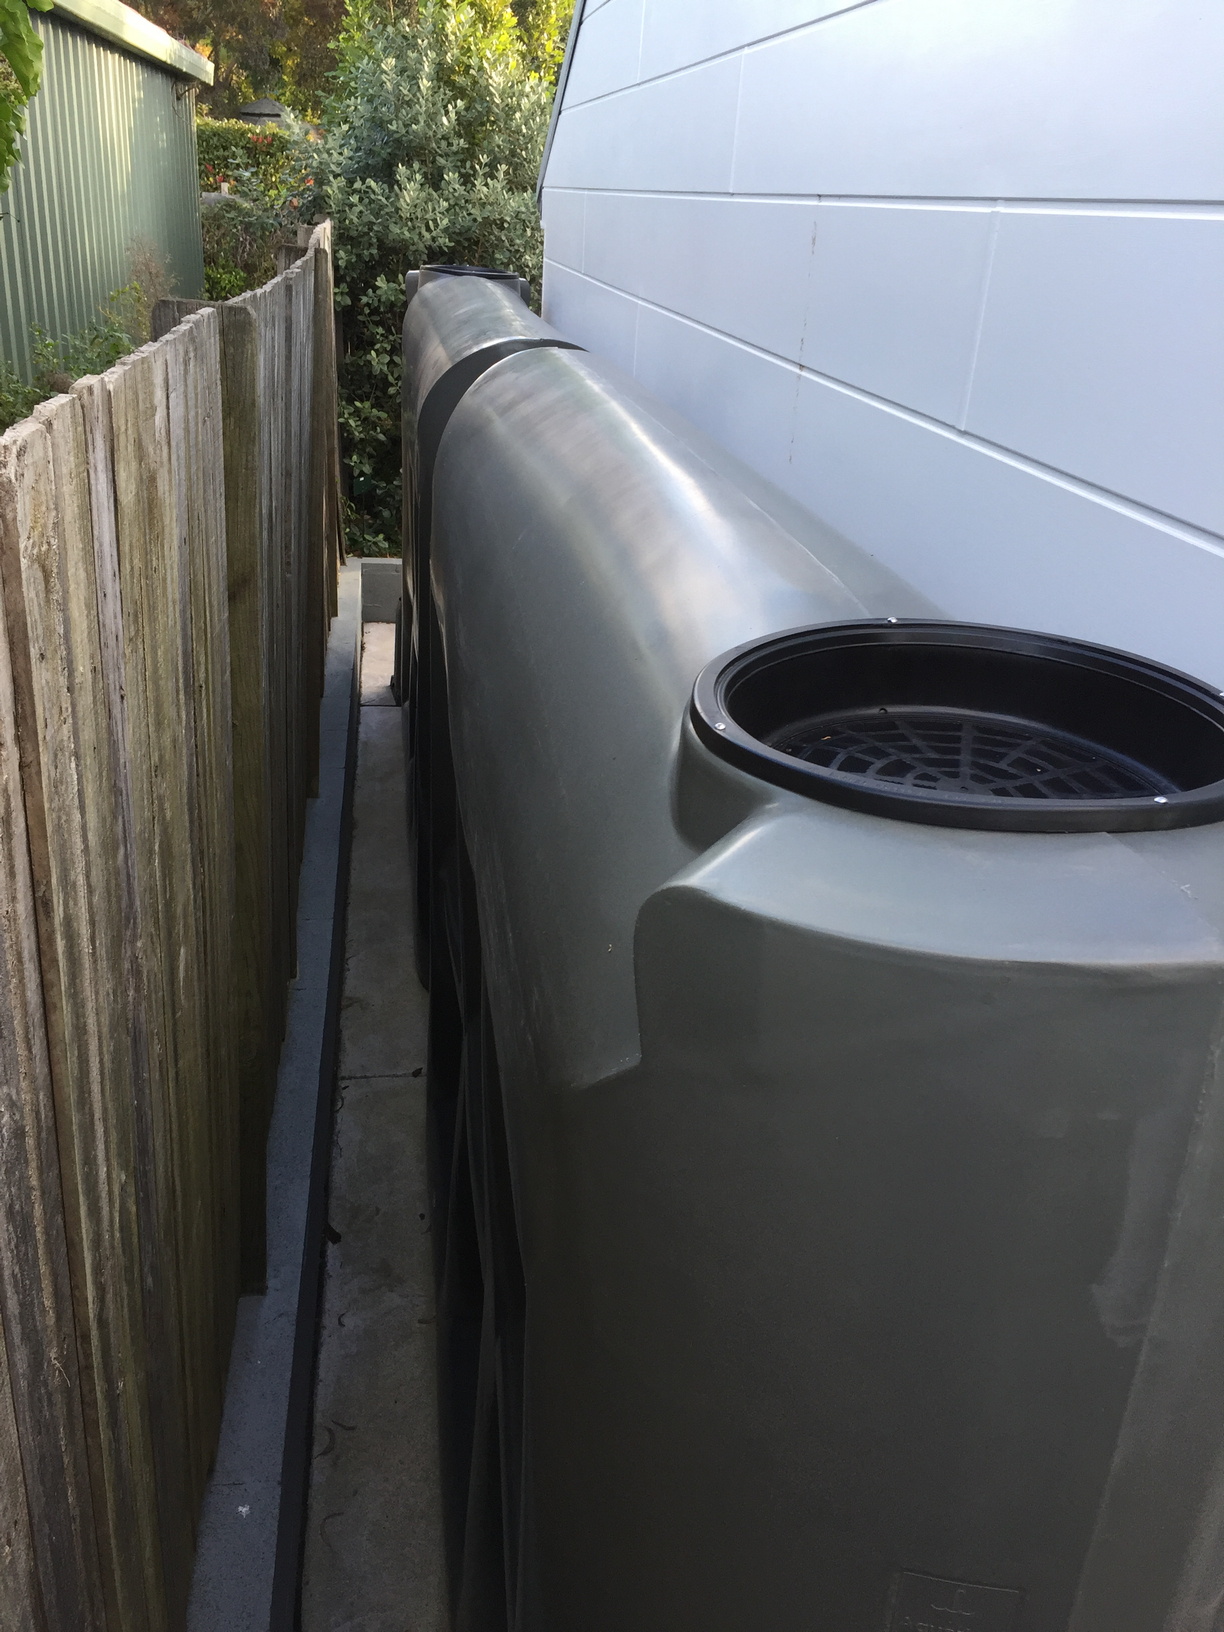
I planned to put in a couple of slim-line rainwater tanks behind the garage after it was renovated.
We got a concreter in to lay concrete around the garage and put in retaining walls between the garage and the back fence and garden. The concrete around the back of the garage was laid thicker to handle the weight of the tanks when they are full.
The double-garage area was to be converted into an external studio/rumpus room. We got a tiler in to lay the floor tiles, then got a kitchen place to do the interior, including a double-sink, benches and 6 sets of floor-to-ceiling cupboards for storage. Much better.
 |
 |
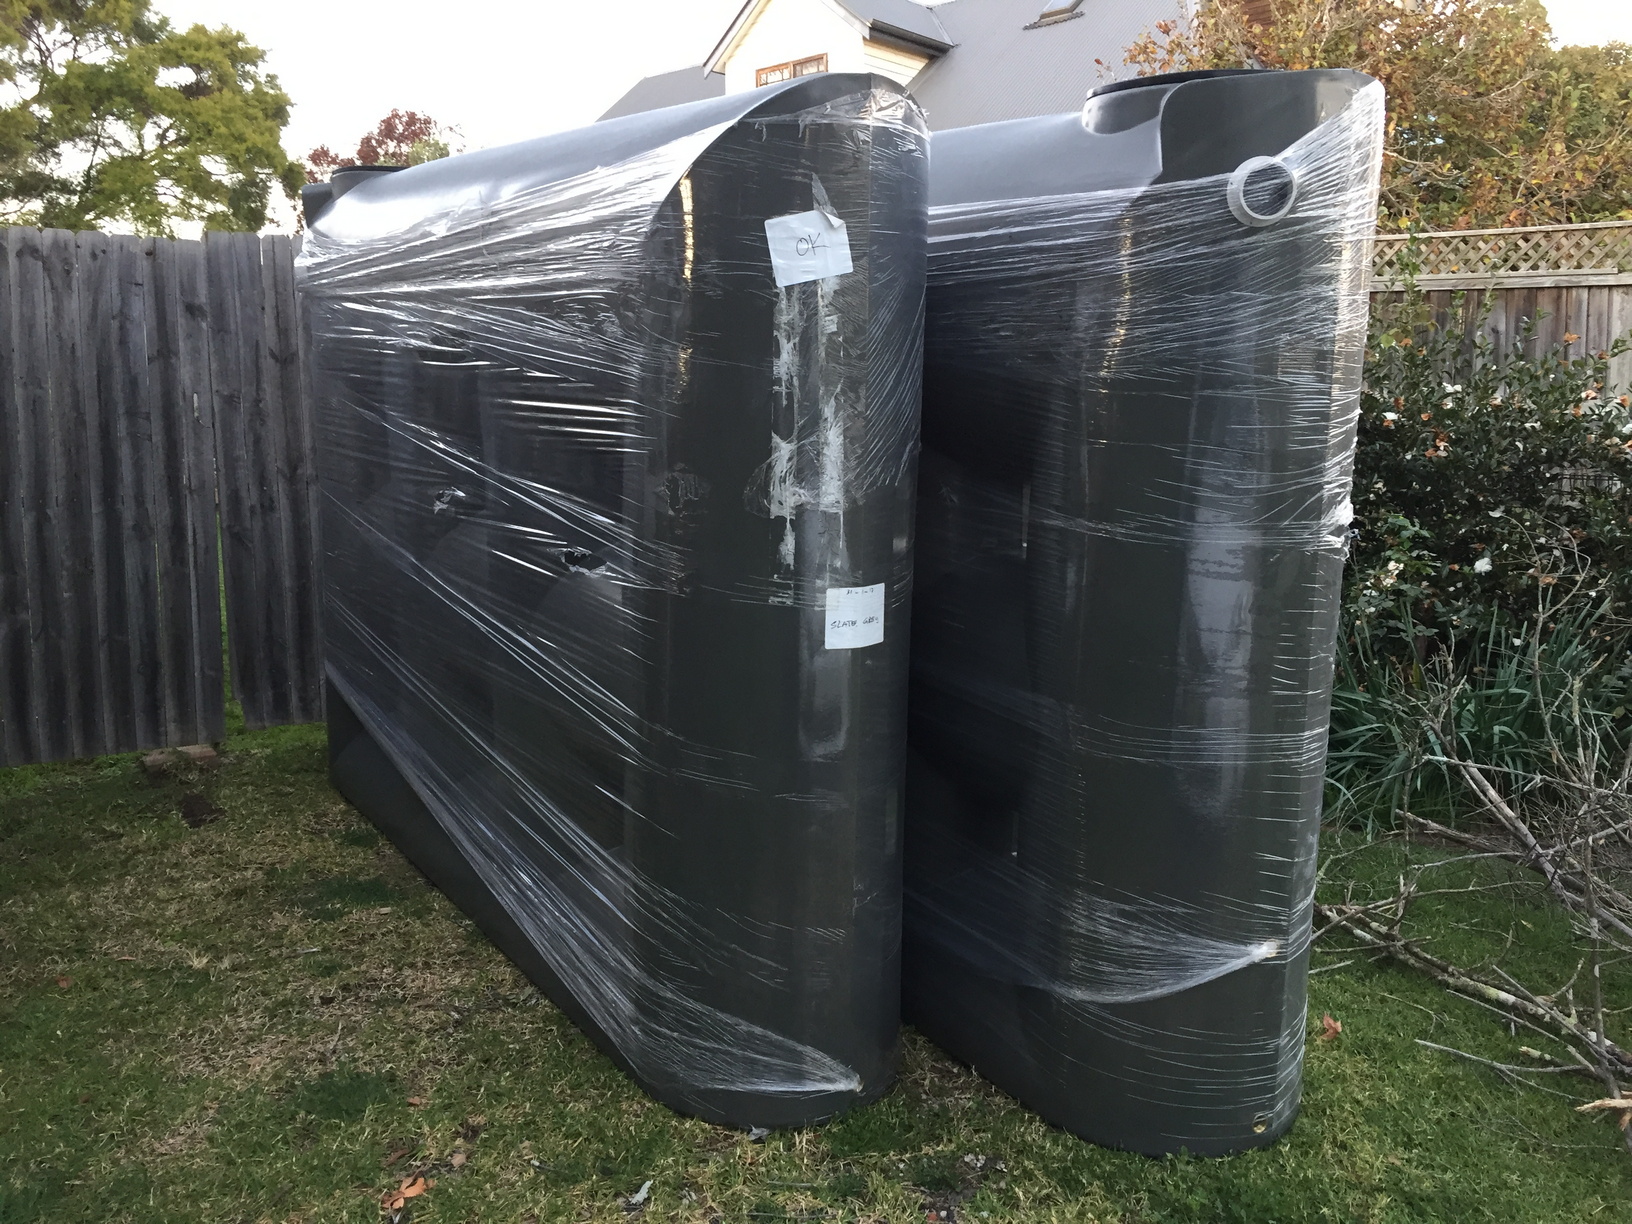
Rainwater tanks
I ordered 2 x 3000L slimline tanks, along with a water pump and pump housing, then got a plumber in to:
- Connect the guttering to the tanks
- Join the two tanks together, giving me a single 6000L body of water
- Connect the pump to the tanks
- Run piping from the tank down either side of the garage and install a tap at the end of each pipe run
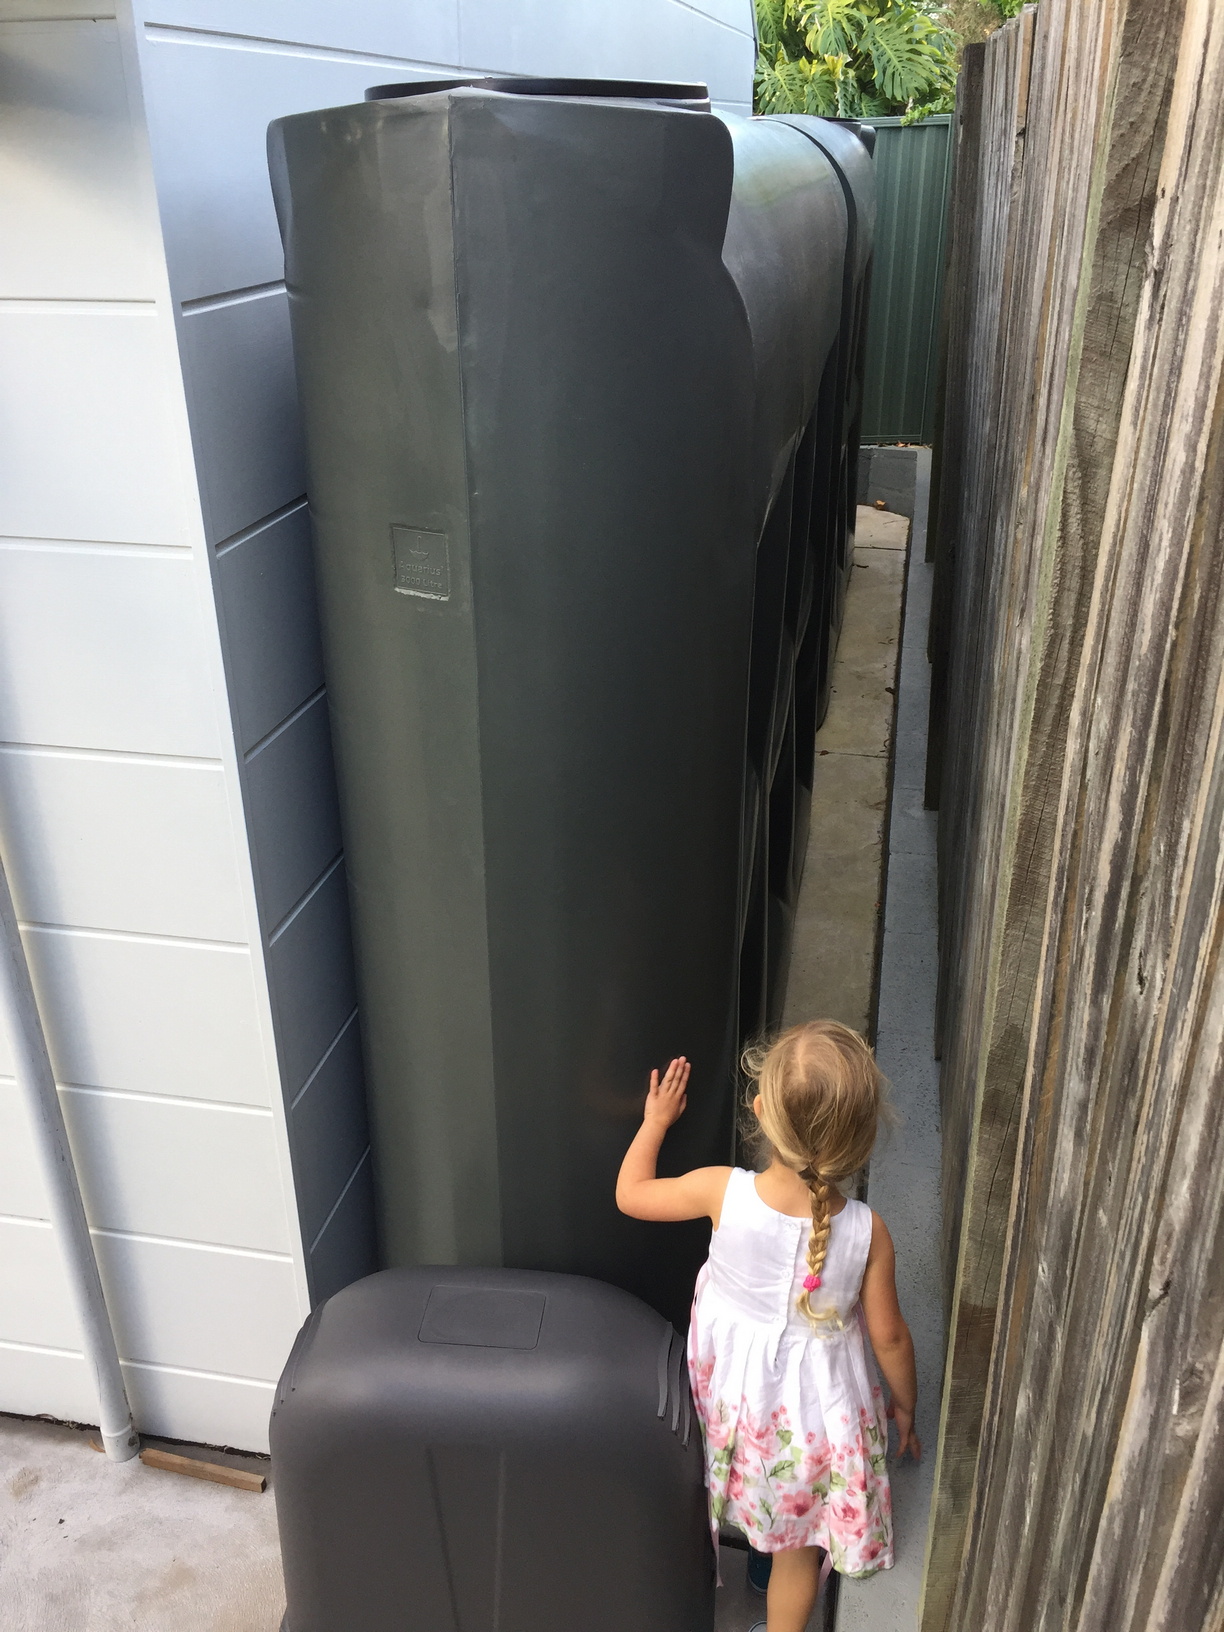
I should have asked the plumber to install 25mm blue-line poly-pipe. Instead I got 20mm pipe installed from the pump to the taps. The people at the irrigation shop later strongly recommended that I install 25mm blue-line poly-pipe from the taps onward to carry the water from the pumps to the solenoid valves, as this would reduce friction losses over the distances involved… and ideally replace the 20mm piping between the pump and taps. I left the 20mm pipe in place, with a view to replacing it later if required, but so far, so good. No pressure issues.
Once the tanks were in, and after our first decent rain, we started connecting our regular garden-hose sprinklers to the rainwater taps to water the garden. It was nice to be able to water the garden with water that would otherwise have gone down the drain!
 |
 |
 |
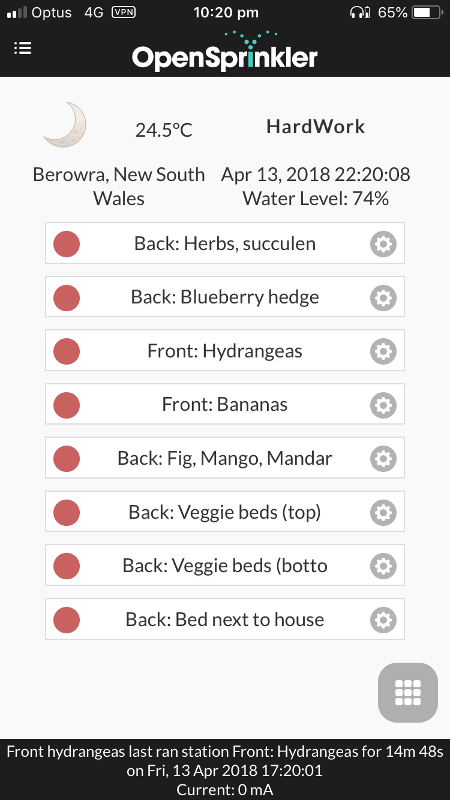
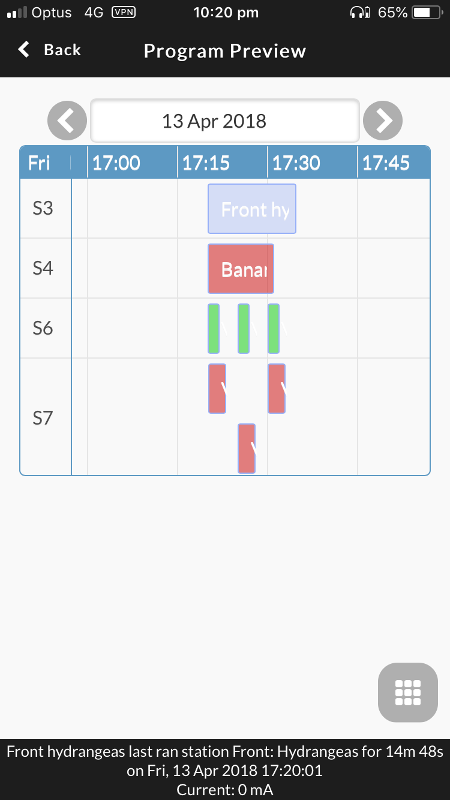
OpenSprinkler
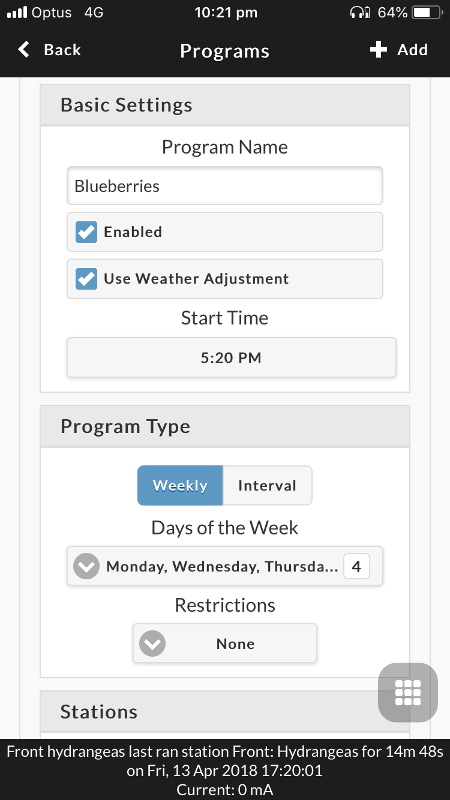
I had my eye on OpenSprinkler for a few years before taking the plunge into this endeavour. OpenSprinkler is the brains behind the irrigation system, allowing manual and scheduled control of the solenoid valves through a web interface, smart-phone application or API. You can also apply for a WeatherUndergound API key and configure the OpenSprinkler to adjust watering levels based on weather observations from a community of local weather stations.
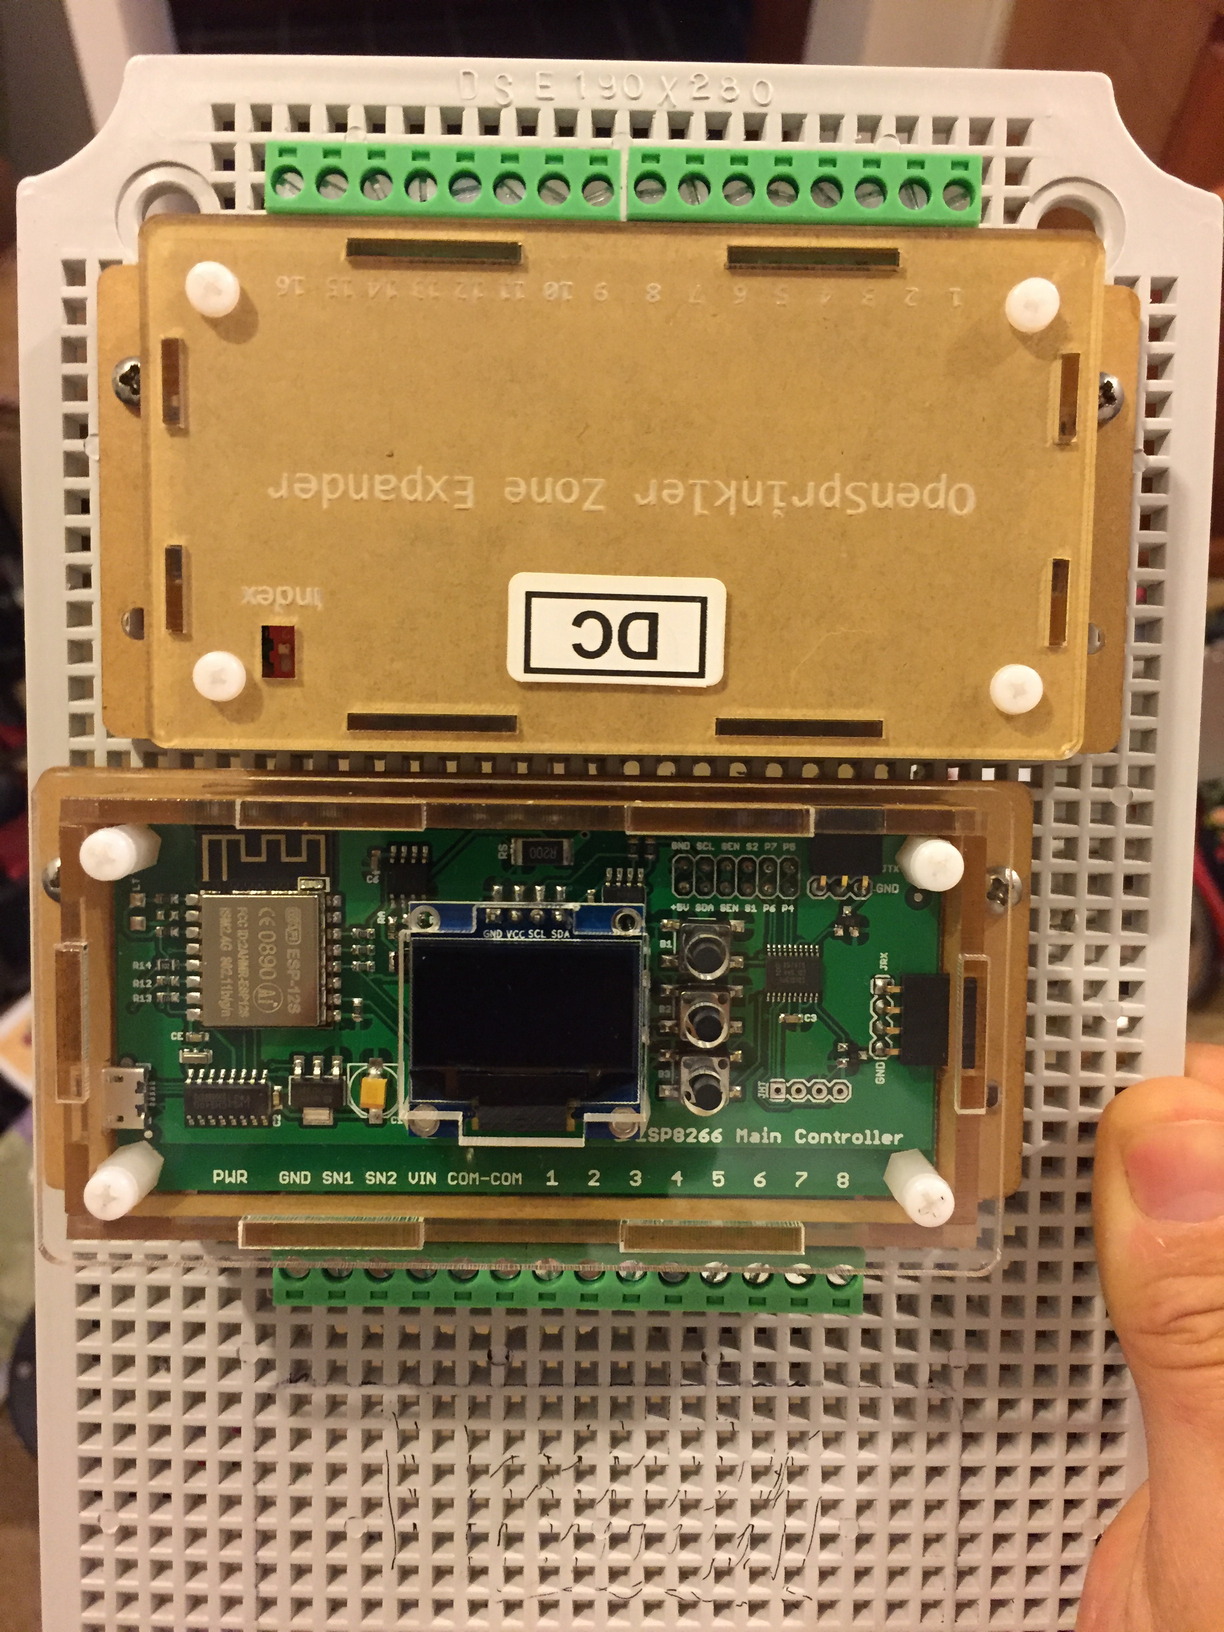
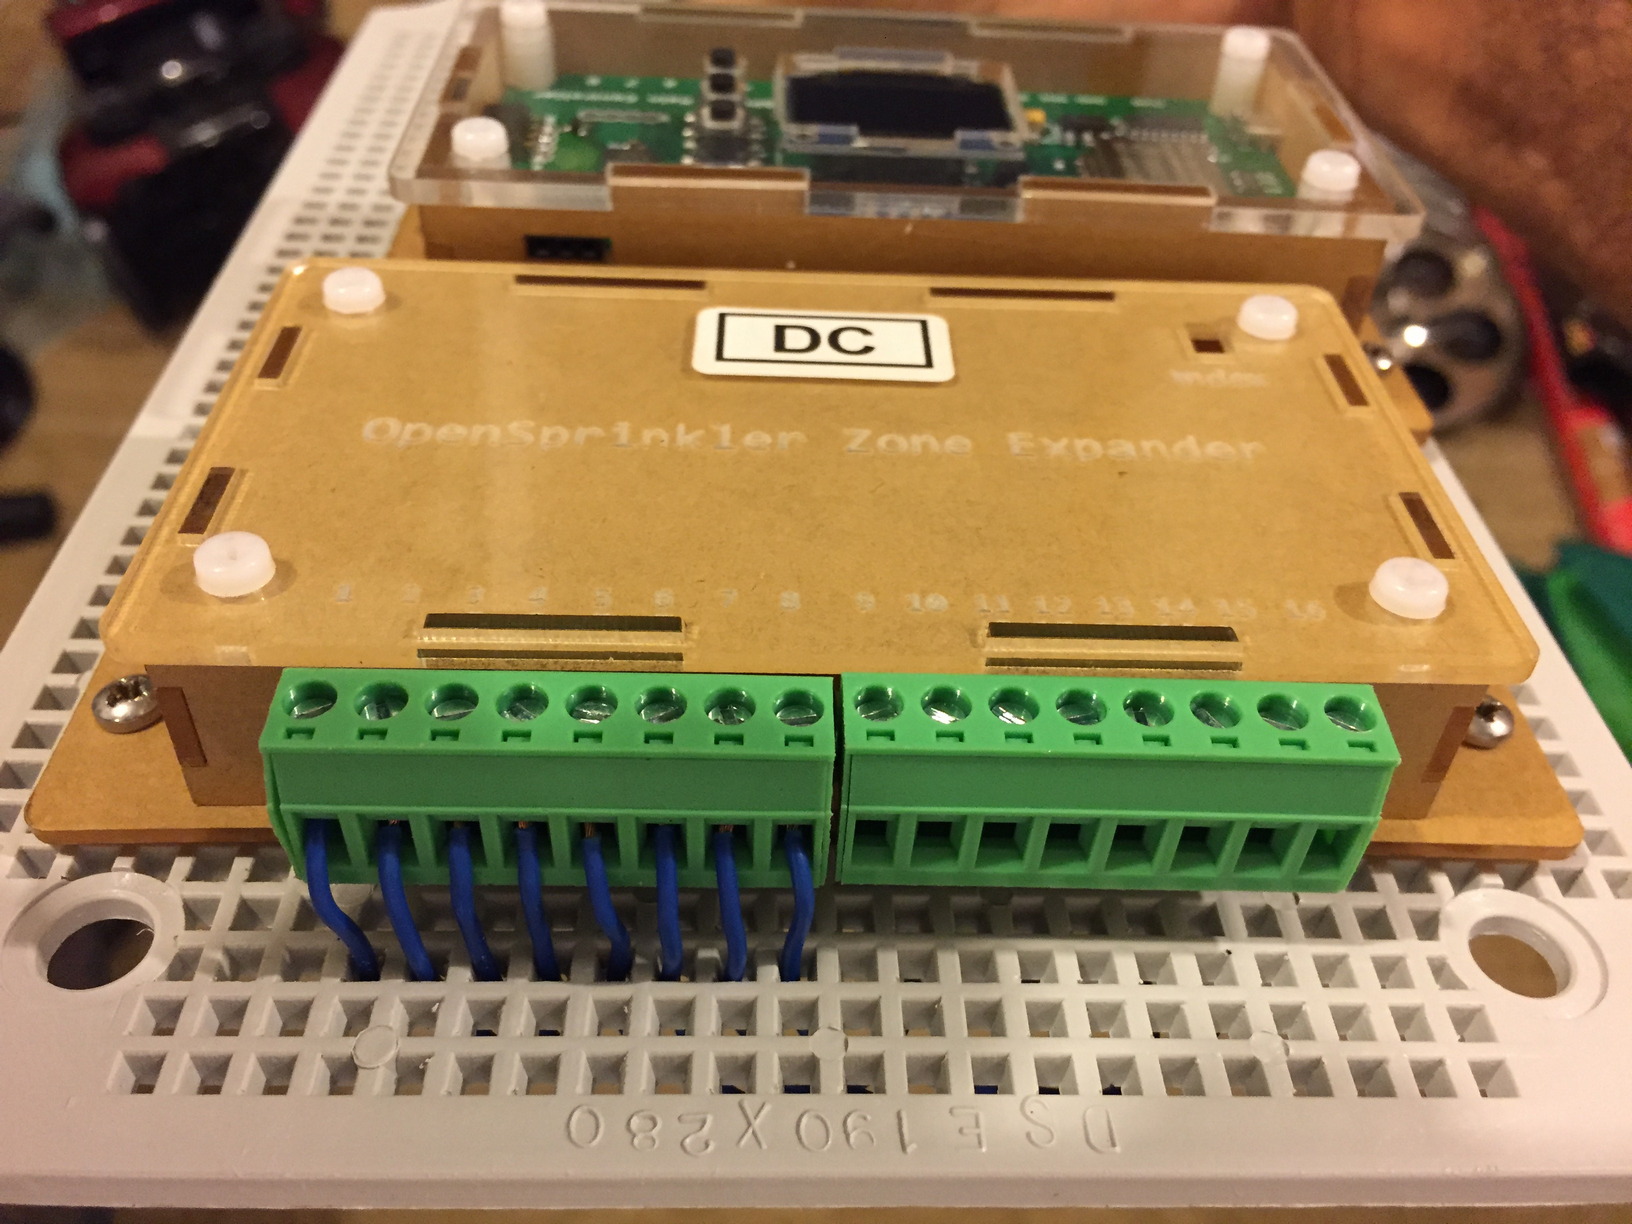
I purchased the DC OpenSprinkler unit (8 zones) and a zone expander (which I thought gave me another 8 zones - turns out it is an additional 16 zones!). I scaled back my plans on the number of zones I wanted slightly after seeing that good quality Solenoid valves and valve boxes are not that cheap, and after seeing how difficult and time-consuming trenching, cabling and piping can be. I could have done without the zone expander, as my current setup only uses 8 zones, however if I ever feel like expanding in future, I have an additional 16 zones to play with. I’ve connected 8 of the 16 zones on the zone expander to a terminal strip, but for now they are unused.
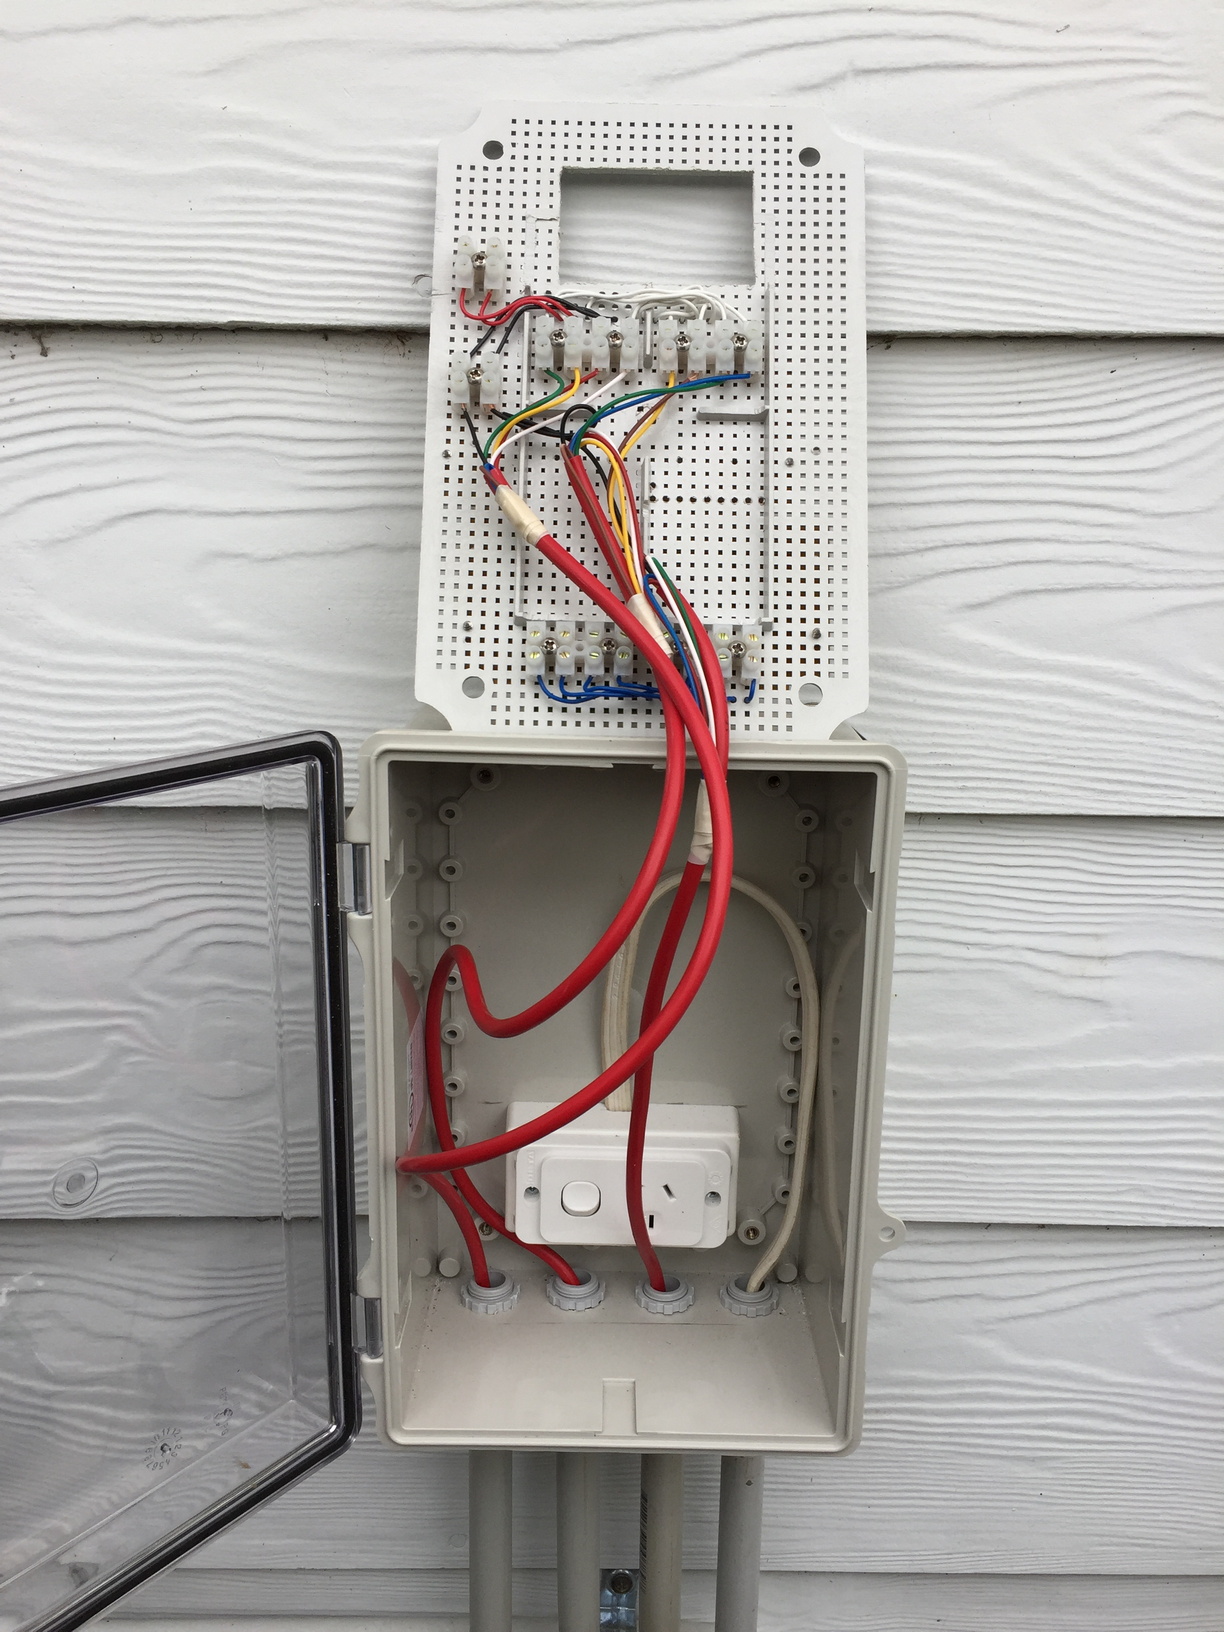
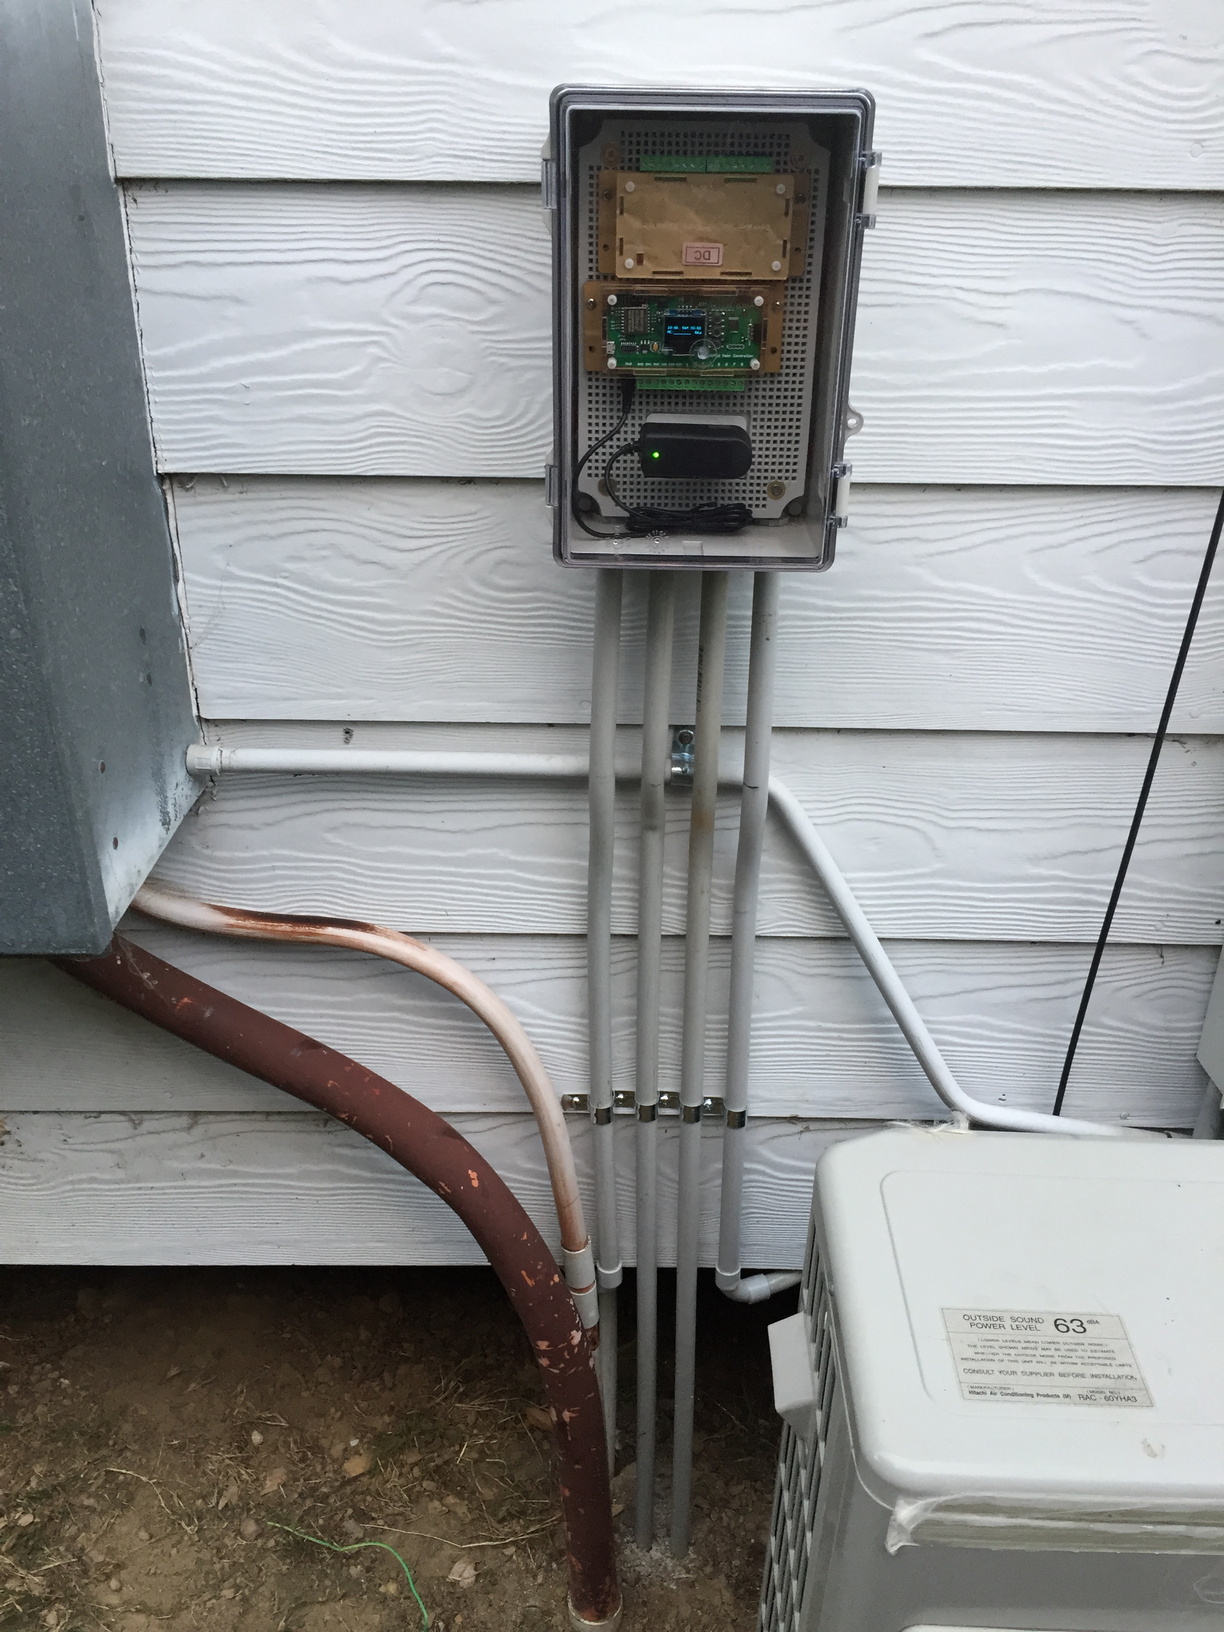
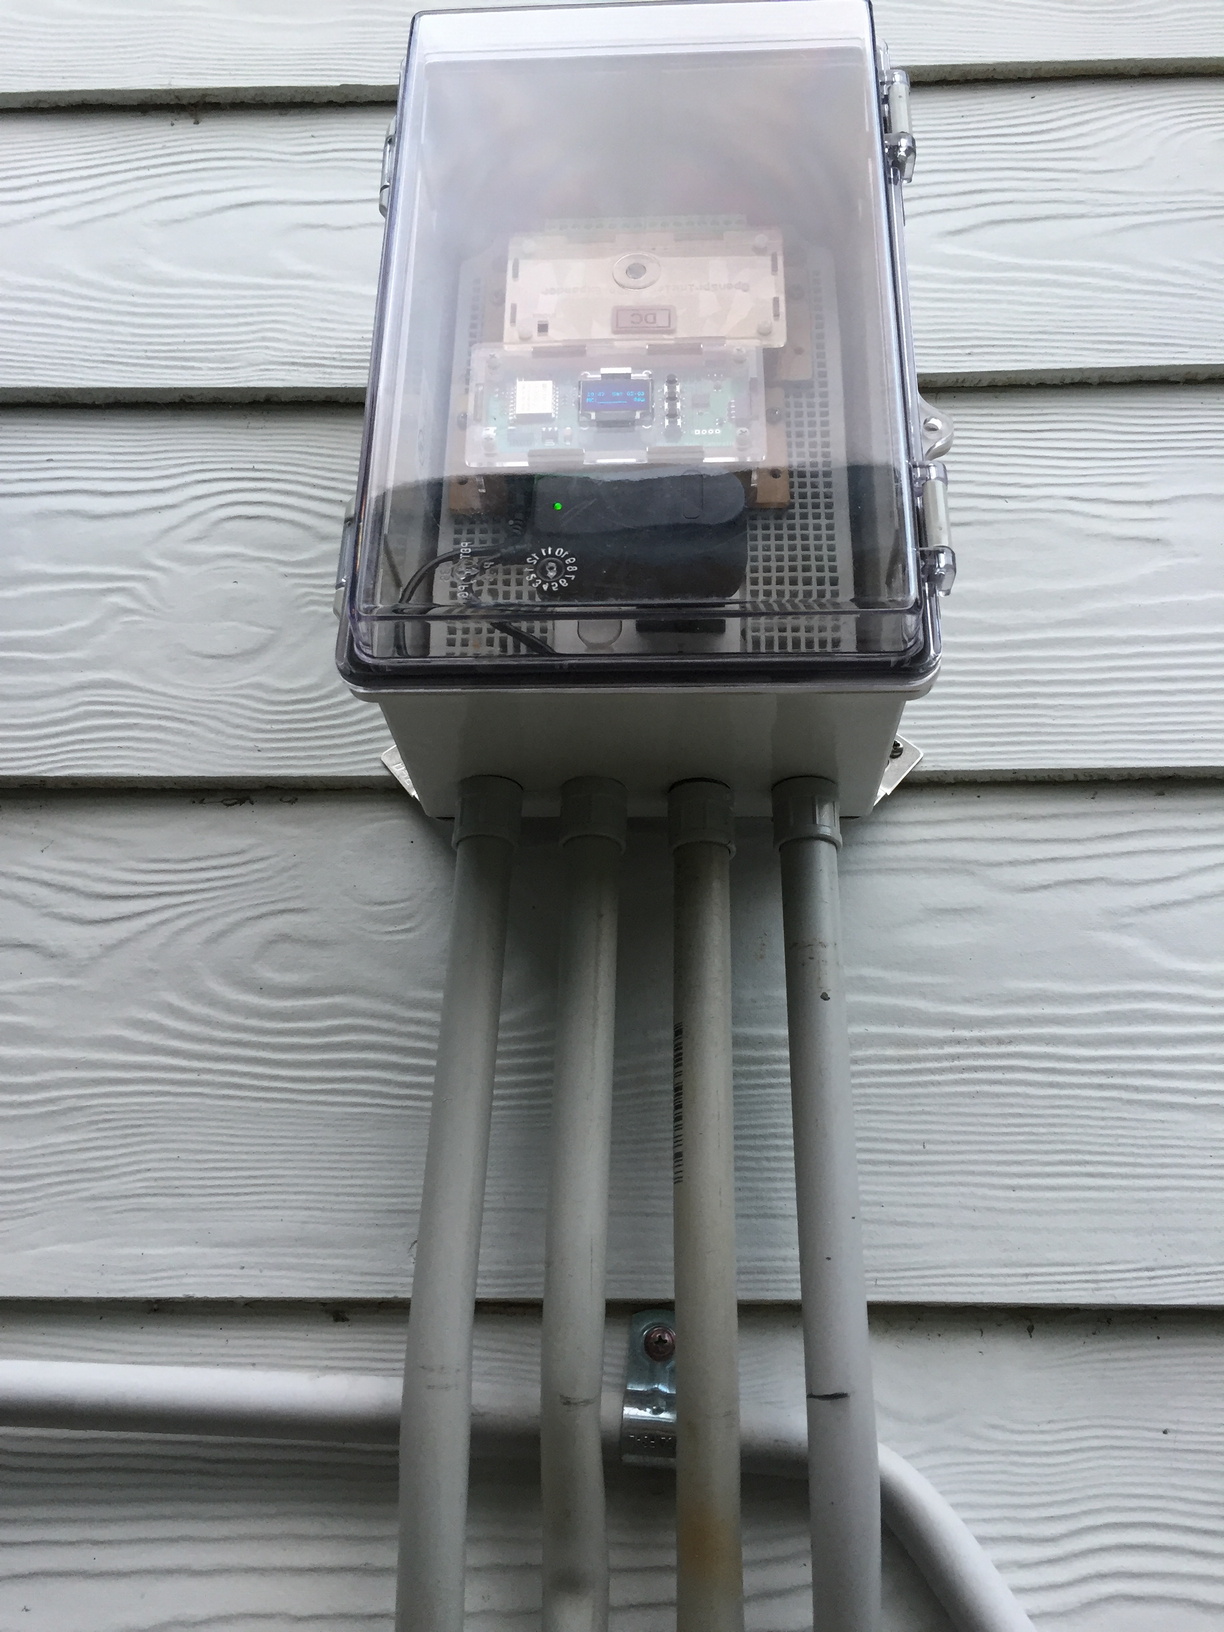
The OpenSprinkler unit is not water-proof and must be installed indoors or in a water-proof enclosure. I went looking for ideas for external enclosures and was inspired by an enclosure setup that I saw on the OpenSprinkler forums: OpenSprinkler in a custom enclosure
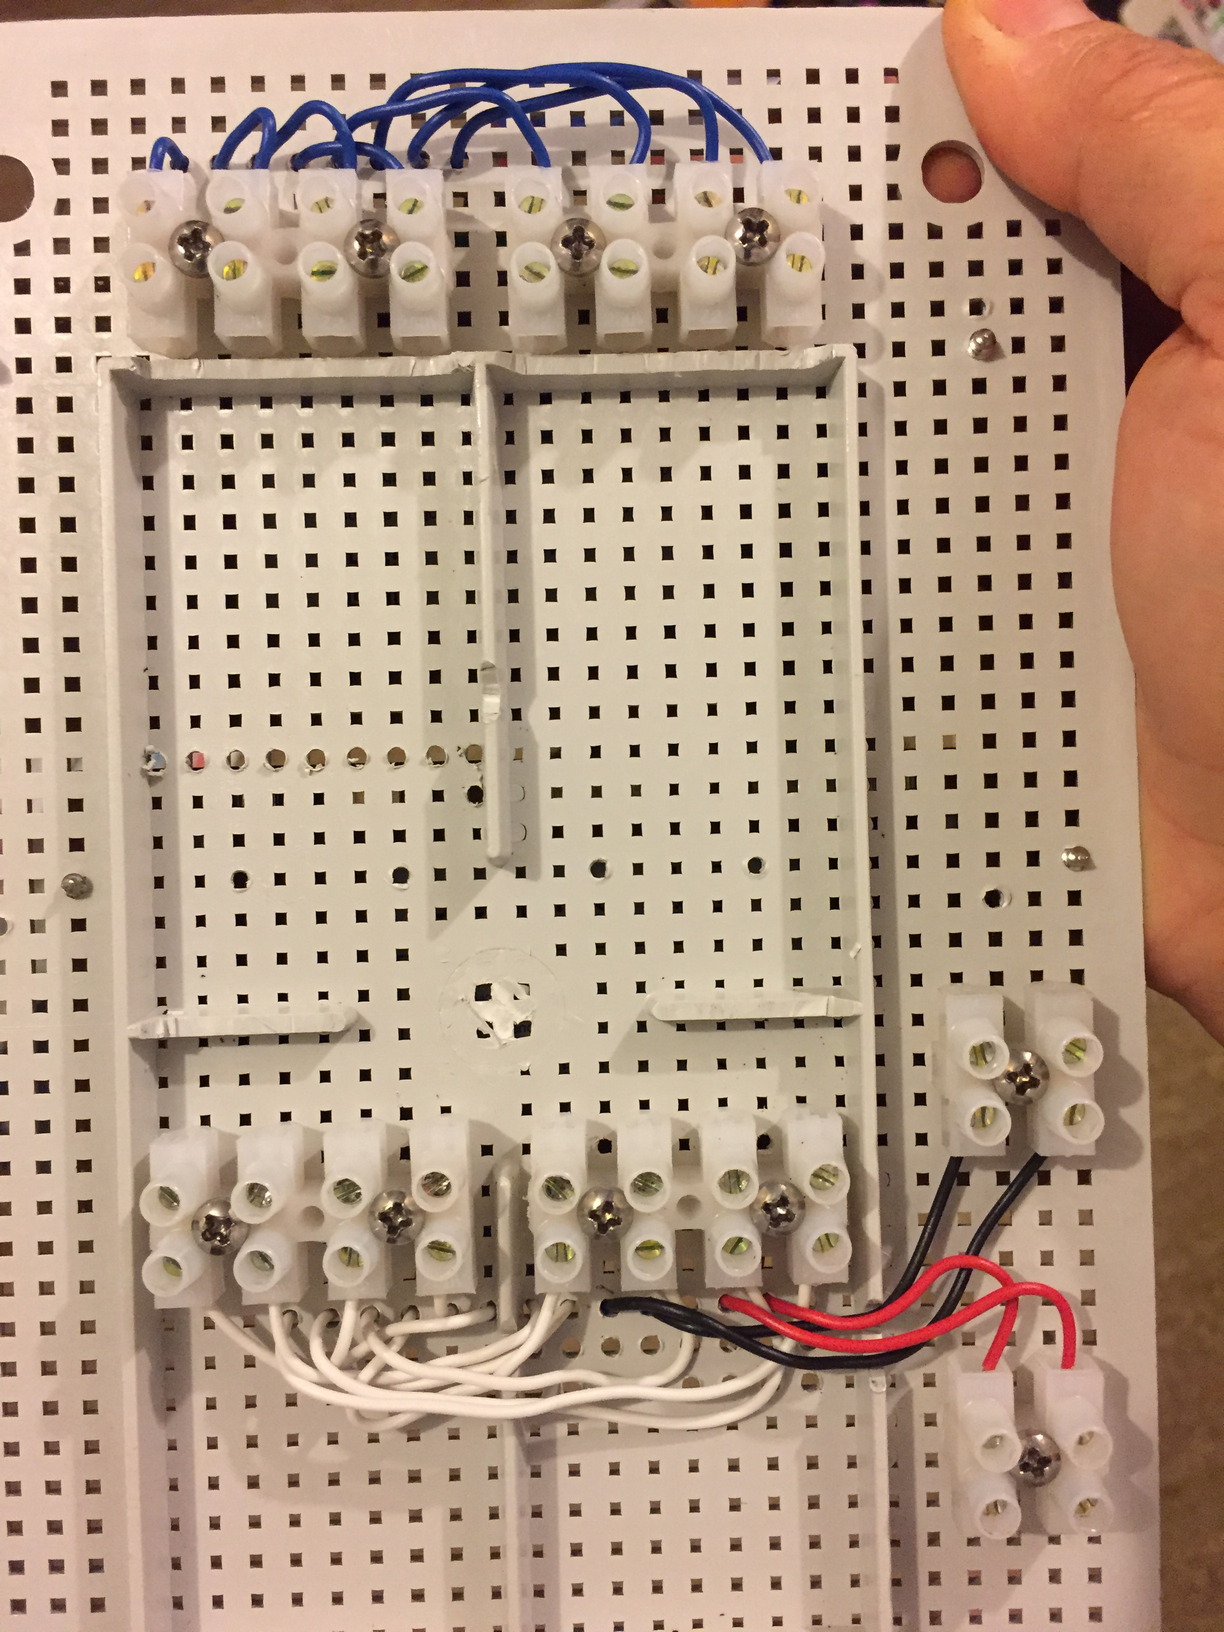
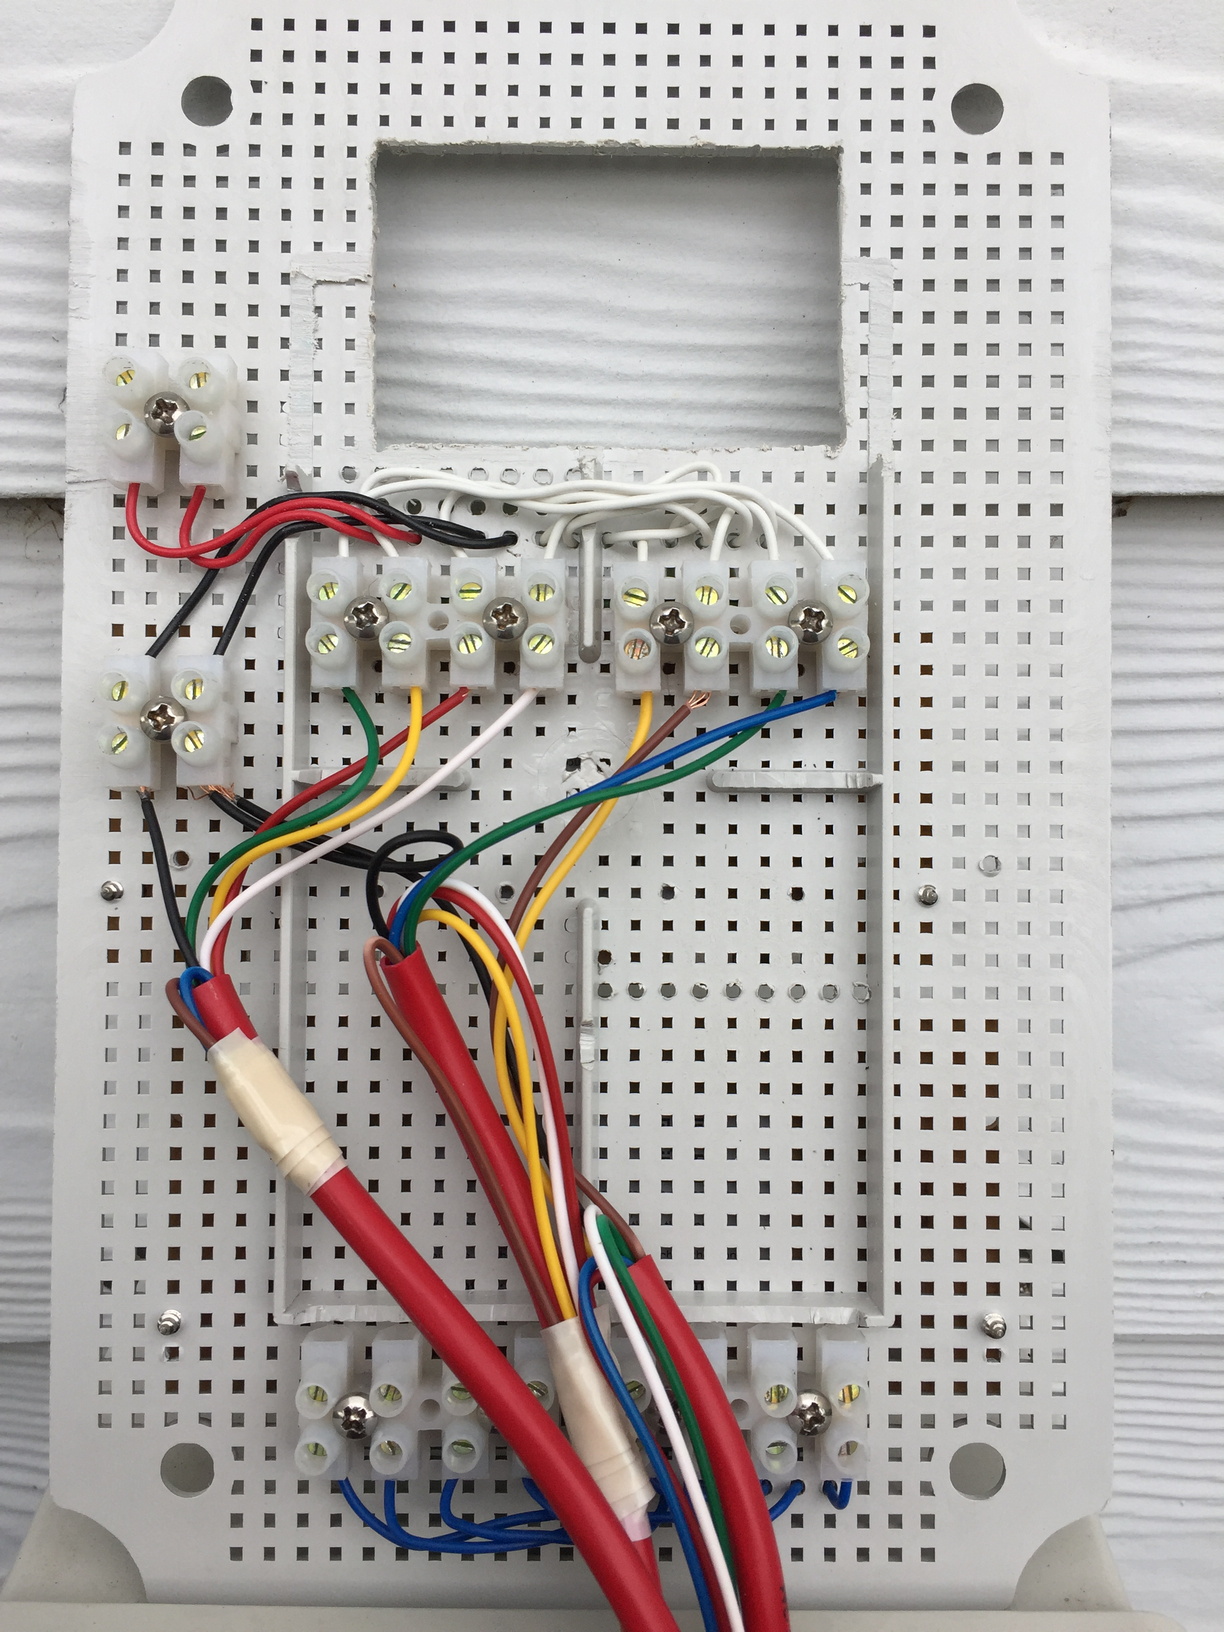
I love how neat this setup looks, and while this setup is larger than I need (this one has the OpenSprinkler and 2 x Zone Expanders), it gave me the name of the enclosure manufacturer and the idea of using terminal strips mounted on the rear of the panel, with short jumper wires connecting the terminal strips to the OpenSprinkler and Zone Expanders. You then connect the irrigation cable wires to the other end of the terminal block and everything is hidden neatly behind the panel. Brilliant!
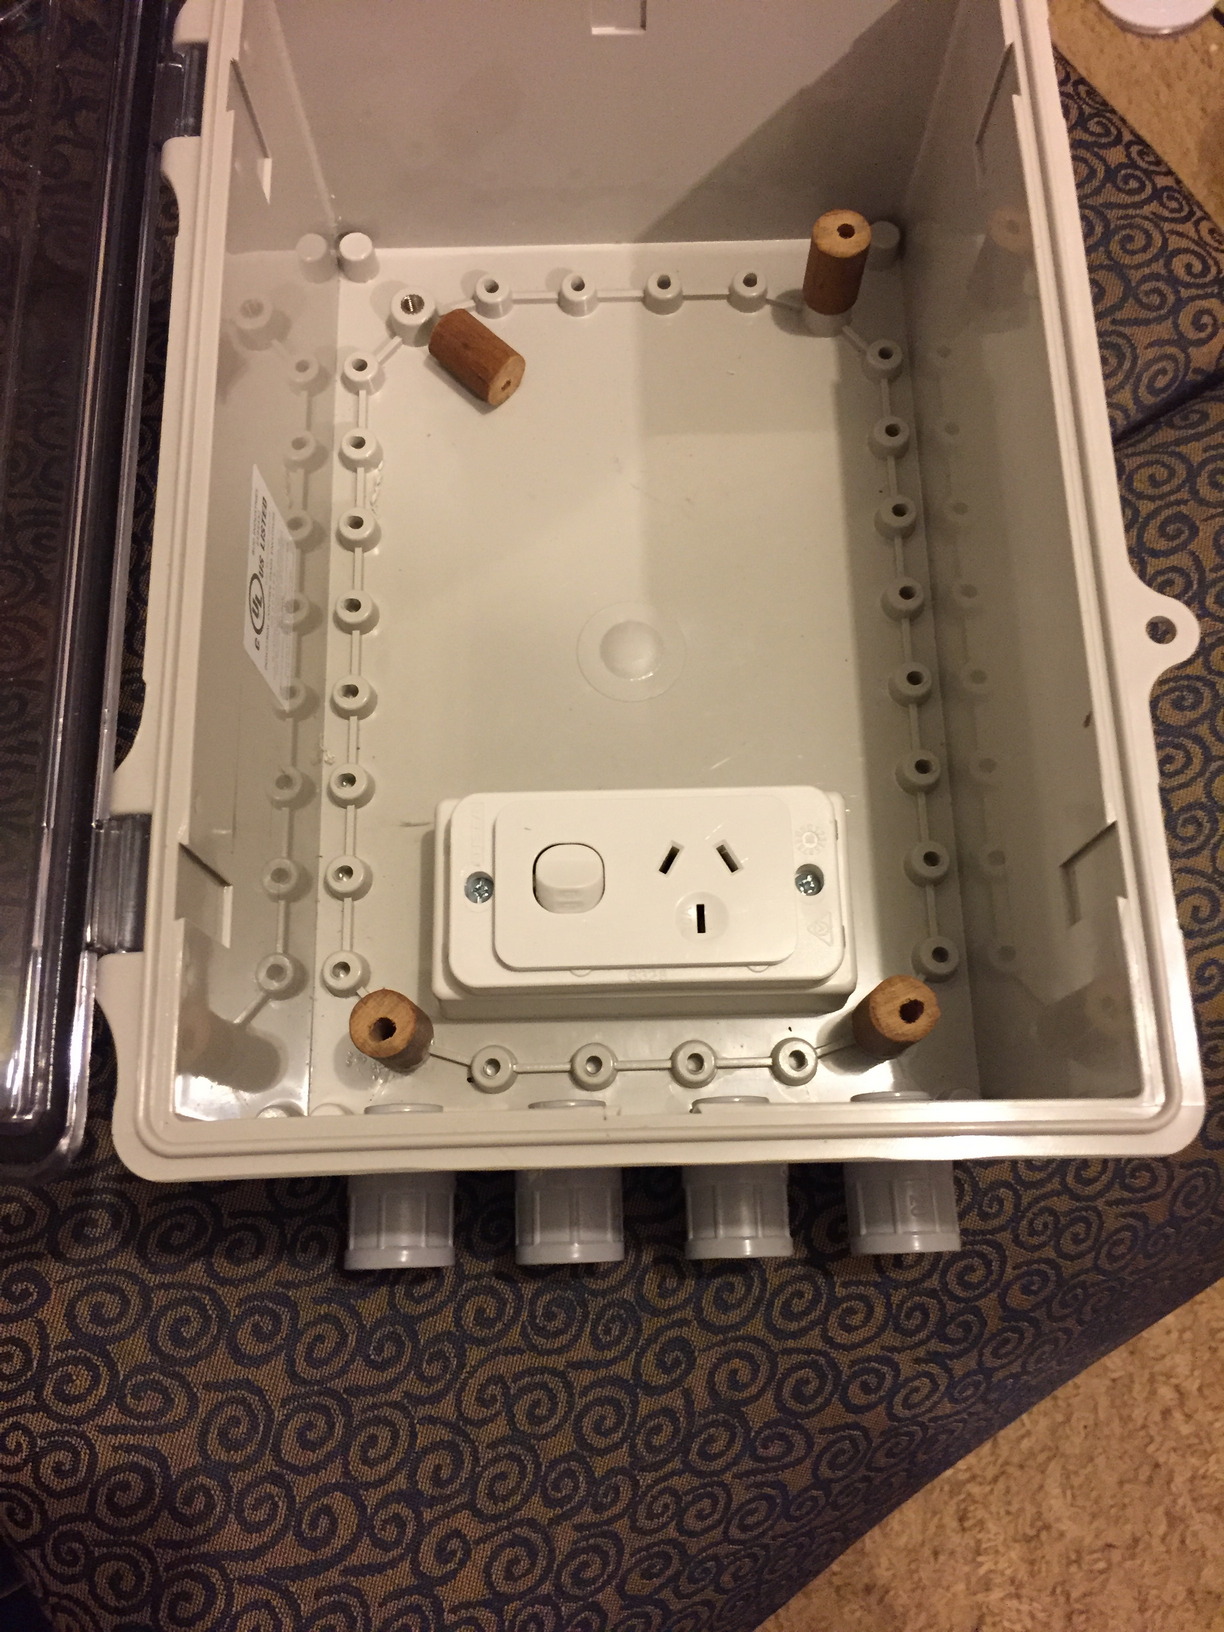
I tracked down an Australian electrical supplier (DigiKey Australia) that sells BUD Industries enclosures and bought a smaller one to hold the OpenSprinkler unit, a single zone expander and the power supply. Everything fits. Just. I could have given myself a little more room, but it worked out well in the end.
The panel required some minor modifications to allow the wires to run more easily around the back of the panel, and a section cut out of it to install the power-point. I also needed to drill 4 large holes in the base of the enclosure to run the electrical cabling into the enclosure.
My father-in-law is an electrician, so he kindly helped me with the installation of the power-point, the electric conduit, trenching for the electrical runs and connecting up power to the enclosure. He also generally helped to keep my crazy ideas in check and made sure that I didn’t take any short-cuts that I would regret later.
One evening, I decided to connect the OpenSprinkler, Zone Expander and terminal blocks to the panel and wire it all together. I showed my father-in-law the next day, very proudly, how I had connected everything to the enclosure panel and wired everything up to the terminal strips. It all looked very neat and tidy. He took one look at it and told me I had hadn’t left enough space to put the power-point in, nor left enough room for the lugs behind the panel to hold it up from the back of the enclosure (to make room for the wiring to run behind the panel). He suggested that I re-arrange everything to create more space, which meant undoing everything, moving it around and re-wiring it. The only orientation that worked was to put the zone expander upside-down above the OpenSprinkler unit. Thankfully, I got it right the second time and there was enough space to fit everything in.
 |
 |
 |
 |
 |
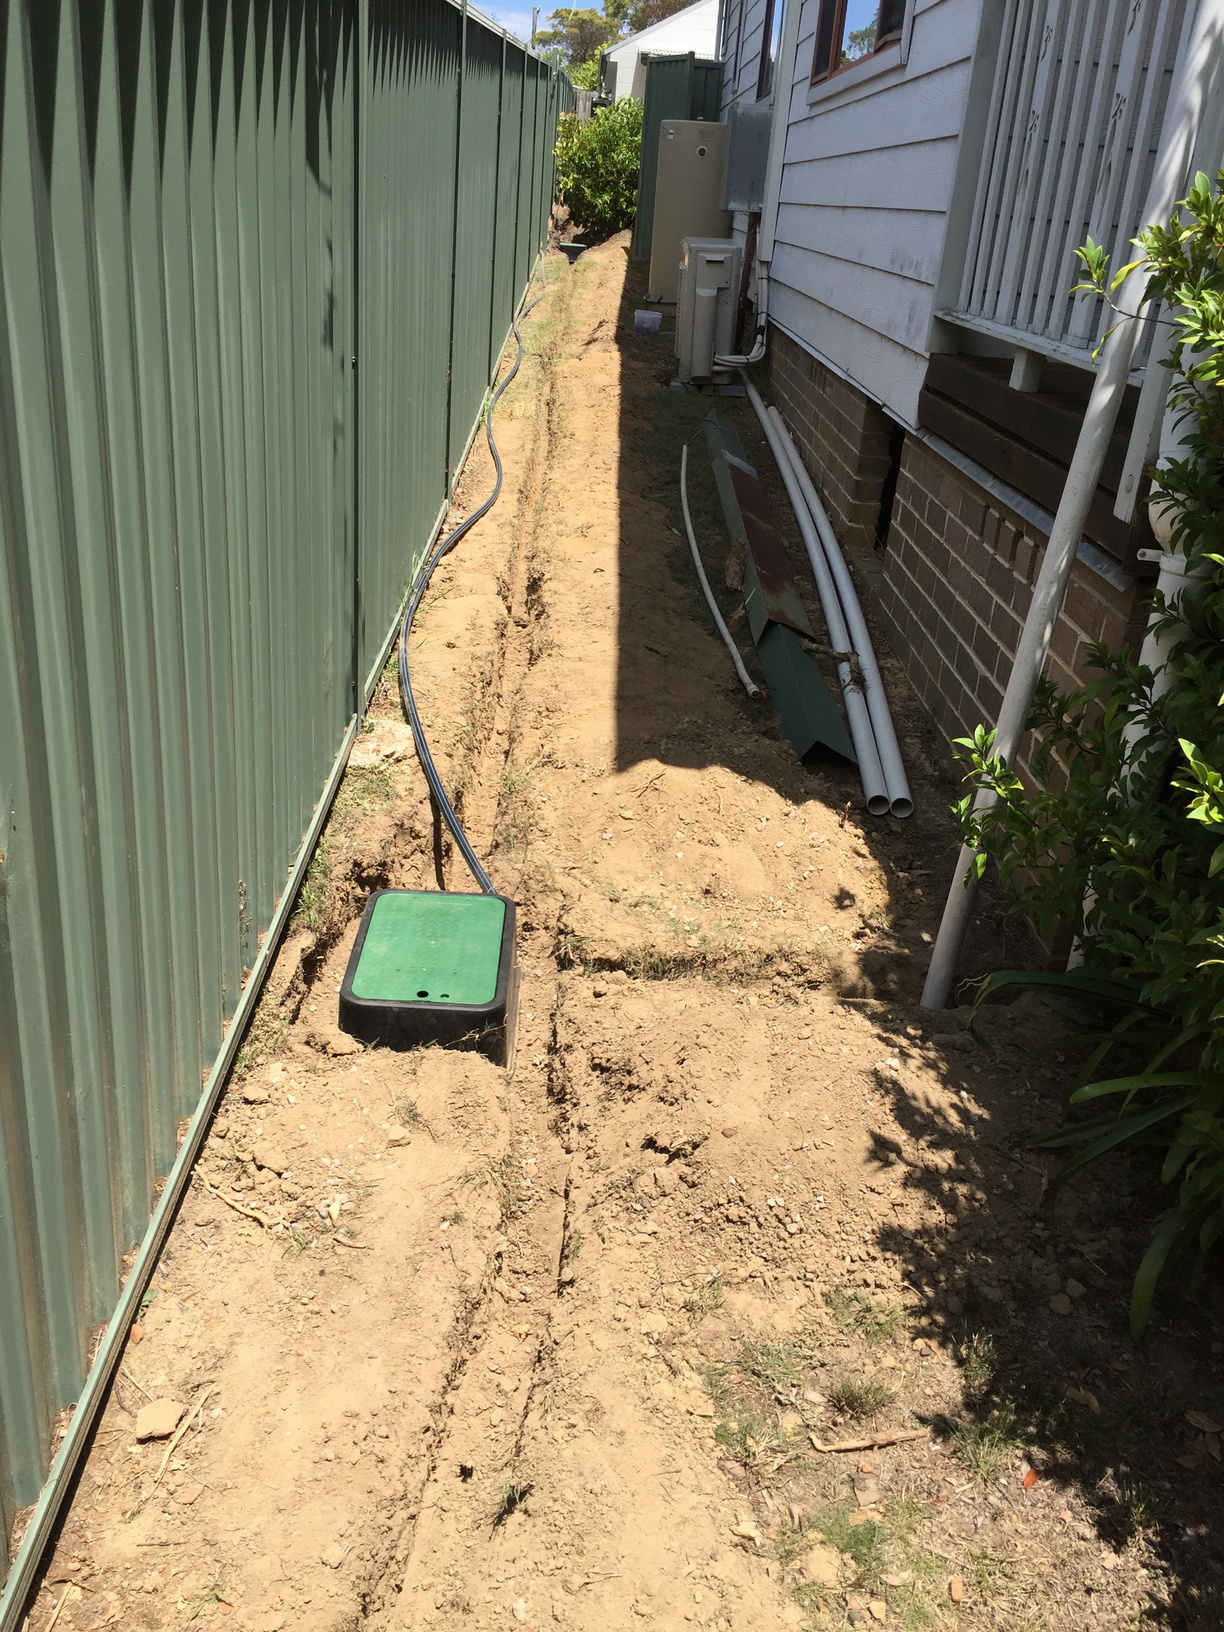
Trenching, electrical and pipe work
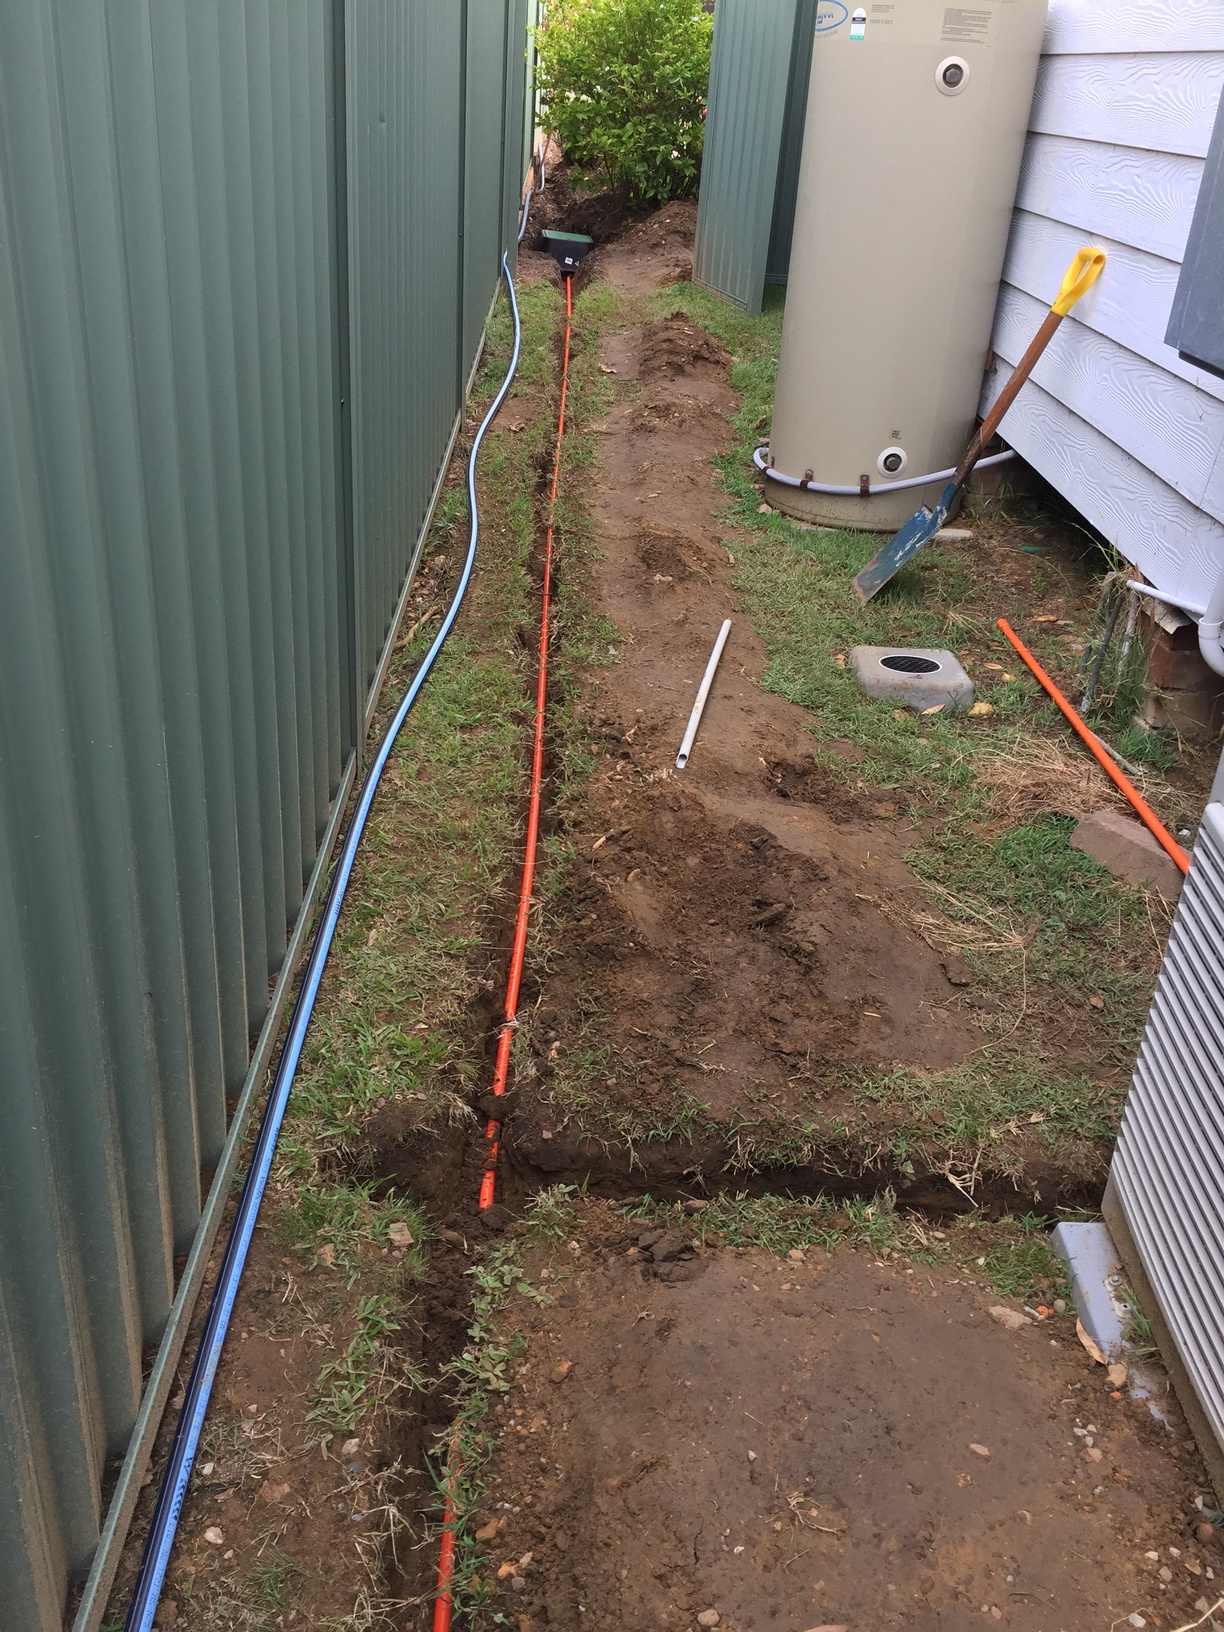
Setting up the OpenSprinkler was definitely the easiest part of the whole exercise. By far, the most difficult and tiring part was getting the trenching done for electrical conduit and the piping. Most of the trenching was done over the Christmas holiday break, and of course, we had a string of 35-40 degree days which made it very sweaty, tiring work.
The Australian standard for trenching low-voltage cabling (24v) is 300mm, and my father-in-law ensured that I dug the trenches to that depth, despite my initial “That should be deep enough, right?” efforts. While 300mm might not sound like very far to dig down, doing it by hand, with the temperatures we were having and through clay soil, for around 40+ metres… I was very happy to see the end of that part.
Thankfully the trenches for the water pipes didn’t need to be quite that deep, and the pipes could go in above where the electrical trenches had already been dug.
Putting in an irrigation system as a fore-thought, rather than an after-thought, would have made things easier. Having lived in our house for around 8 years, I already had a number of established garden beds and plants, which made putting trenches in for the pipes a little trickier than it could have been if I had done earlier.
The trenching, electrical and pipe-work were done in two stages. Given that I have two tap outlets from the tanks/pump, I connected one up first, got it working completely, then did the other. The east side of the property was done first and put into operation, then the west-side was completed at a later stage.
The pictures of the trenches are deceptive. They look really shallow in the photos, but all electrical trenches are 300mm deep.
 |
 |
 |
 |
 |
 |
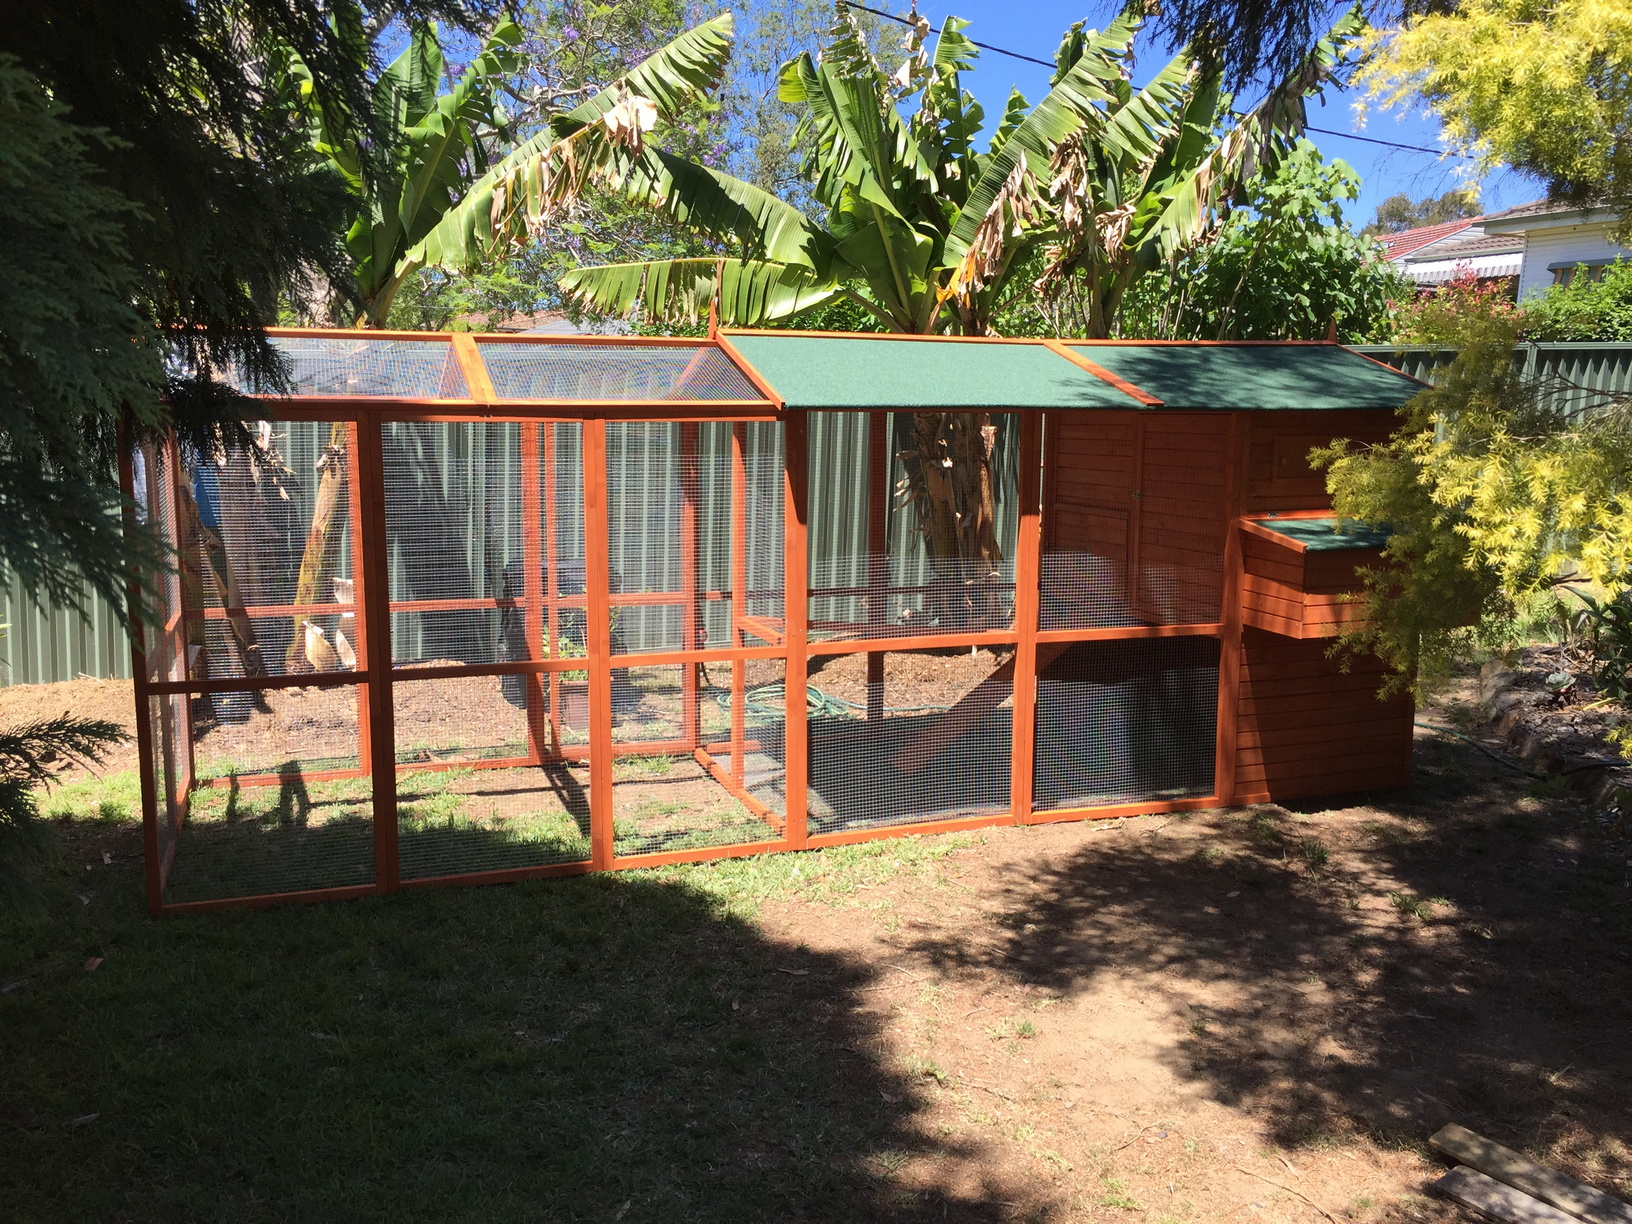
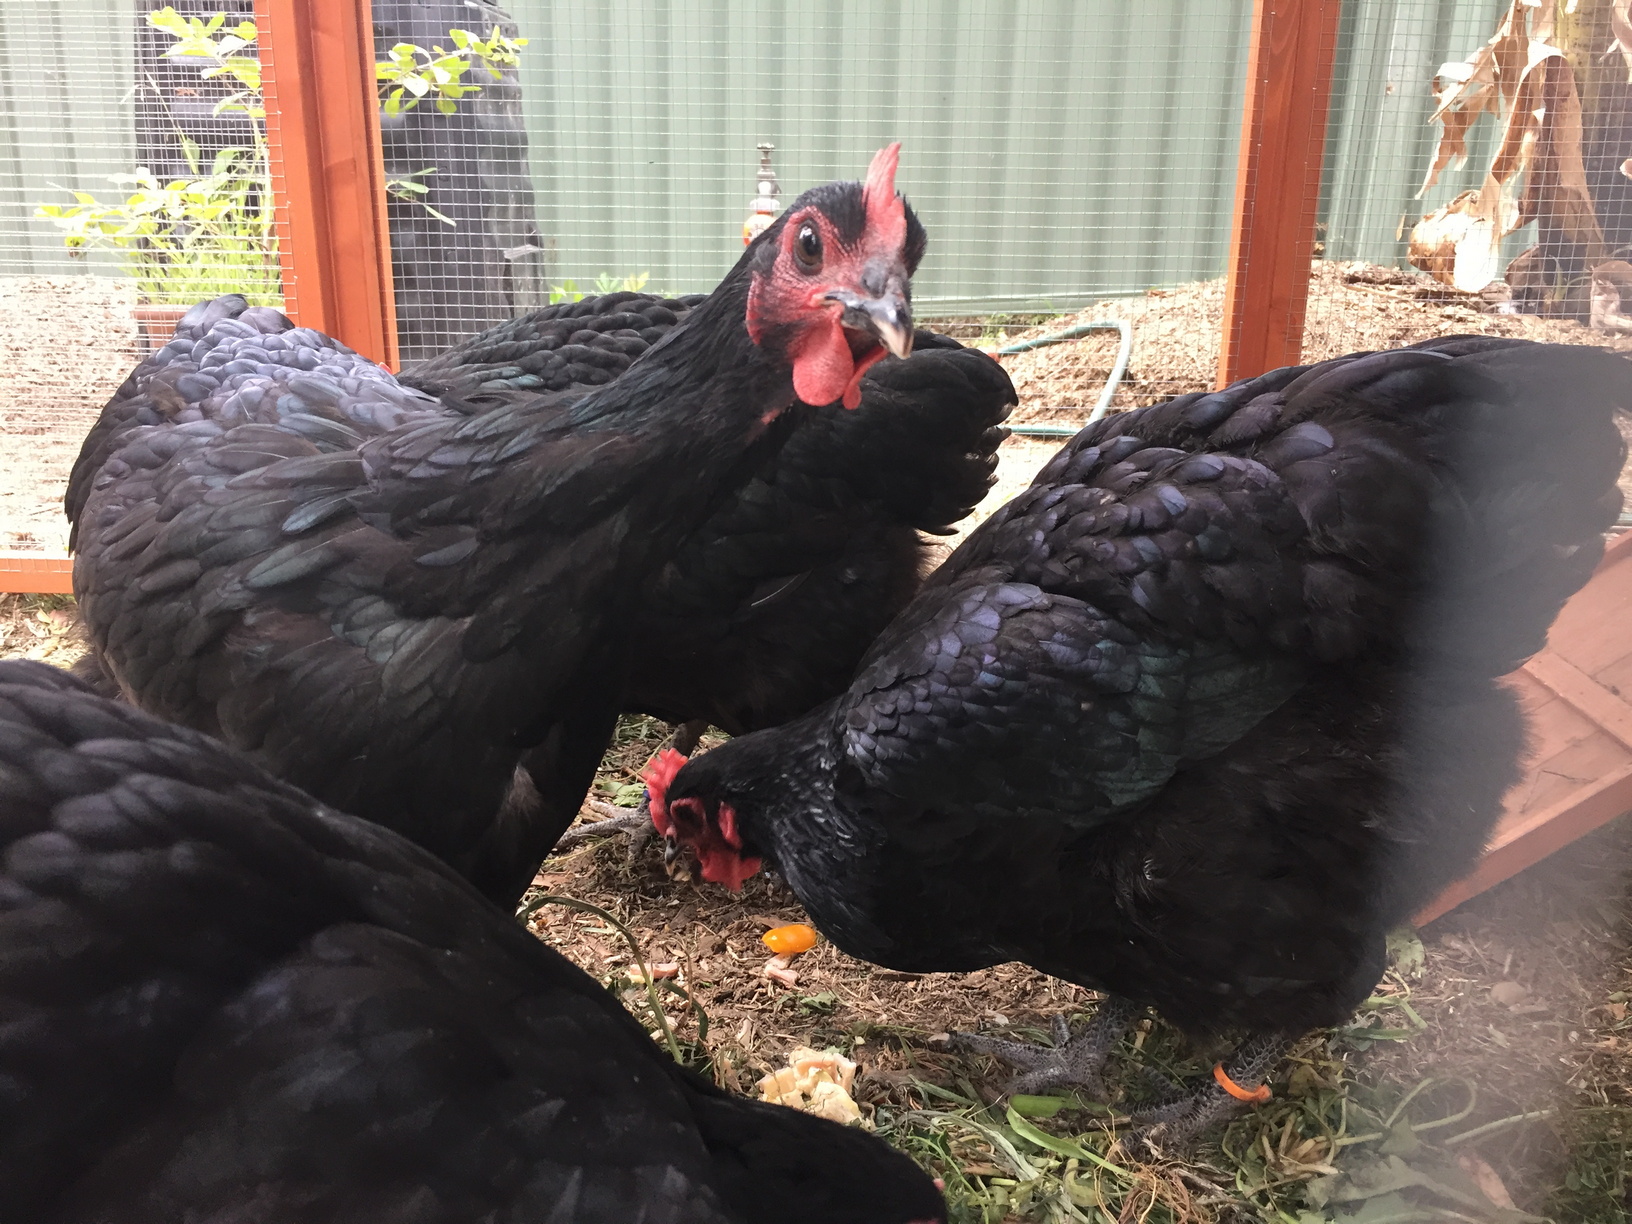
Chickens?
OK, chickens were definitely NOT an essential part of the irrigation system, but I ended up deciding that I didn’t have enough work to do, so ordered a palatial sized chicken-coop, which now houses 5 very productive Australorp chickens. The chicken coop took about 3 days to setup, including vermin/predator proofing the outside of the chicken coop. I dug a shallow trench around the outside of the coop, attached chicken mesh to the outside bottom-edge of the coop and ran it out about 300mm from the edge of the coop, then filled the trenches. So, if anything does try to dig, slide or crawl under the coop (rats, foxes, brush turkeys, snakes etc), they will hit chicken mesh underground and hopefully be deterred. I haven’t seen any evidence of digging around the outside of the coop yet.
 |
 |
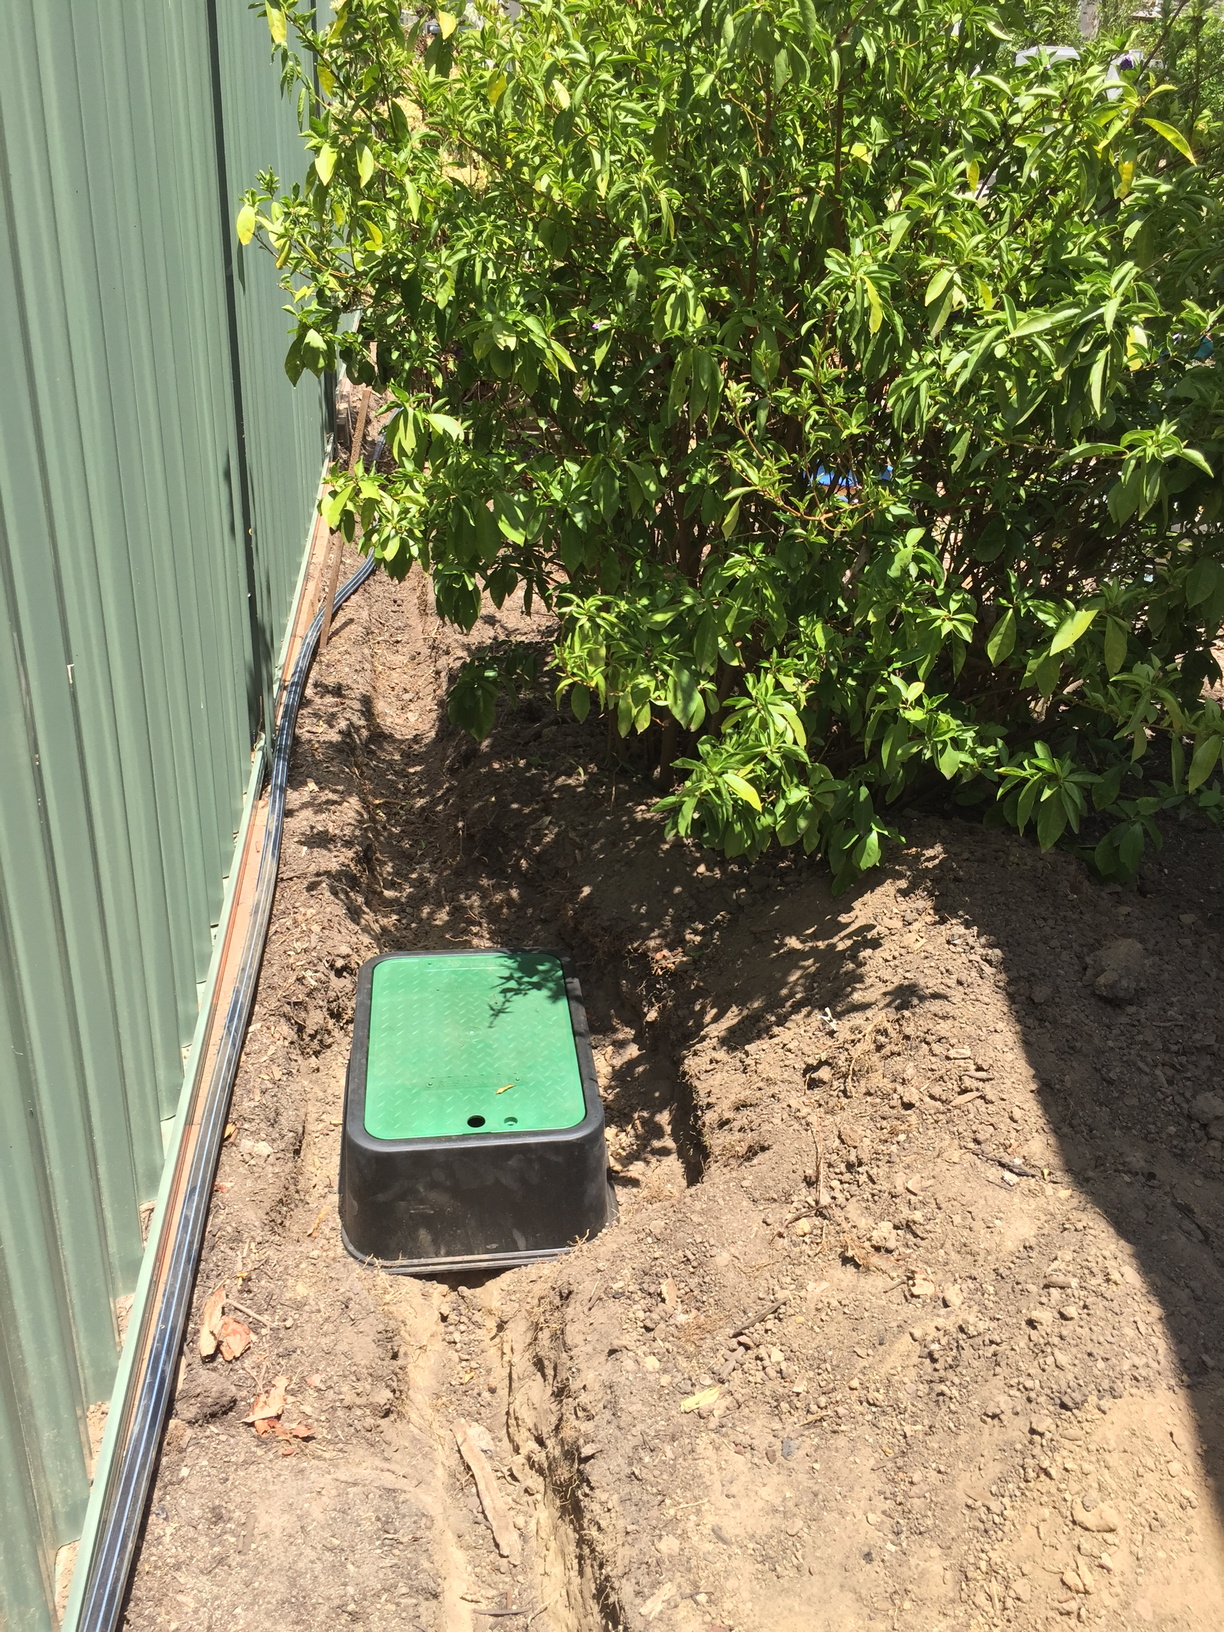
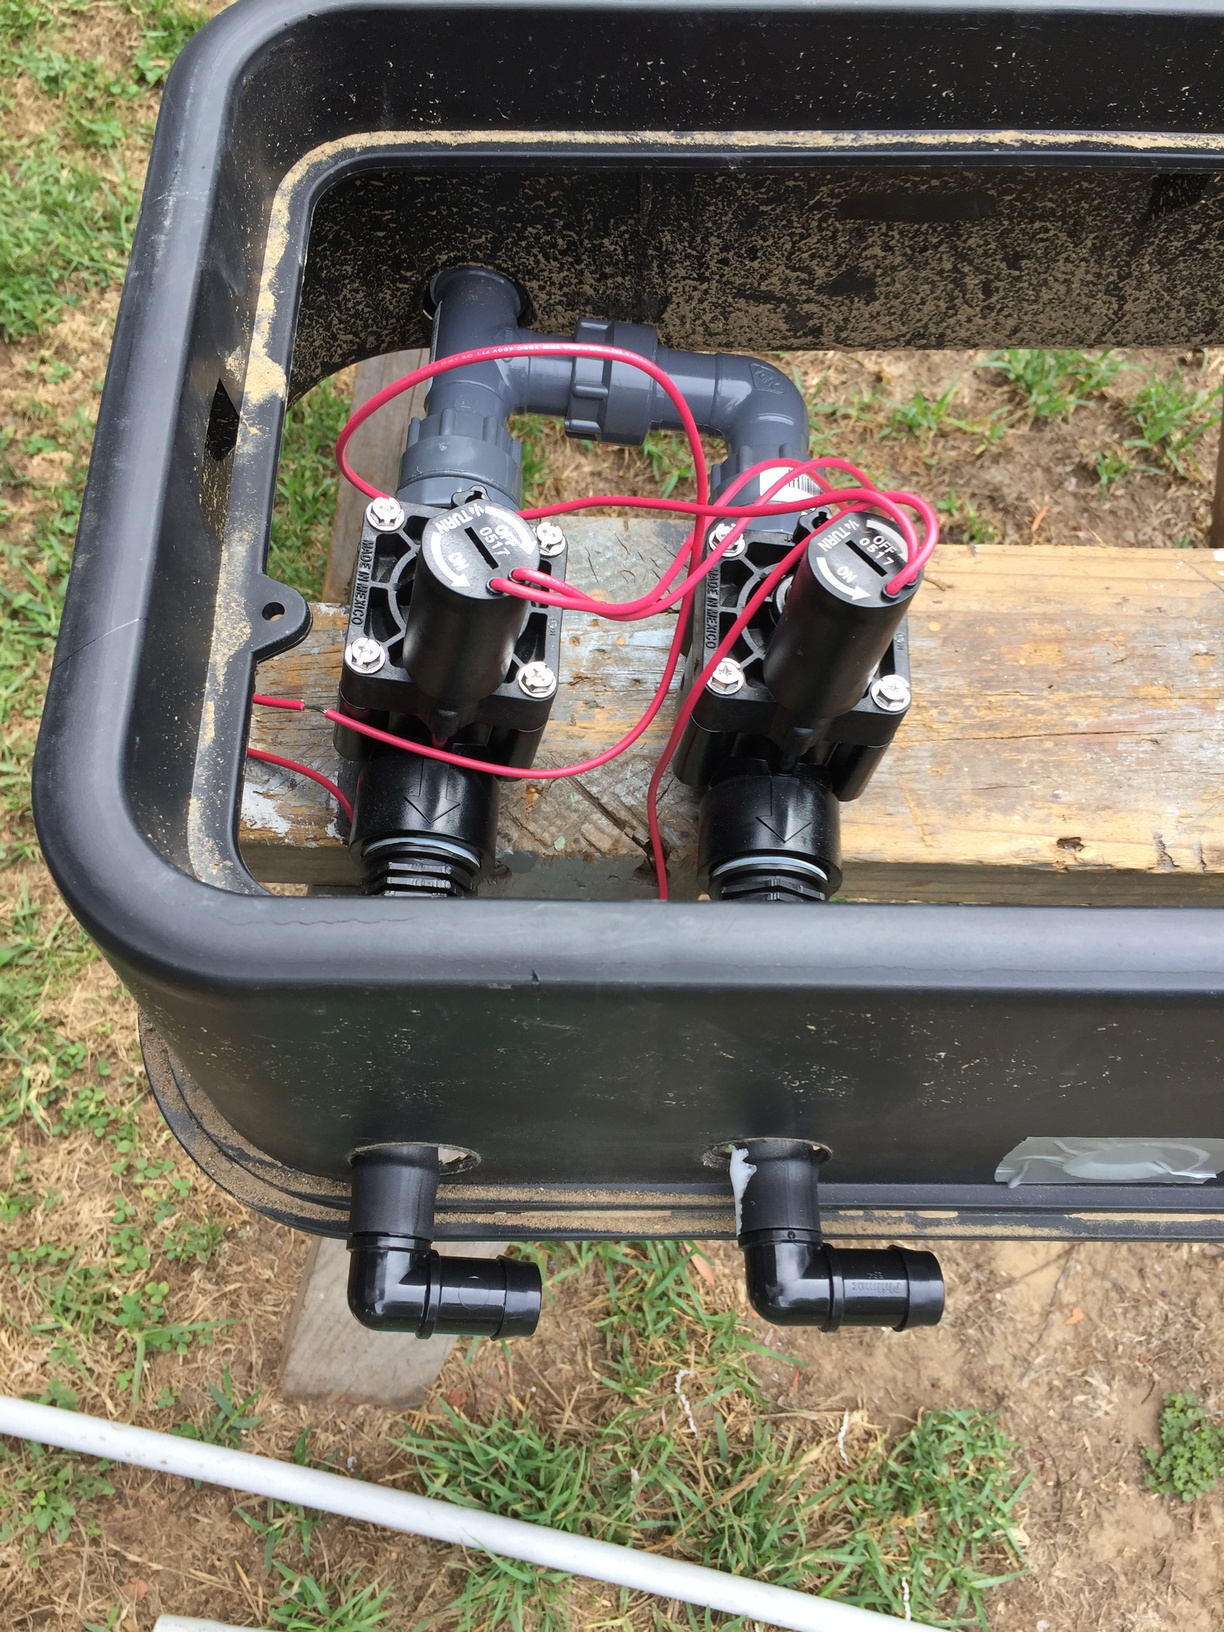
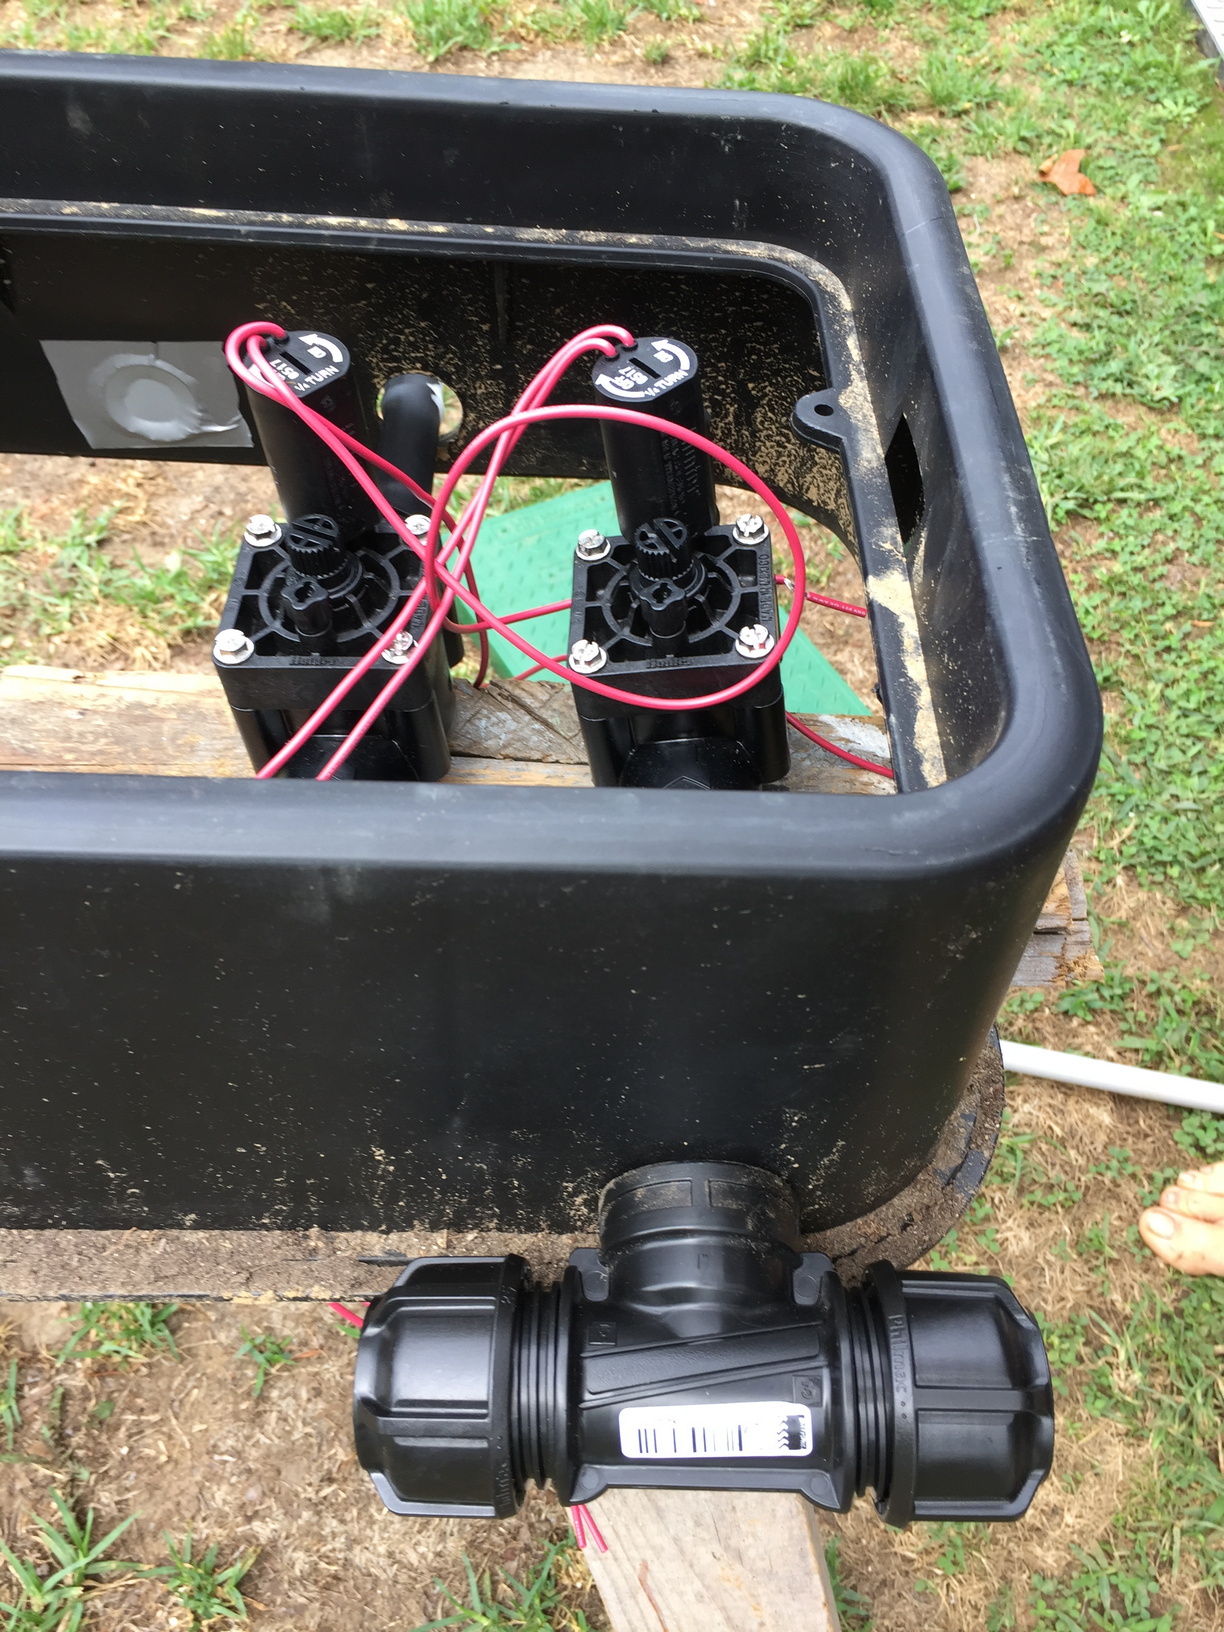
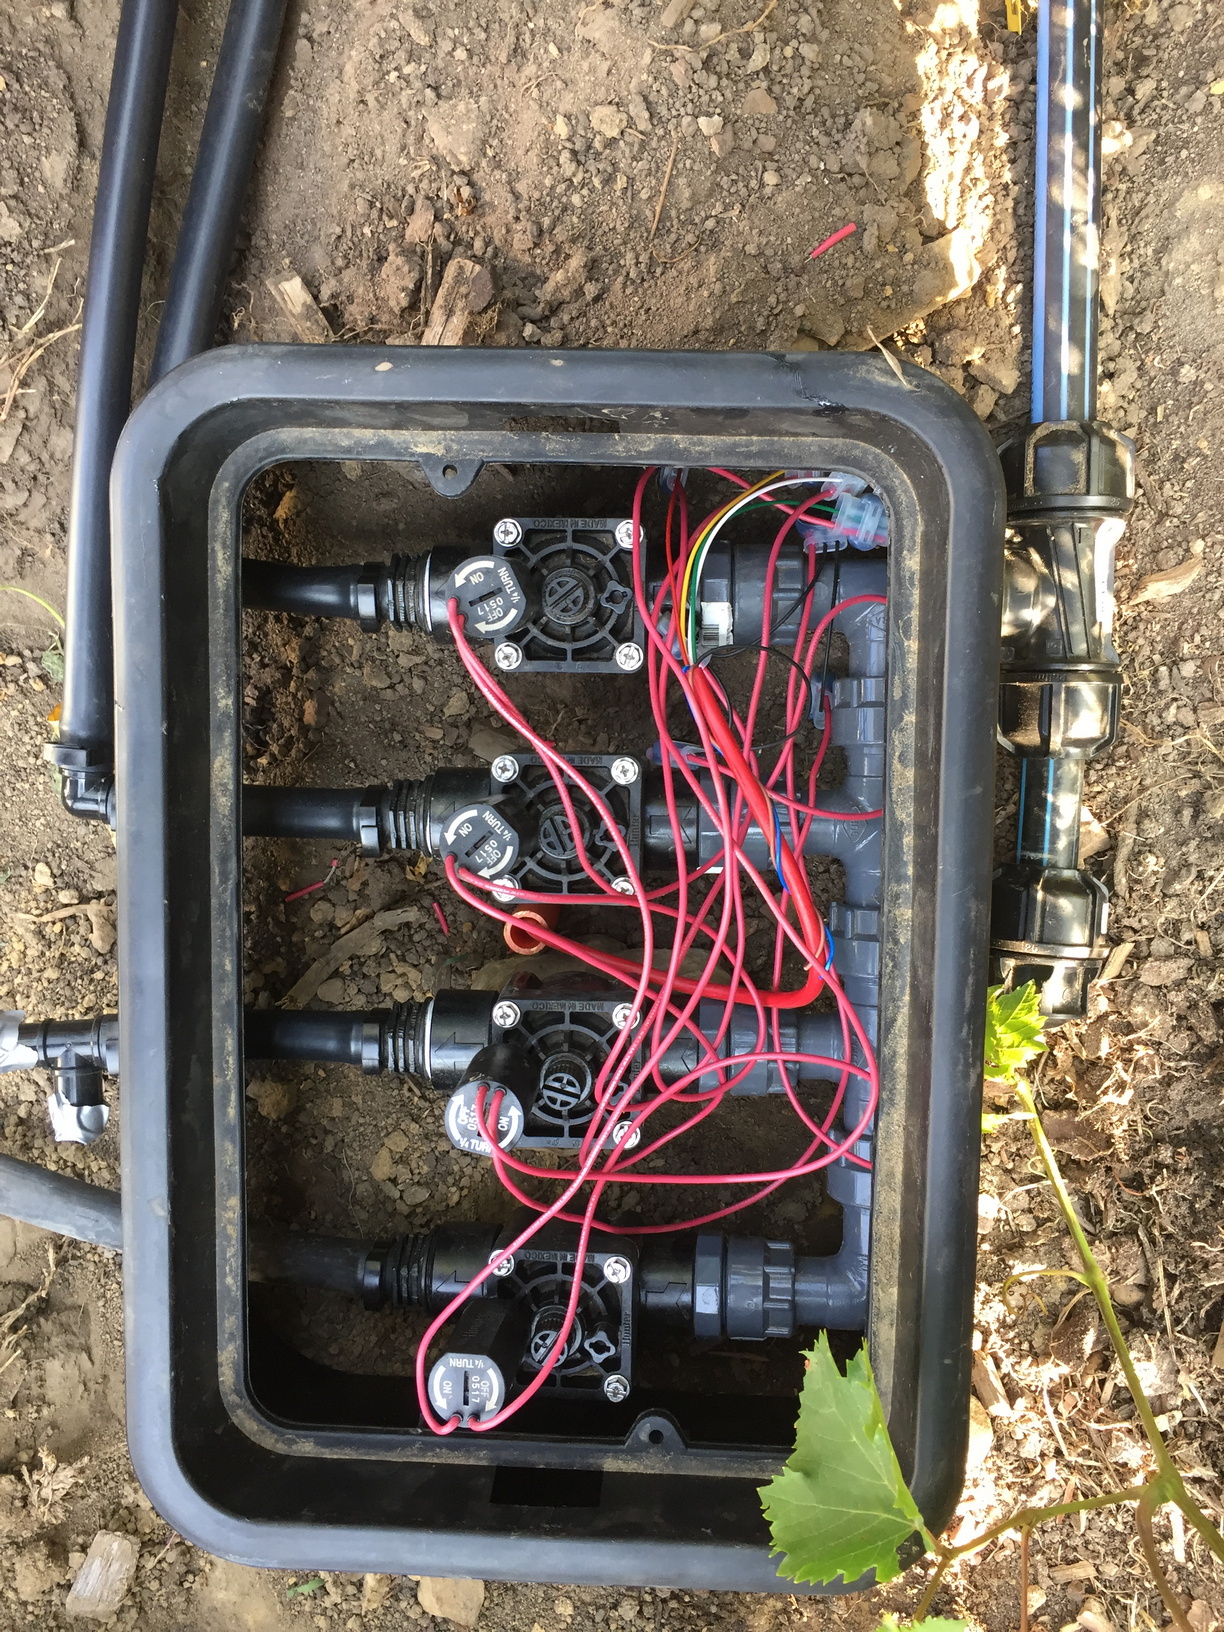
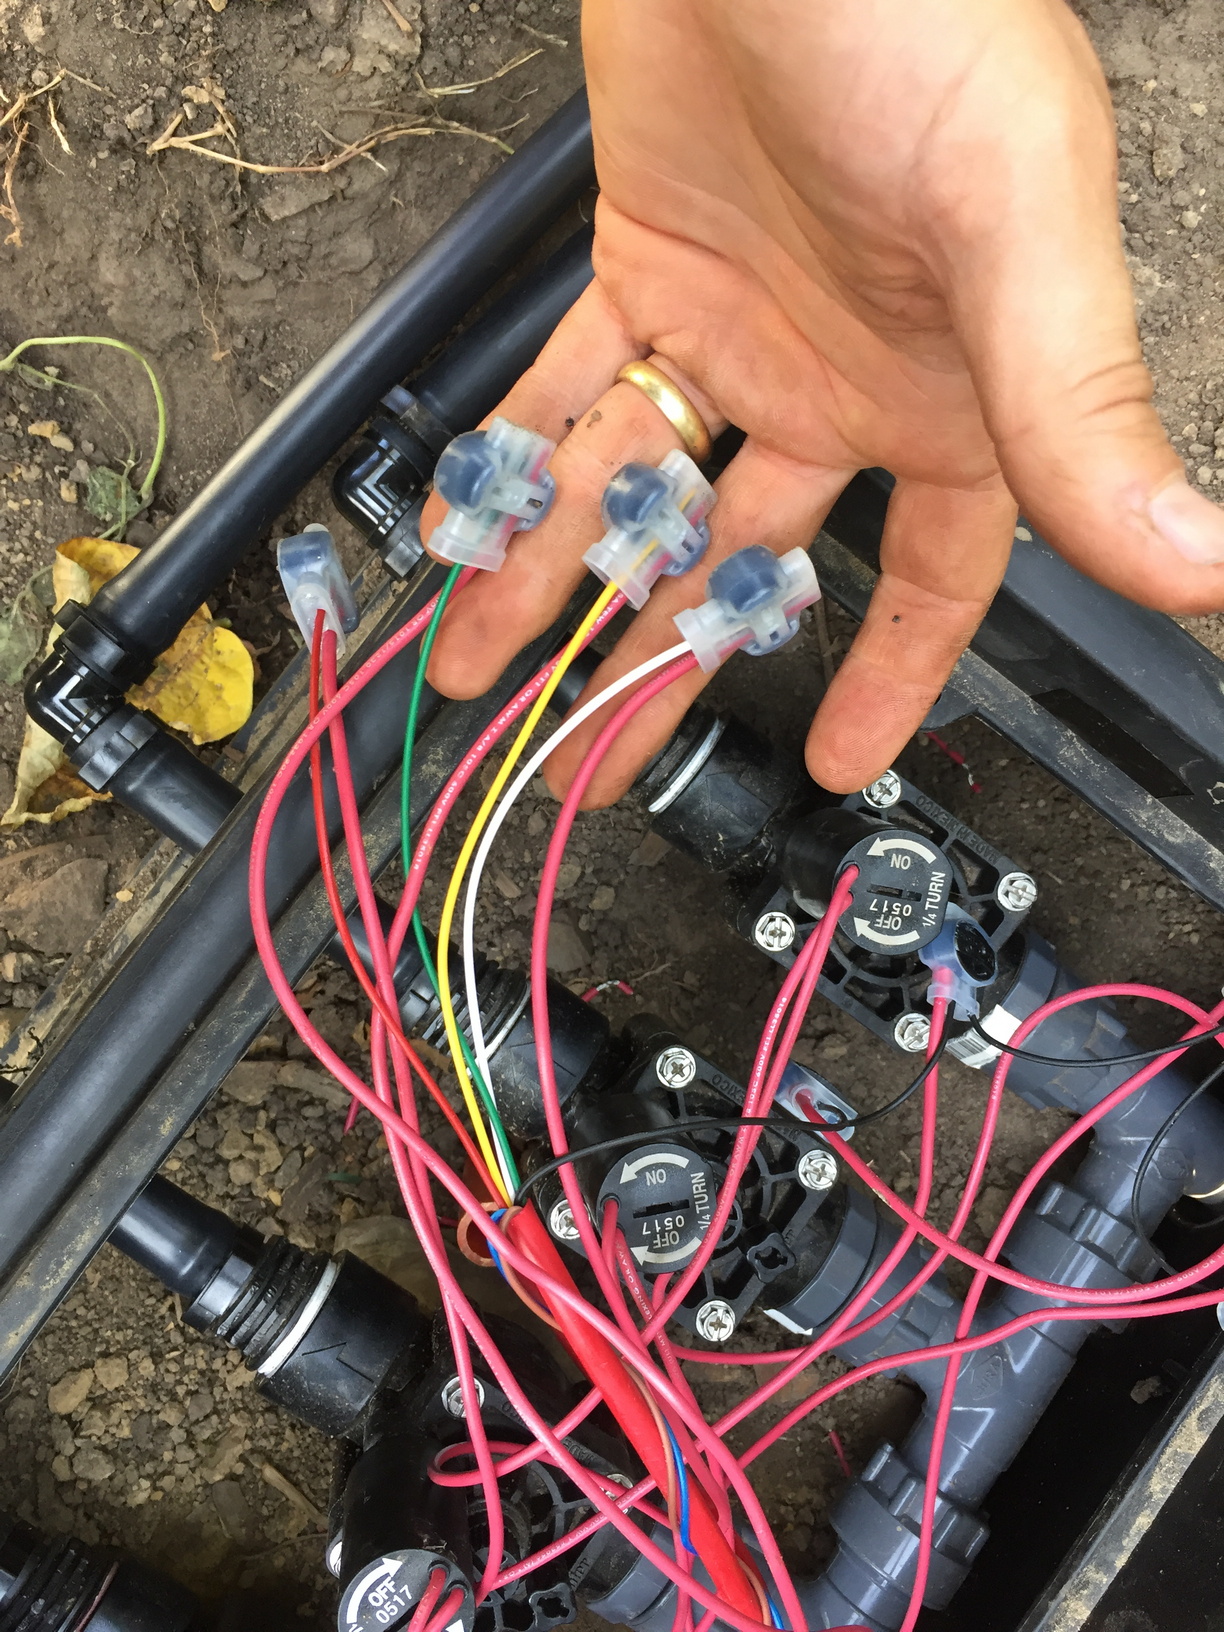
Solenoid valves and valve boxes
The solenoid valves control the water flow to each of the sprinkler zones. The valves are connected together in a manifold configuration, taking one input from the “mains” supply (mine is not directly connected to mains pressure, but to the pump), and this is distributed between all valves in the manifold. The solenoid valves are in a default off position, and only open when a current is applied.
I have two valve boxes containing two valves each, and a third valve box containing four valves.
Each valve box has a run of 7 core irrigation cable running back to the OpenSprinkler unit. Should I ever wish to install any additional valves, I can add up to another two valves to each of the current 2-valve boxes.
The valve boxes are buried into the ground, with holes cut out of the sides to allow the mains input and the solenoid outputs. The valves themselves are water-proof and the wiring is also waterproof. All the valves have two wires, one of which is connected to a common wire (black) going back to the OpenSprinkler common port, and the other wire of each valve is connected to an active core going back to each zone input on the OpenSprinkler.
 |
 |
 |
 |
 |
 |
 |
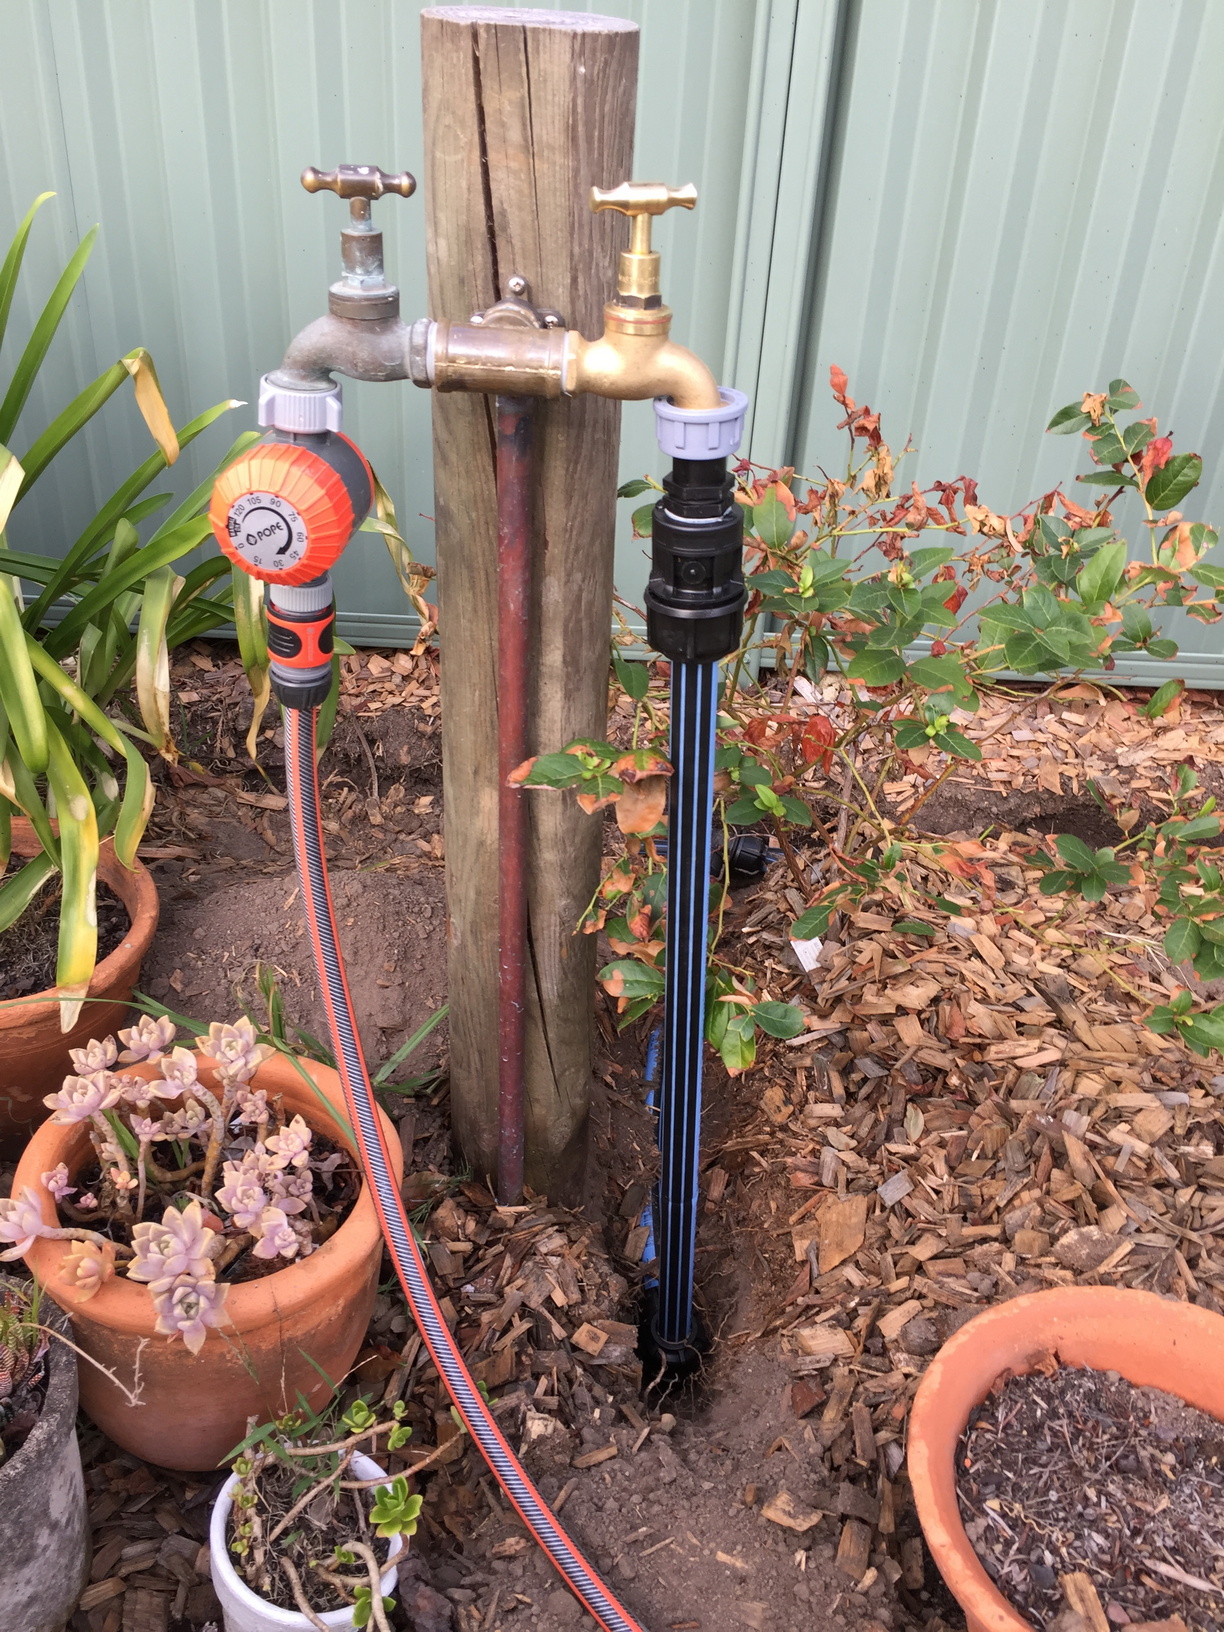
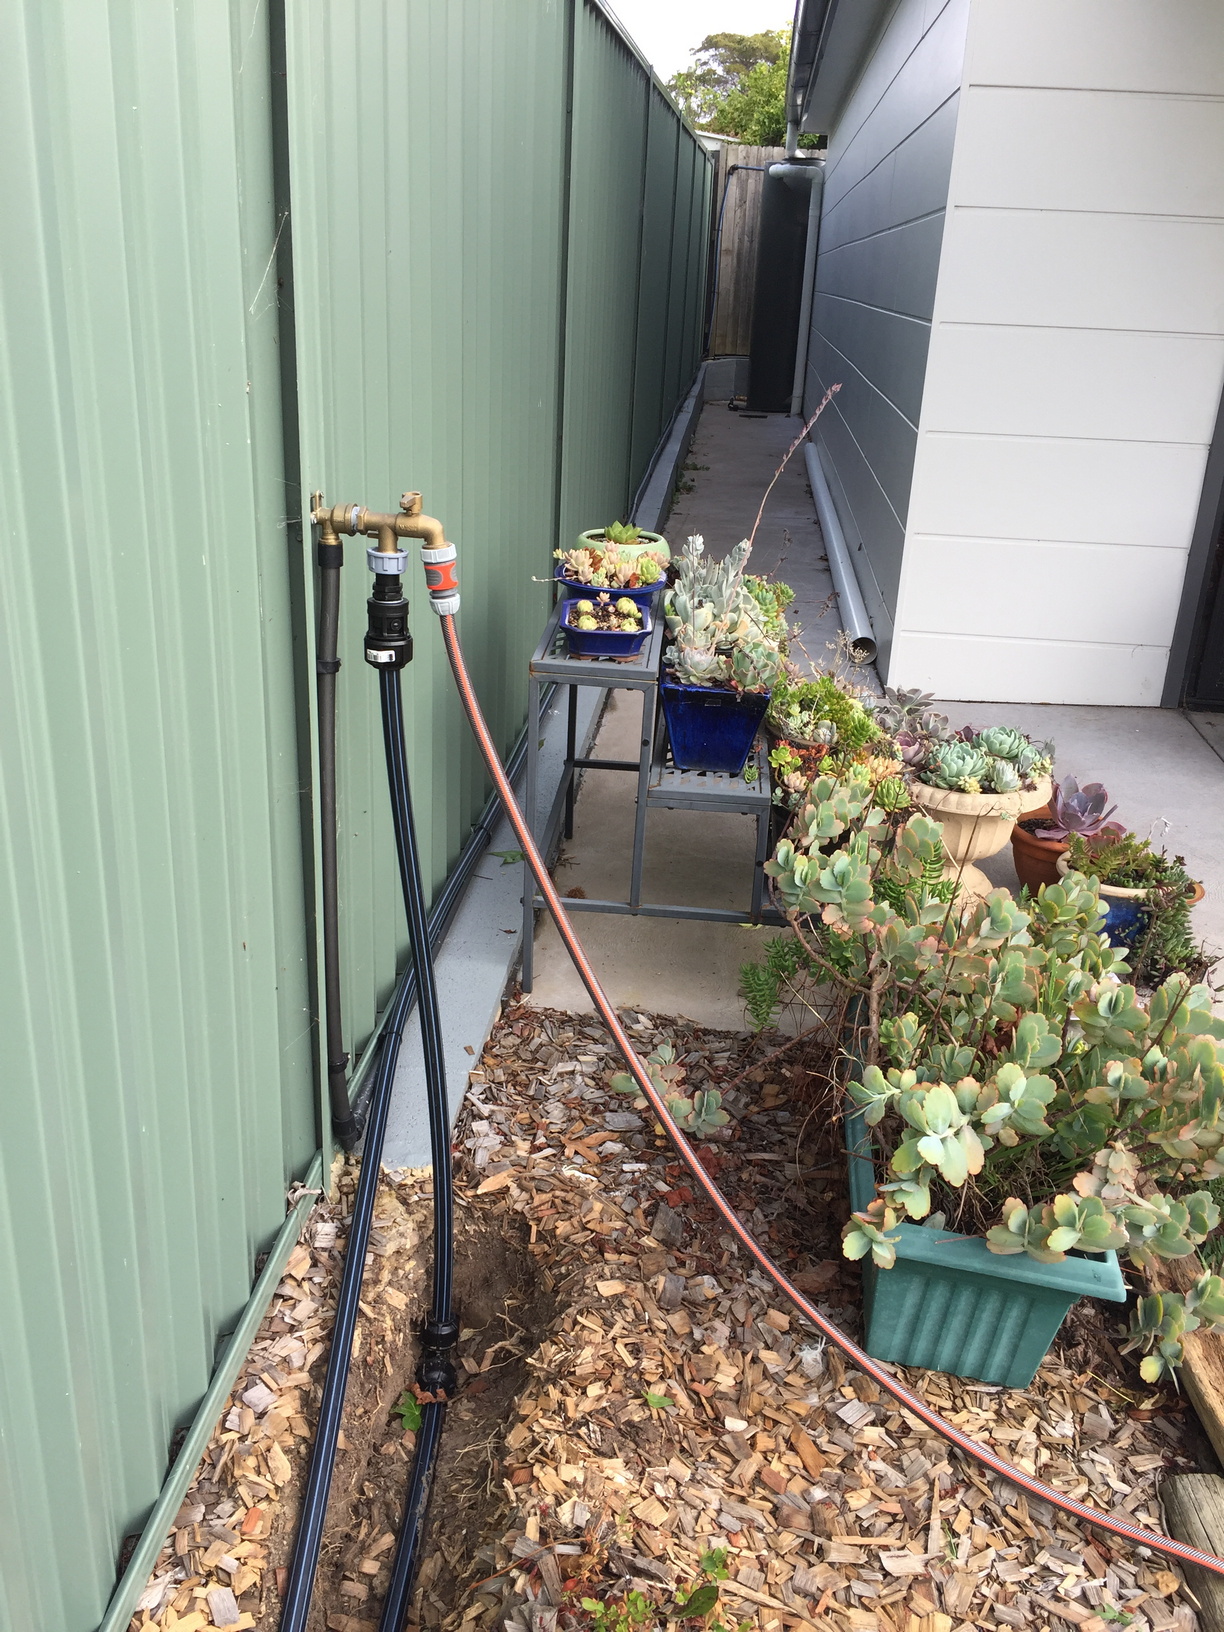
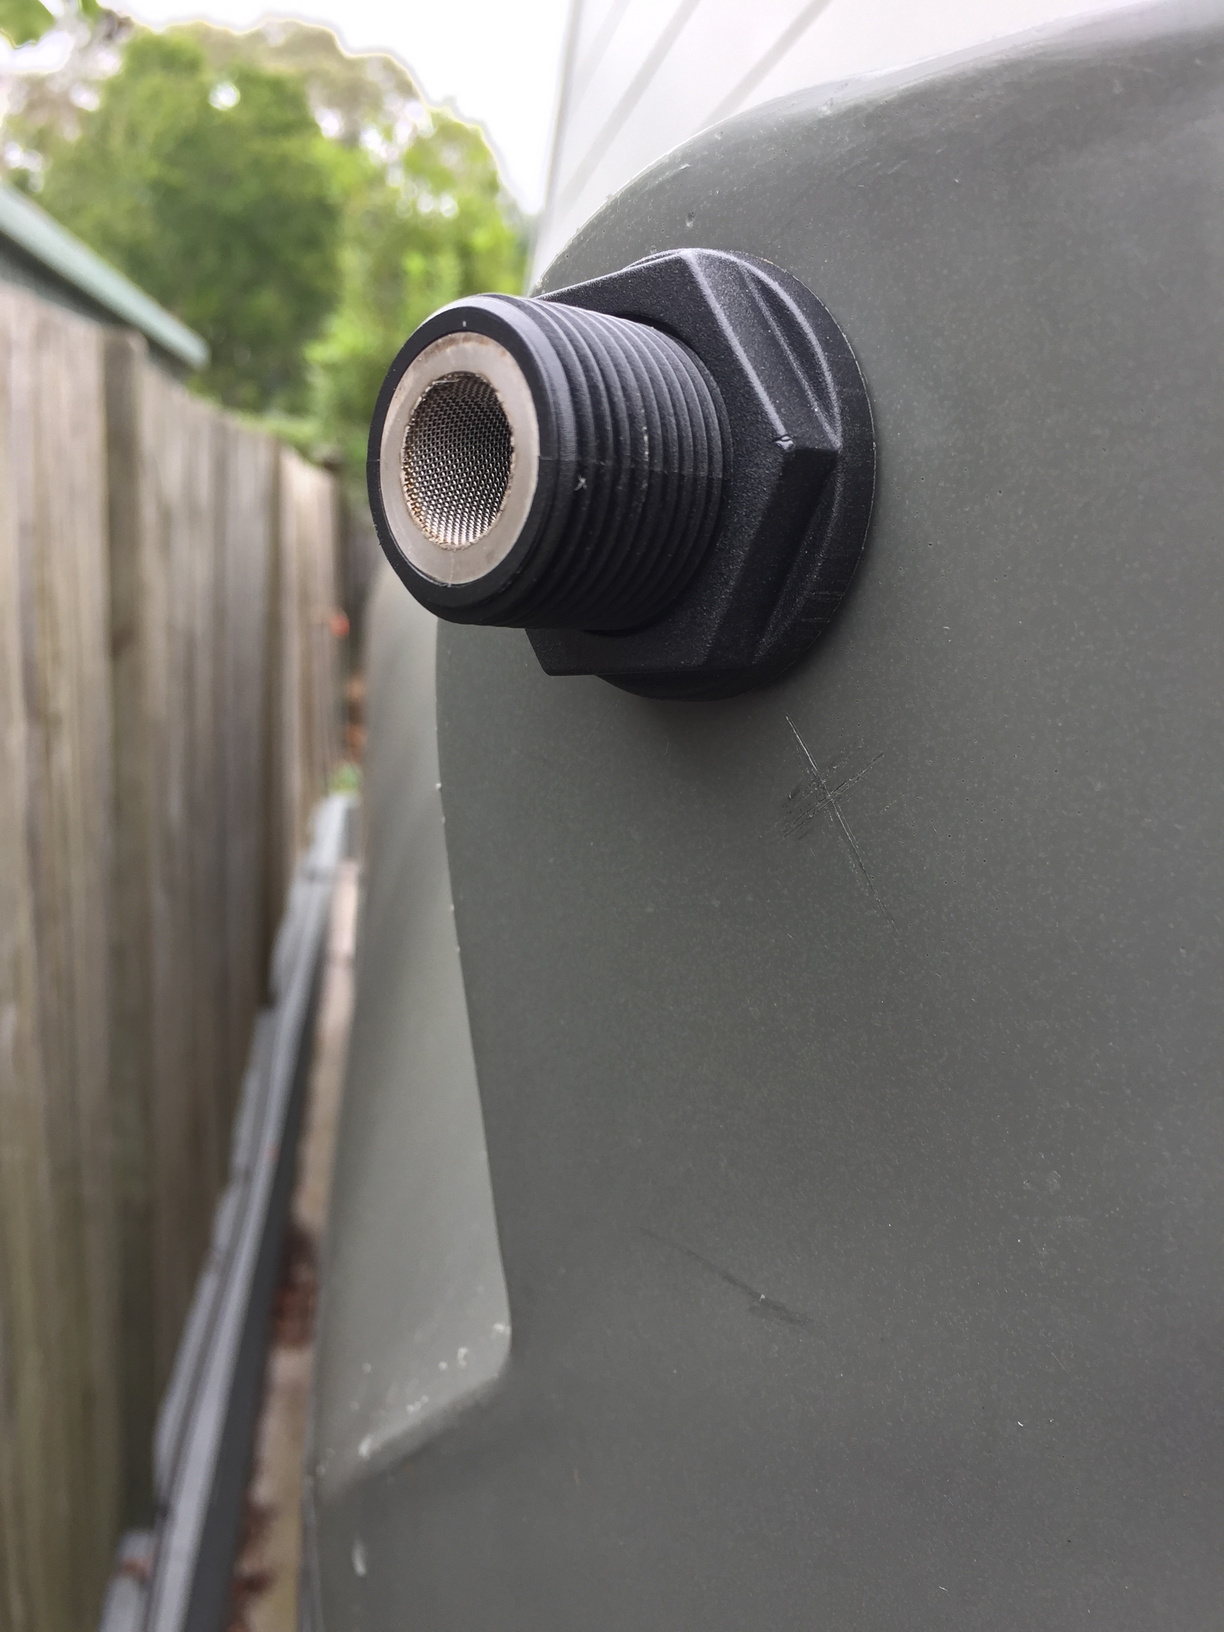
Mains water top-up for rainwater tanks
It dawned on me after installation of the tanks, if I was setting up this whole complicated irrigation system to run off rainwater tanks… and I didn’t get any rain, my whole system would be useless. I had to put in a mains water top-up. Thankfully such a thing is reasonably inexpensive, and I already had more than enough piping to add another run to the tanks from my garden tap. It would have been better to have thought about this much earlier and run a copper mains water supply to near the tanks, before concreting around the garage, but too late for that.
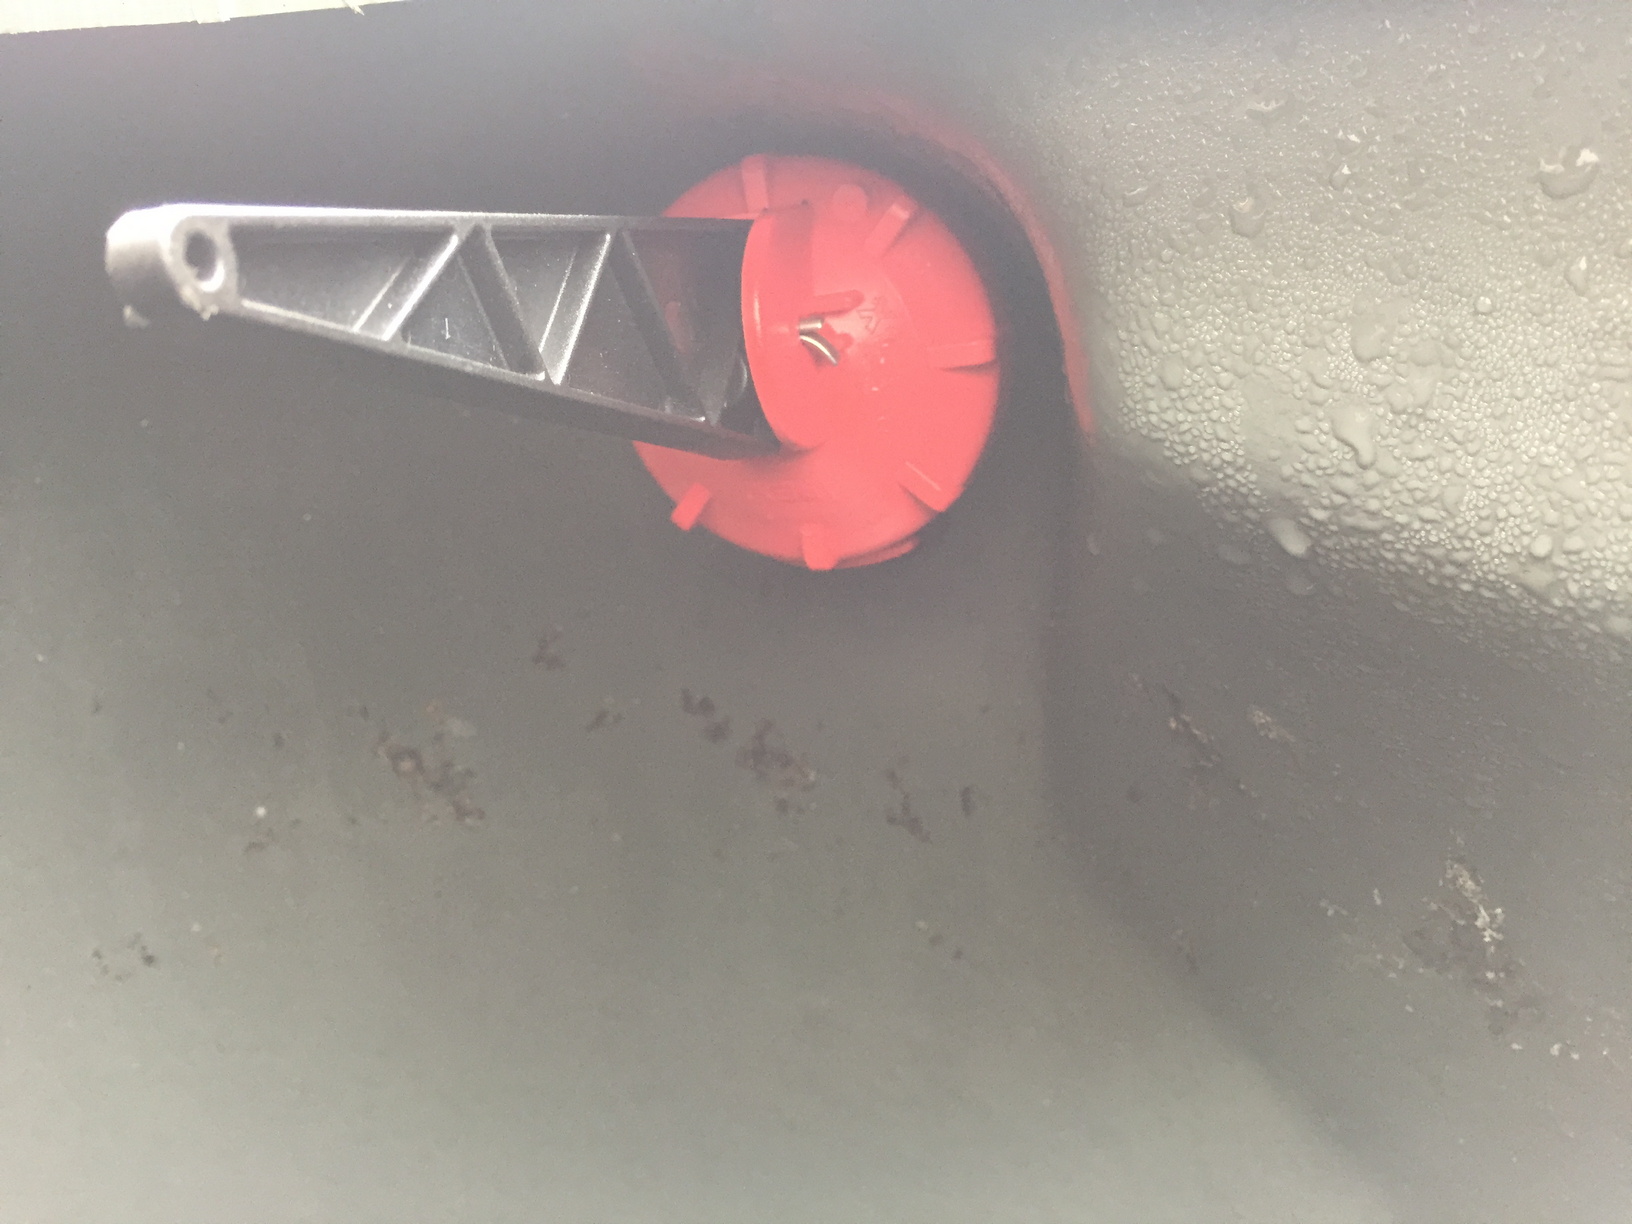
I installed a second tap on my mains-water garden tap and ran a 25mm blue-line poly-pipe run to the rainwater tanks. This is connected to a float-valve inside the tank. The idea is to only top up a small amount of water when the water level in the tanks is low. There is a weighted float tied to the arm of the float switch. When the float is in water, the valve remains shut. When the weighted float is not in water, the weight pulls the arm down and opens the valve to top up the tanks. Because the tanks are connected to one another, I only need to fill one tank. When the tanks get down to the last ~10%, the float valve kicks in and tops it back up a small amount, to roughly 12%. This way, room is left for rainwater to fill the tanks when available, without ever letting the tanks go dry. The pump does have a dry-run protection mechanism, but it’s more about making sure water is always available for irrigation.
 |
 |
 |
 |
How much did it cost?
I haven’t actually worked it out exactly until now, and I’m probably going to regret doing it rather than living in sweet ignorance as to how much I’ve actually spent on this.
| Item | Cost |
|---|---|
| 2 x 3000L slimline water tanks | $2130 |
| 1 x pump | $653 |
| 1 x OpenSprinkler and 1 x Zone Expander | $353 |
| 8 x Solenoid valves | $297 |
| 3 x Valve boxes | $62 |
| 1 x 50m length of 7-core irrigation cable | $85 |
| 1 x Main auto top-up valve for rainwater tanks | $157 |
| Piping, fittings, irrigation tools and equipment | $601 |
| Total | $4338 |
Ouch! Ok, that was more than I was expecting.
Was it worth it?
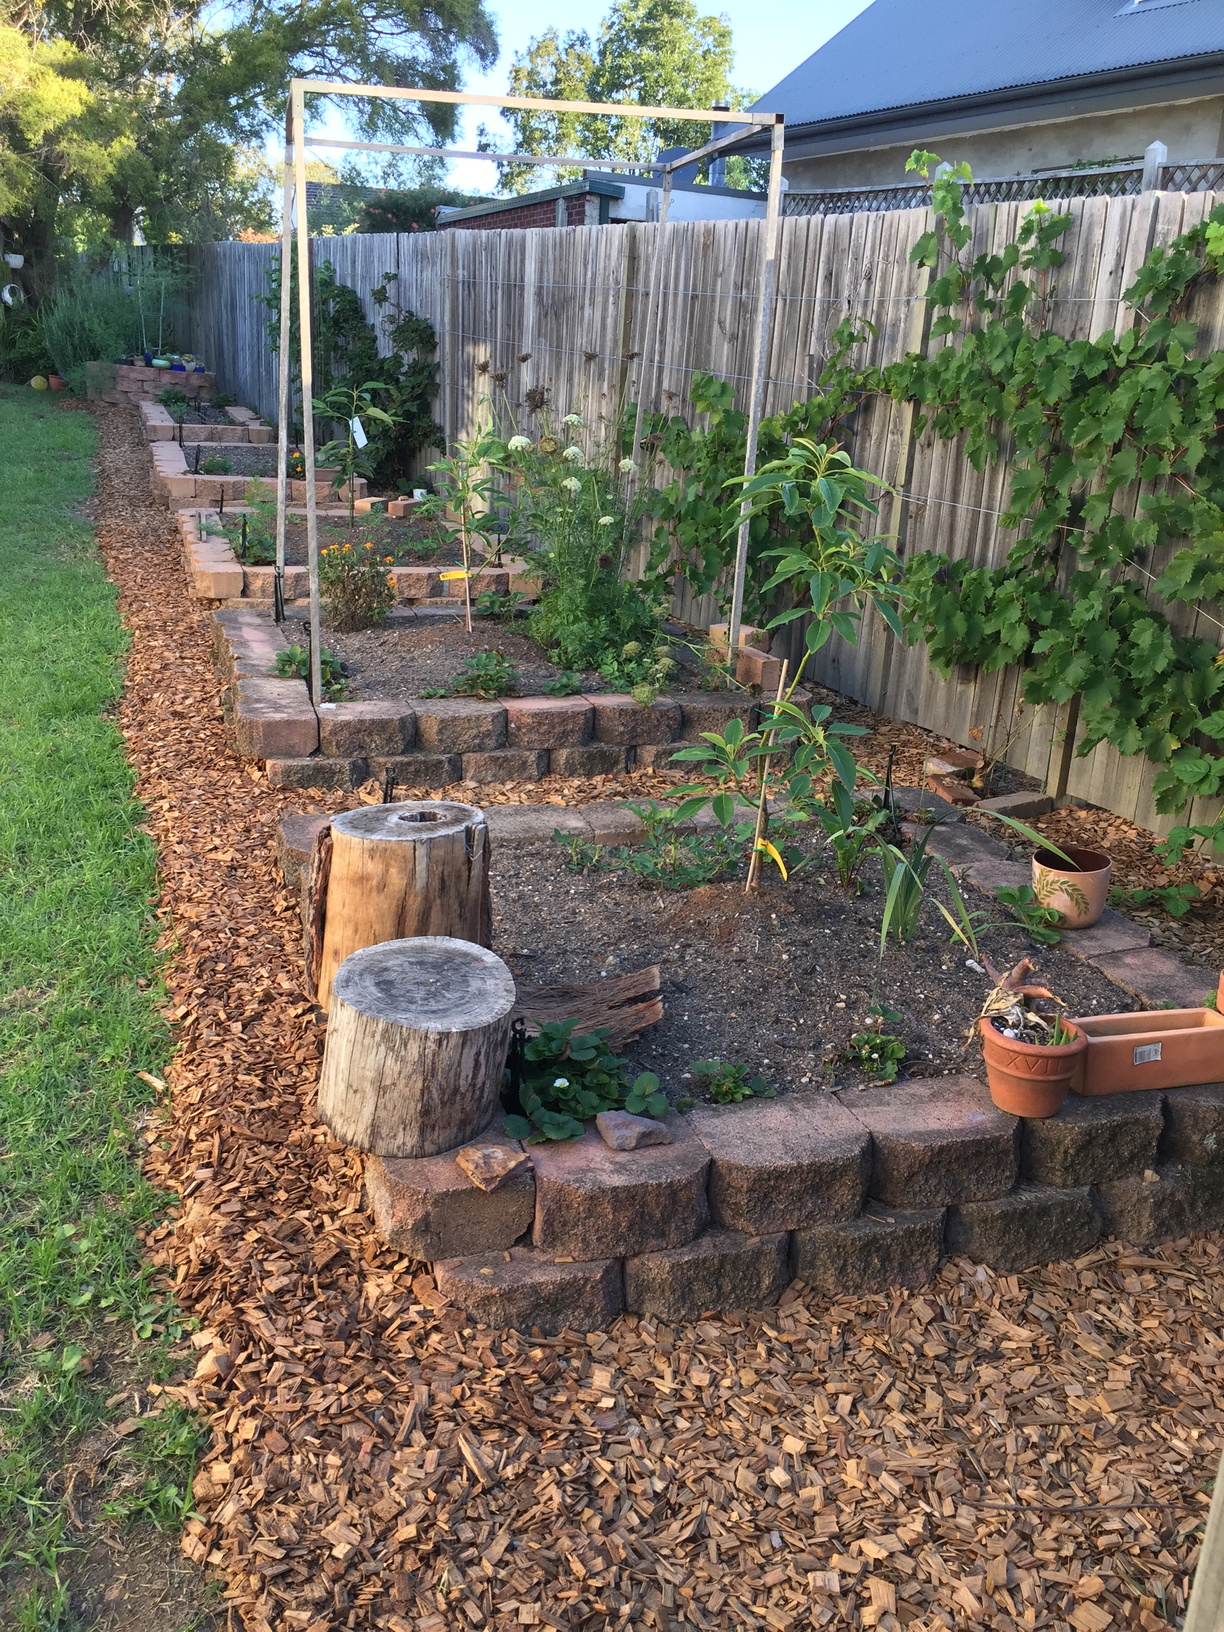
Absolutely. It cost me a lot in terms of time, effort and money, but I learned a lot, sometimes about what not to do if I ever needed to do something like this again in future, but I am very happy with the result.
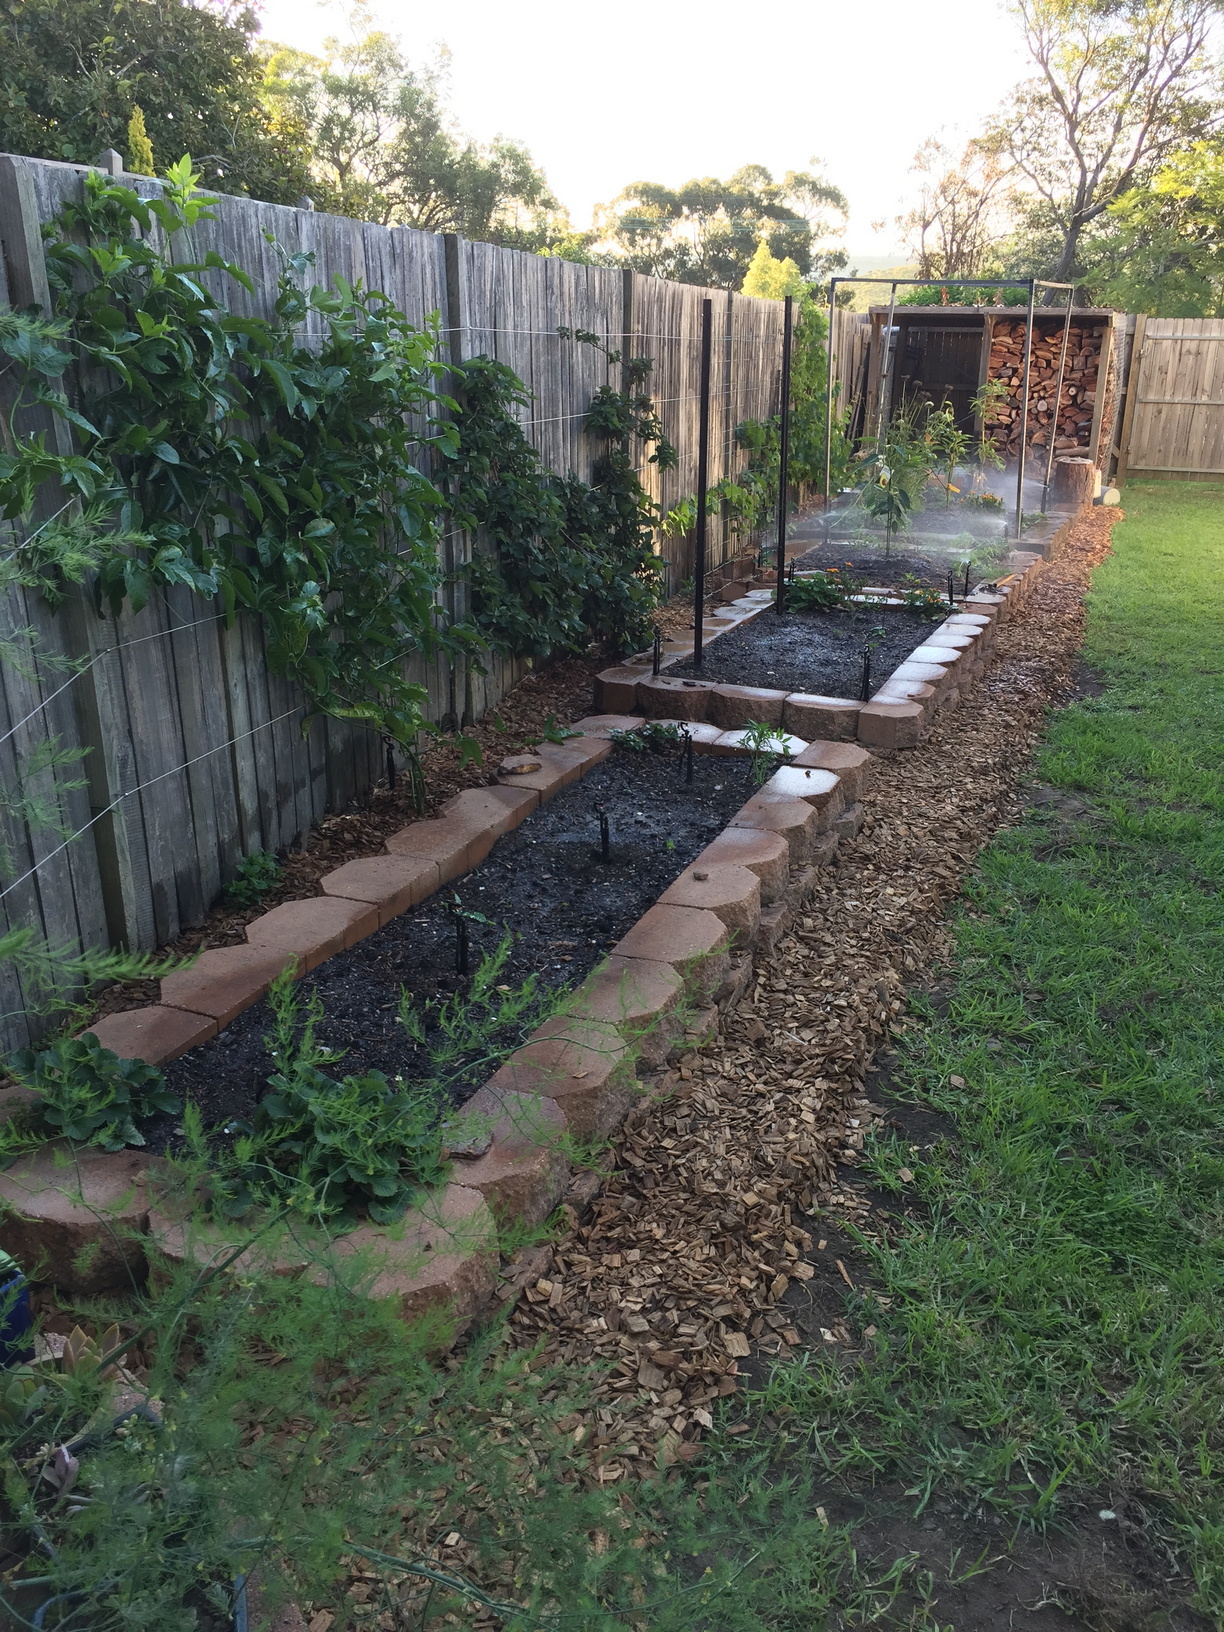
My raised veggie beds are looking great! I am converting three of them to raised avocado tree beds instead of veggie beds long-term. I was having trouble growing avocado trees directly in the ground due to the clay soil in our area. The raised beds are split into two zones, the lower beds and upper beds. I have planted a tree in the centre of each of the lower three beds, as the soil is rich and raised, so has good drainage. I have these being watered on a less frequent schedule, and plan to grow whatever veggies will grow around the trees for as long as I can. The trees will provide much needed afternoon shade to the house for the long, hot summer afternoons, and the trees will hopefully provide me with a wealth of avocados. I have a Sheppard, Hass and Fuerte avocado in the veggie beds, a struggling but recovering Wurtz in the ground, and a Pinkerton avocado in the front yard.
Knowing that my garden will be watered precisely where and when I want, and being able to control it from anywhere in the world (via VPN), is very comforting. Seeing the results in the short time it has been operational has been very exciting. Everything seems to be thriving and I can’t wait until I start seeing some of the fruits of my labour.
 |
 |
 |
 |
 |