Chickens
My wife and I spoke a number times over the years about the fact that our yard would be big enough to get a few chickens and that it would be nice for our kids to be able to collect eggs, but never pulled the trigger for a number of reasons. The main reasons for not getting chickens were:
- Excess food in their enclosure could attract mice and rats
- If we let them free range, we would end up with chicken poop everywhere and they would likely destroy all our hard work in the garden beds by scratching everything up
- Chicken poop doesn’t smell great
- You have to clean out their coop on a regular basis
- Buying eggs from the shops is not terribly expensive
- Putting in a chicken coop would take up a good chunk of the back yard
For a number of years, the reasons in the above list were enough to prevent any further investigation into getting chickens. Whenever the discussion came up, the same reasons re-surfaced and we decided to leave it.
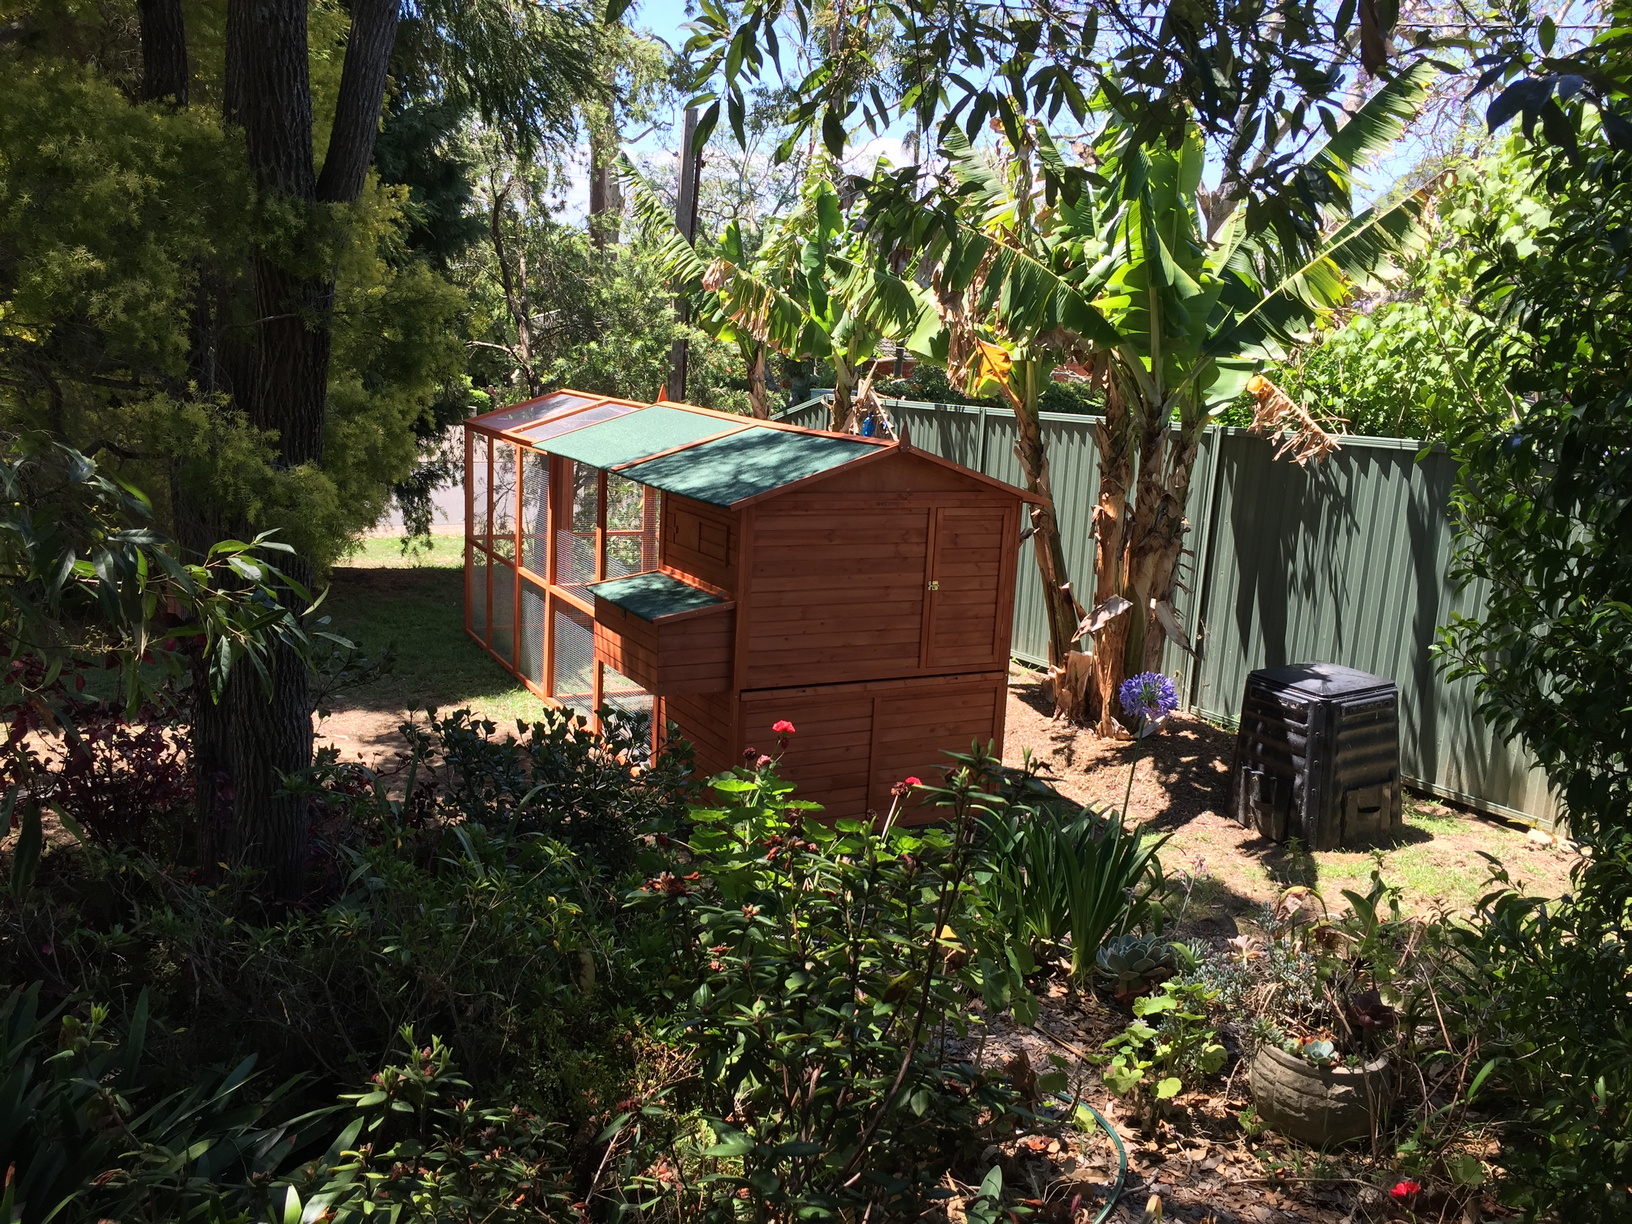
I was looking at our front yard one day and thought “We don’t really make a lot of use of the front yard… Wait! Maybe I could put a chicken coop in the front yard!”
That solves the problem of it taking up any space in the back yard. I needed to find a vermin proof coop, that was easy to clean and access, and looks reasonable to cover off some of the other points. I can live with needing to clean out the coop on a regular basis if most of the other items are covered off.
The Coop
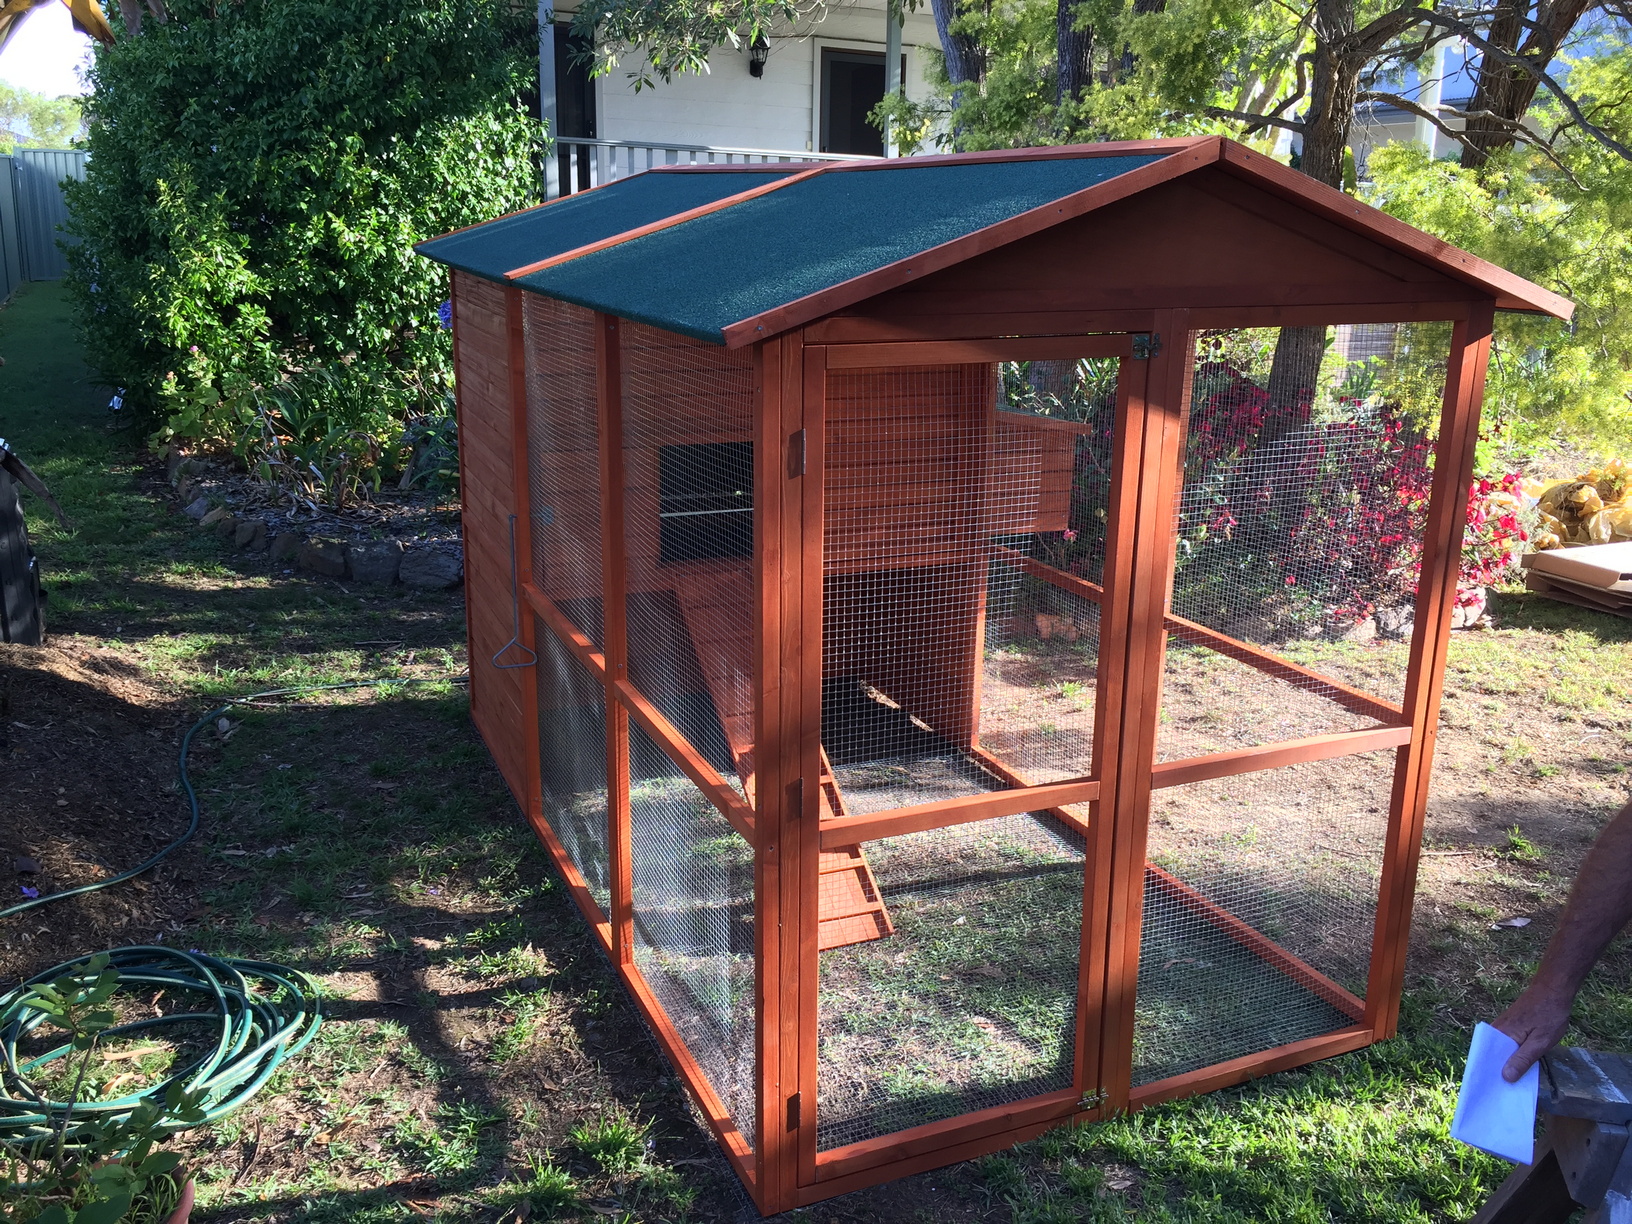
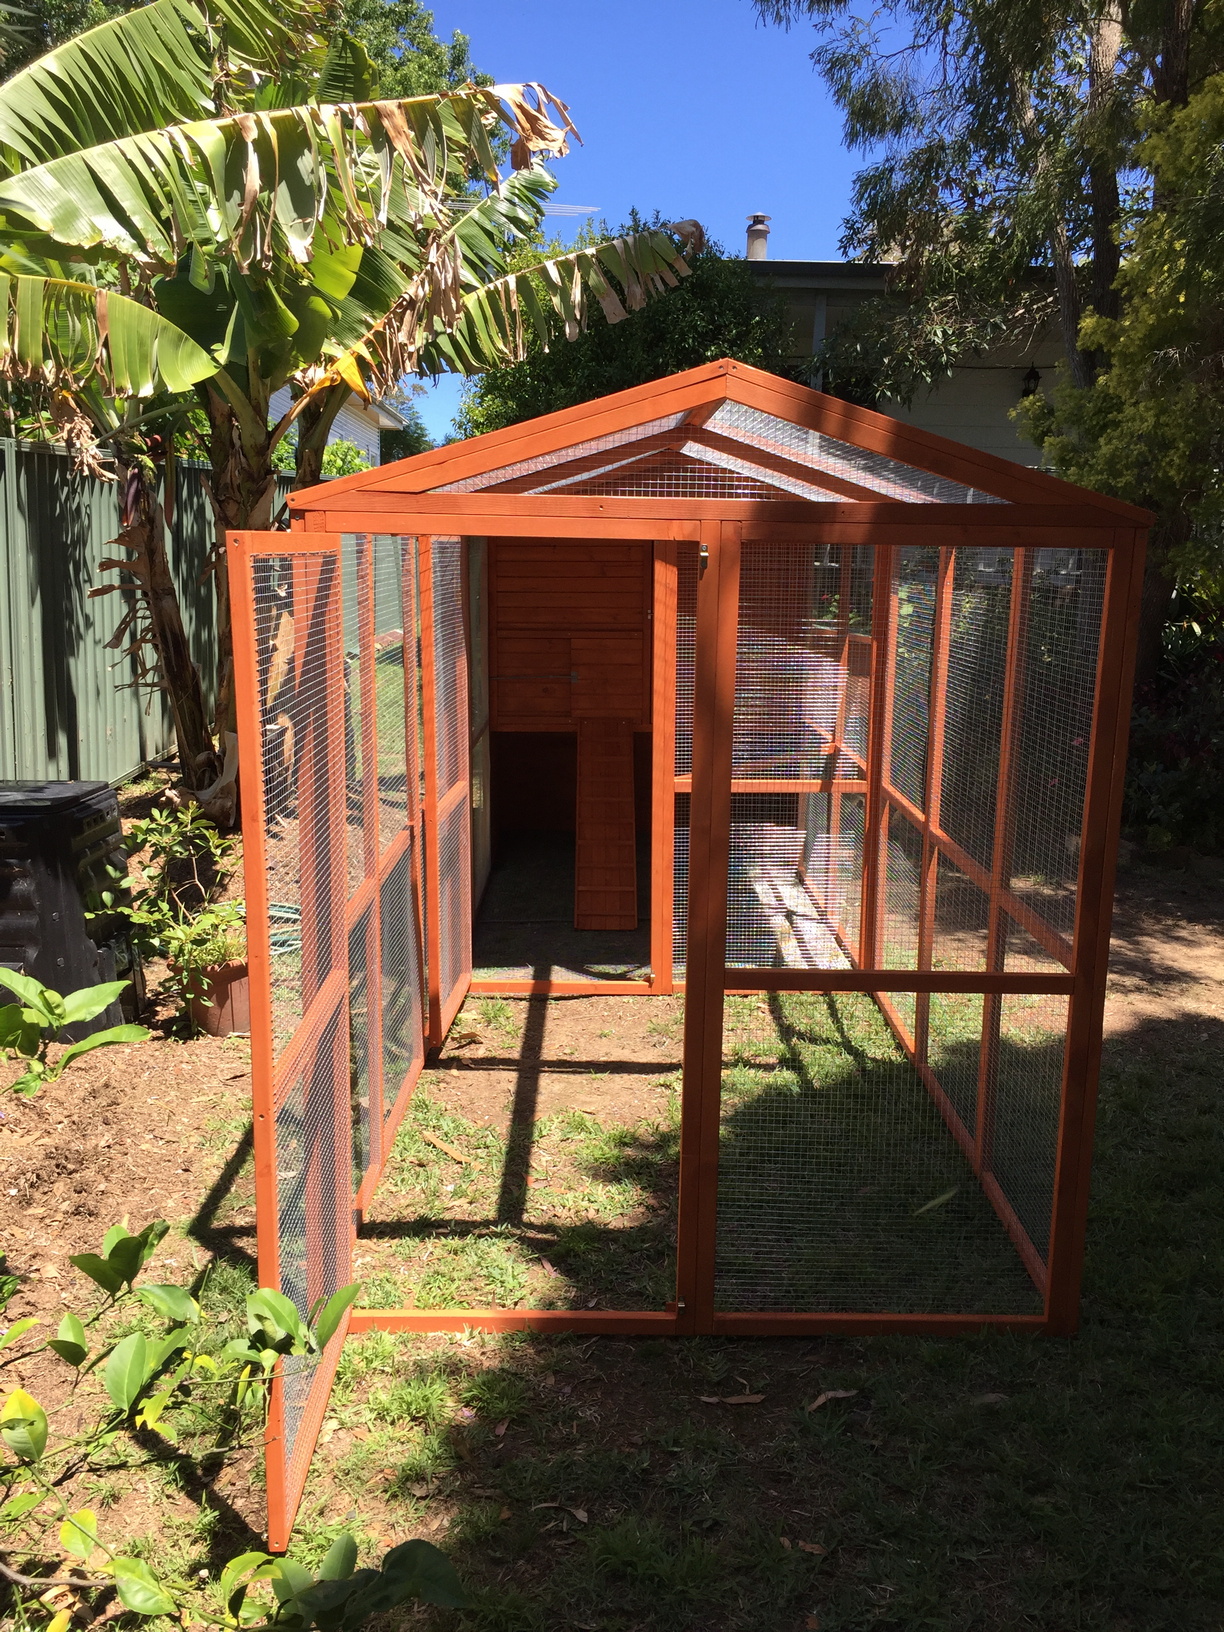
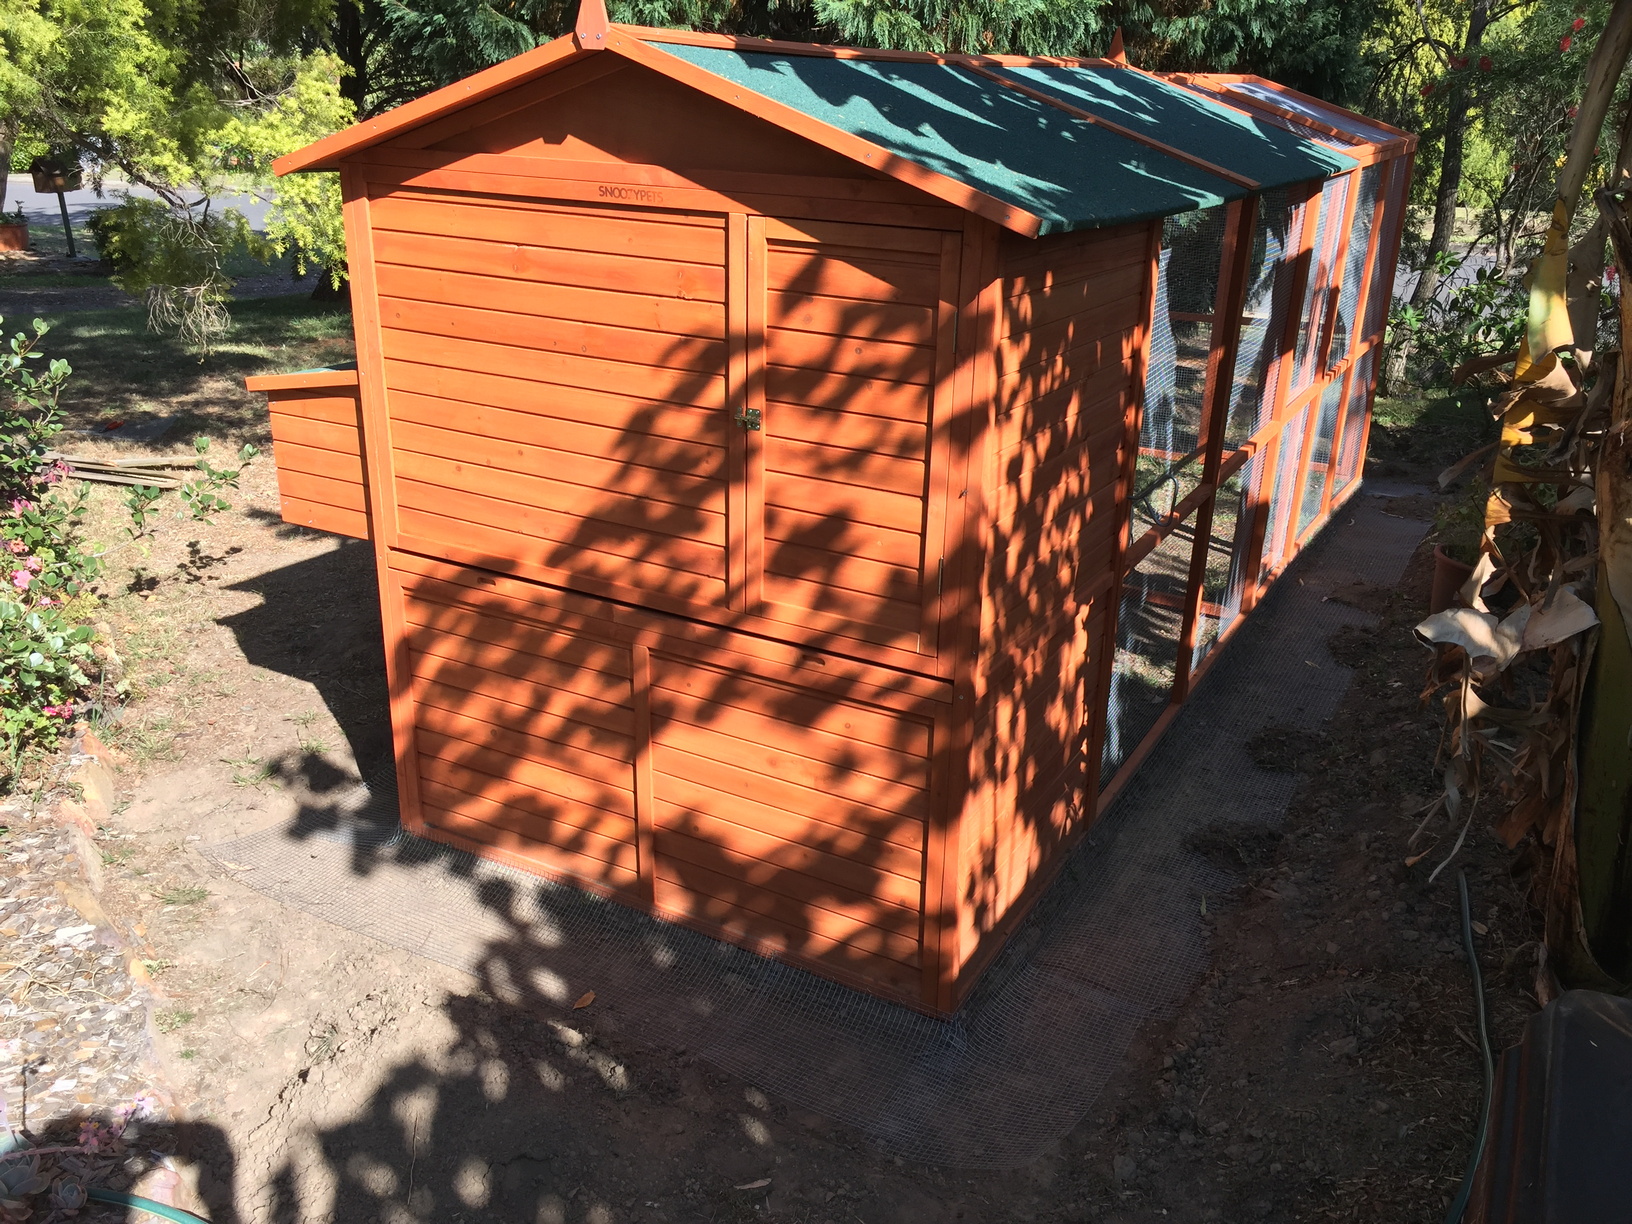
I looked around online and found a coop with an additional run out the front that would comfortably house 10 chickens. Hornsby council only allows 5 chickens maximum per dwelling (and no roosters, for obvious reasons), so I figured a coop that can house 10 chickens should be very comfortable for 5 chickens.
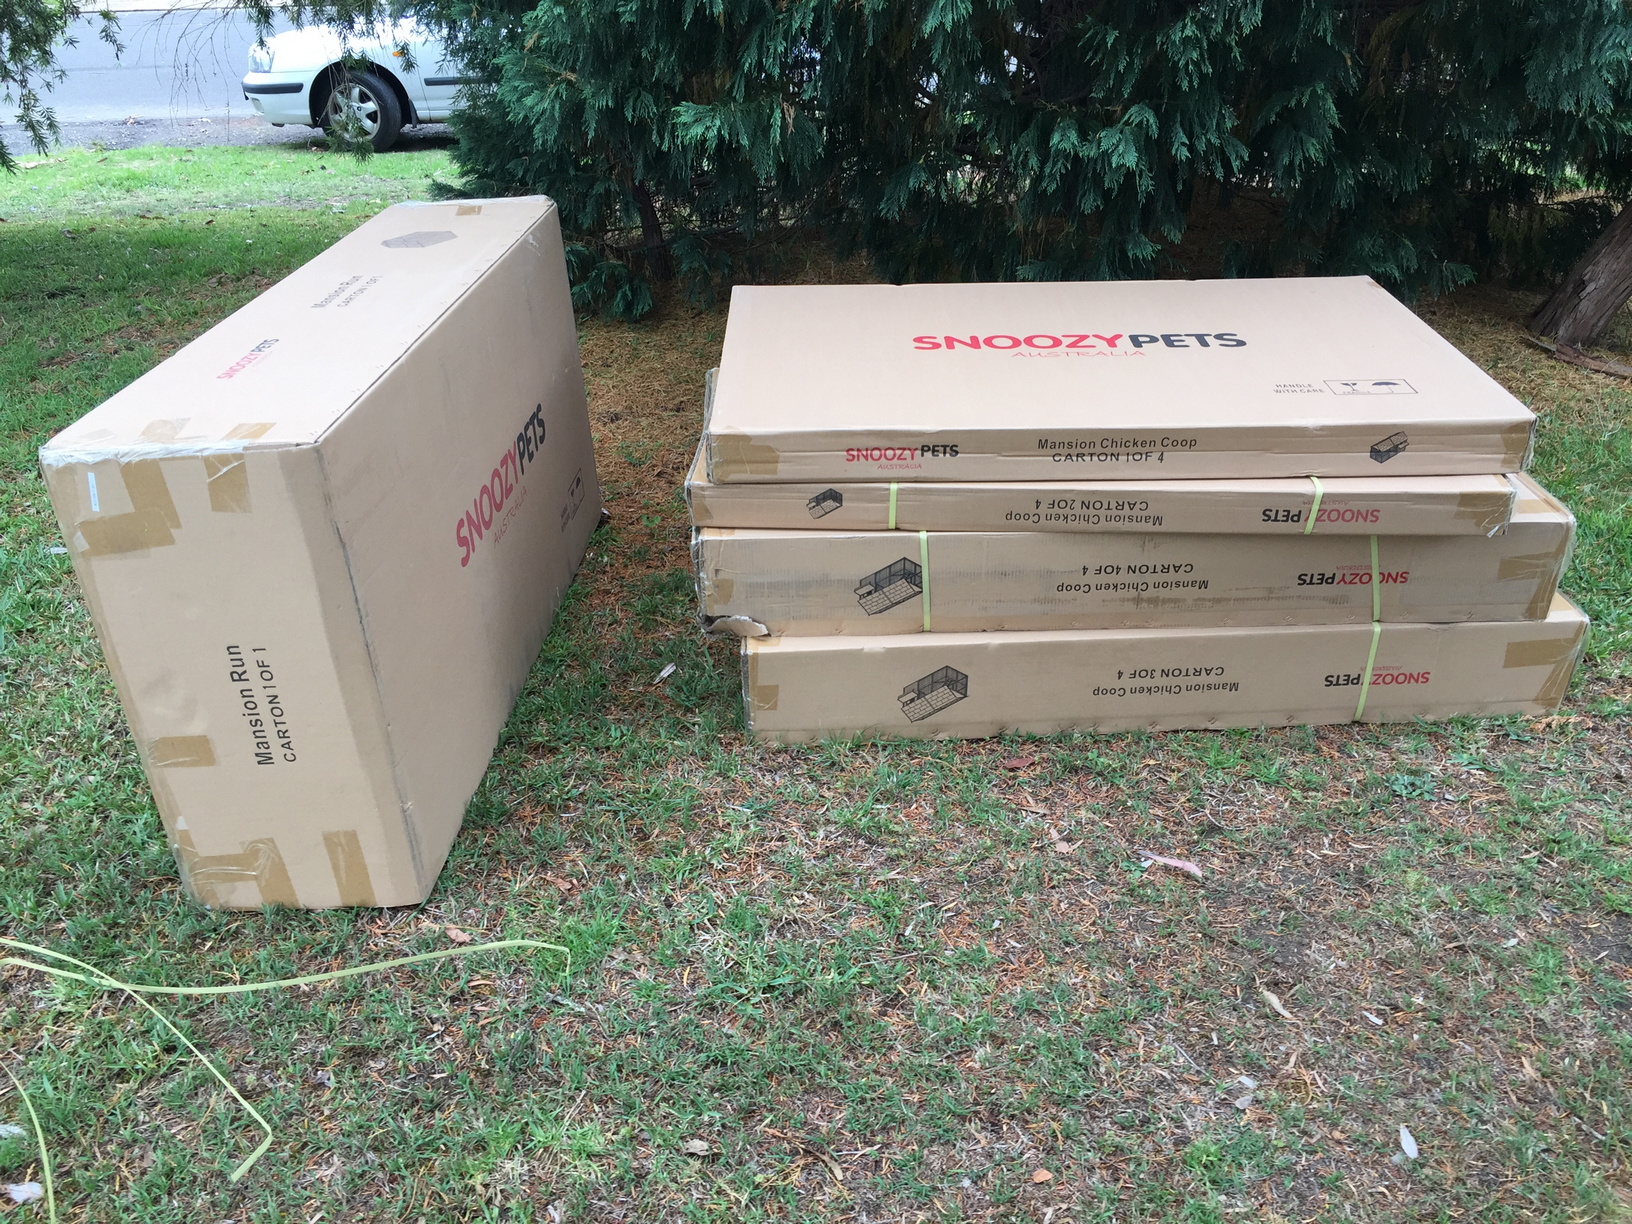
A “Super Mansion Chicken Coop”, along with additional mesh flooring for the run was purchased from MyChickenCoop and arrived 5 days later.
It was “tools down” on the irrigation system once the chicken coop arrived.
 |
 |
 |
 |
 |
 |
 |
 |
 |
 |
 |
 |
 |
Vermin and Predator Prevention
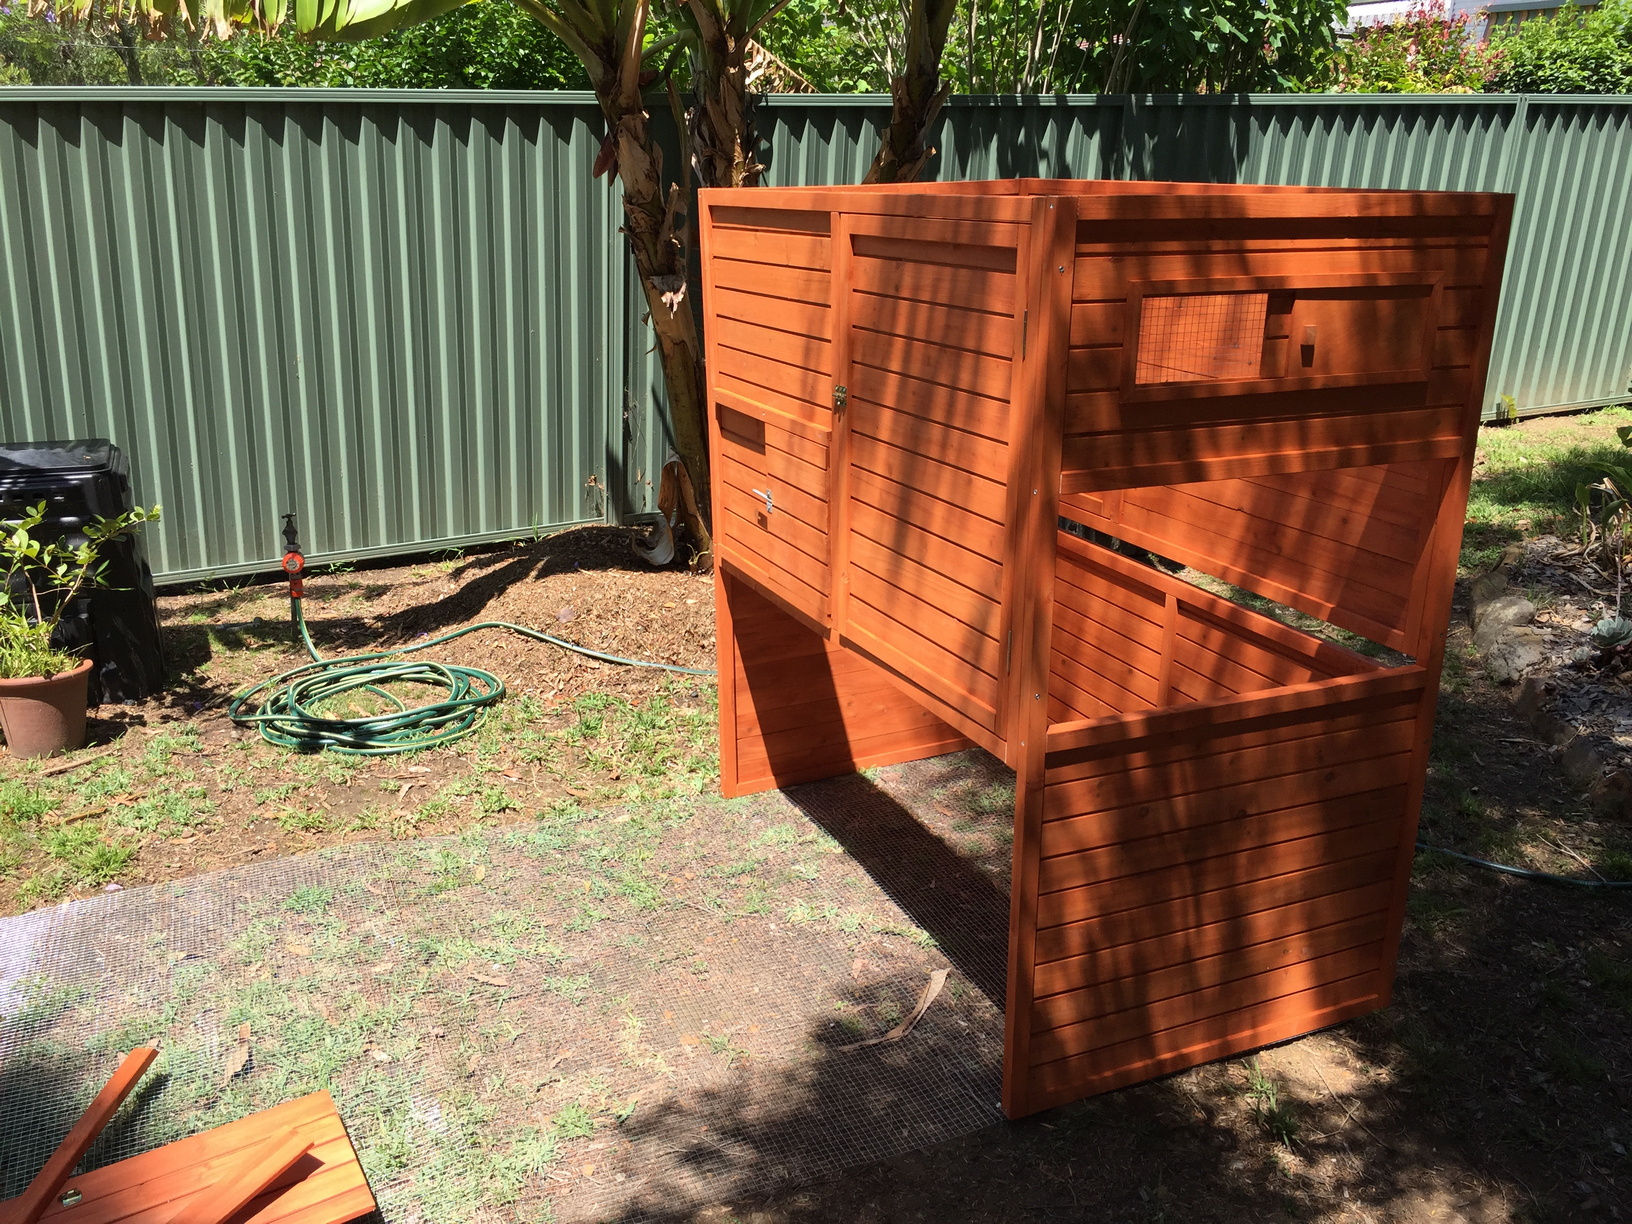
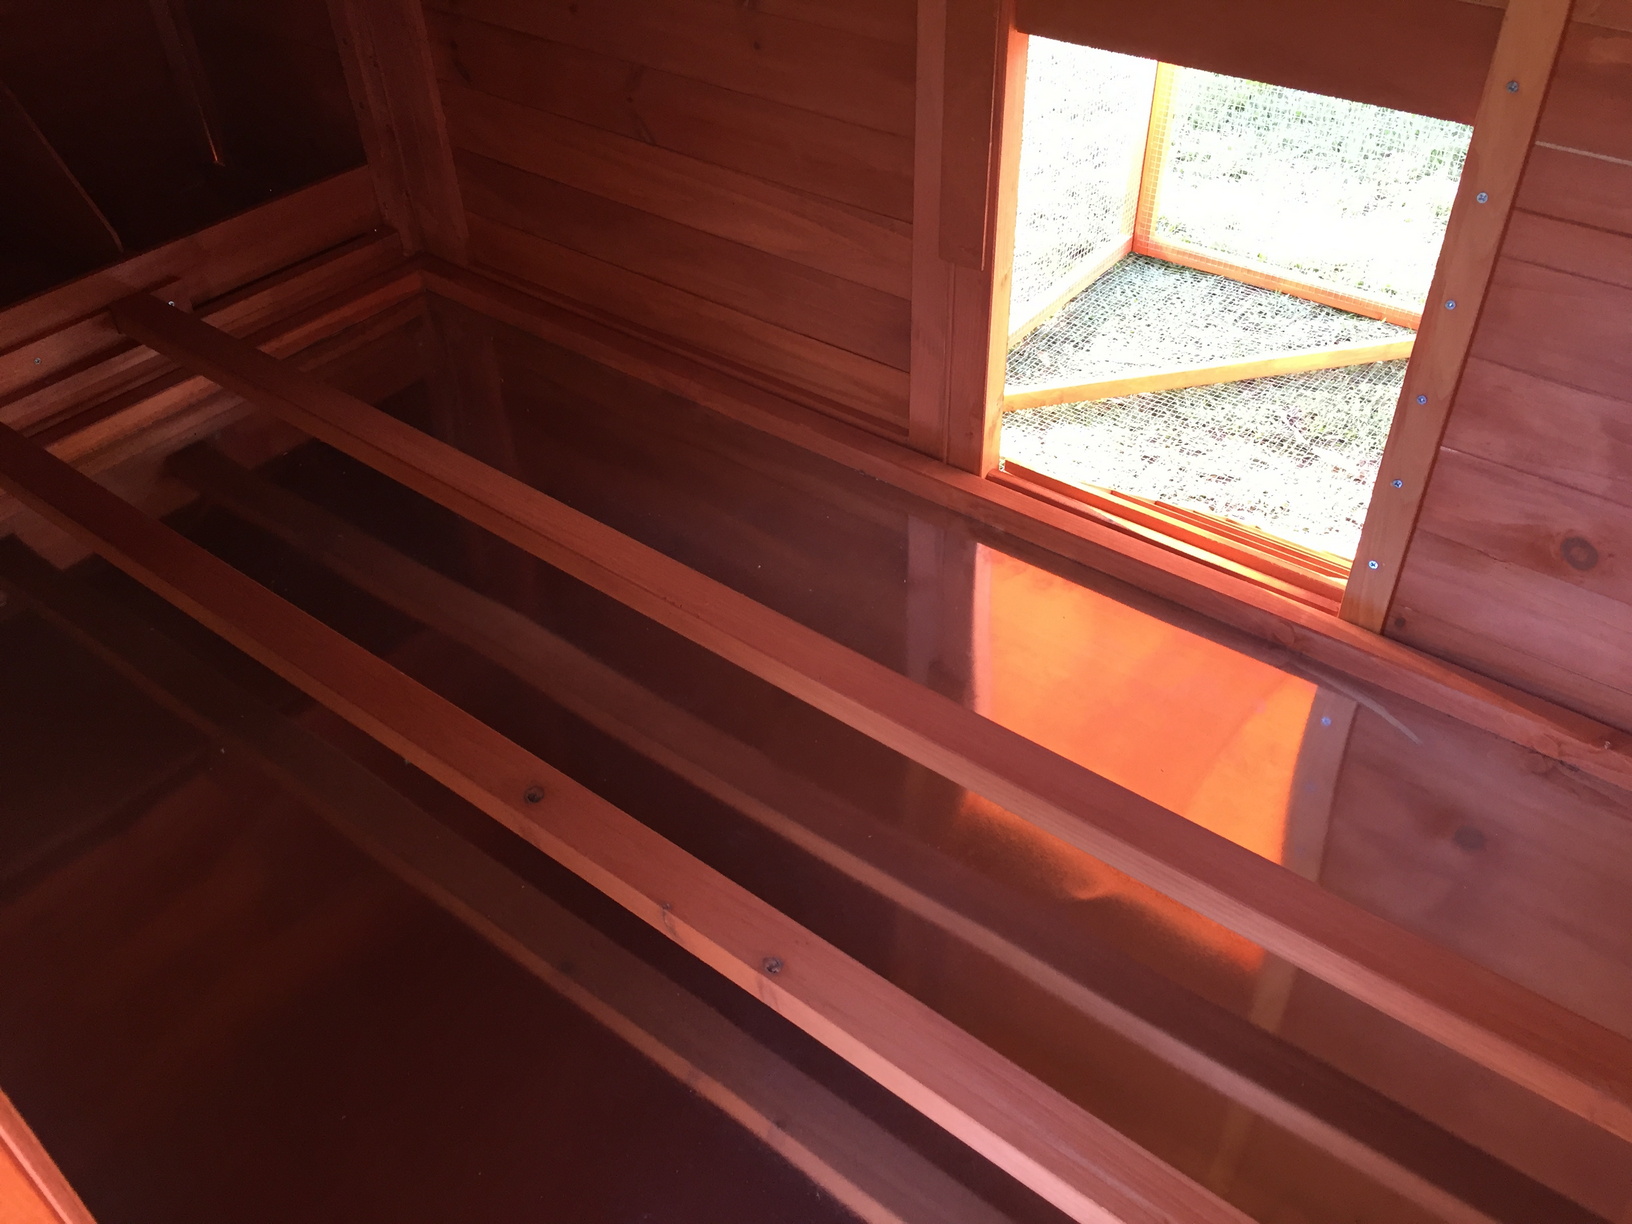
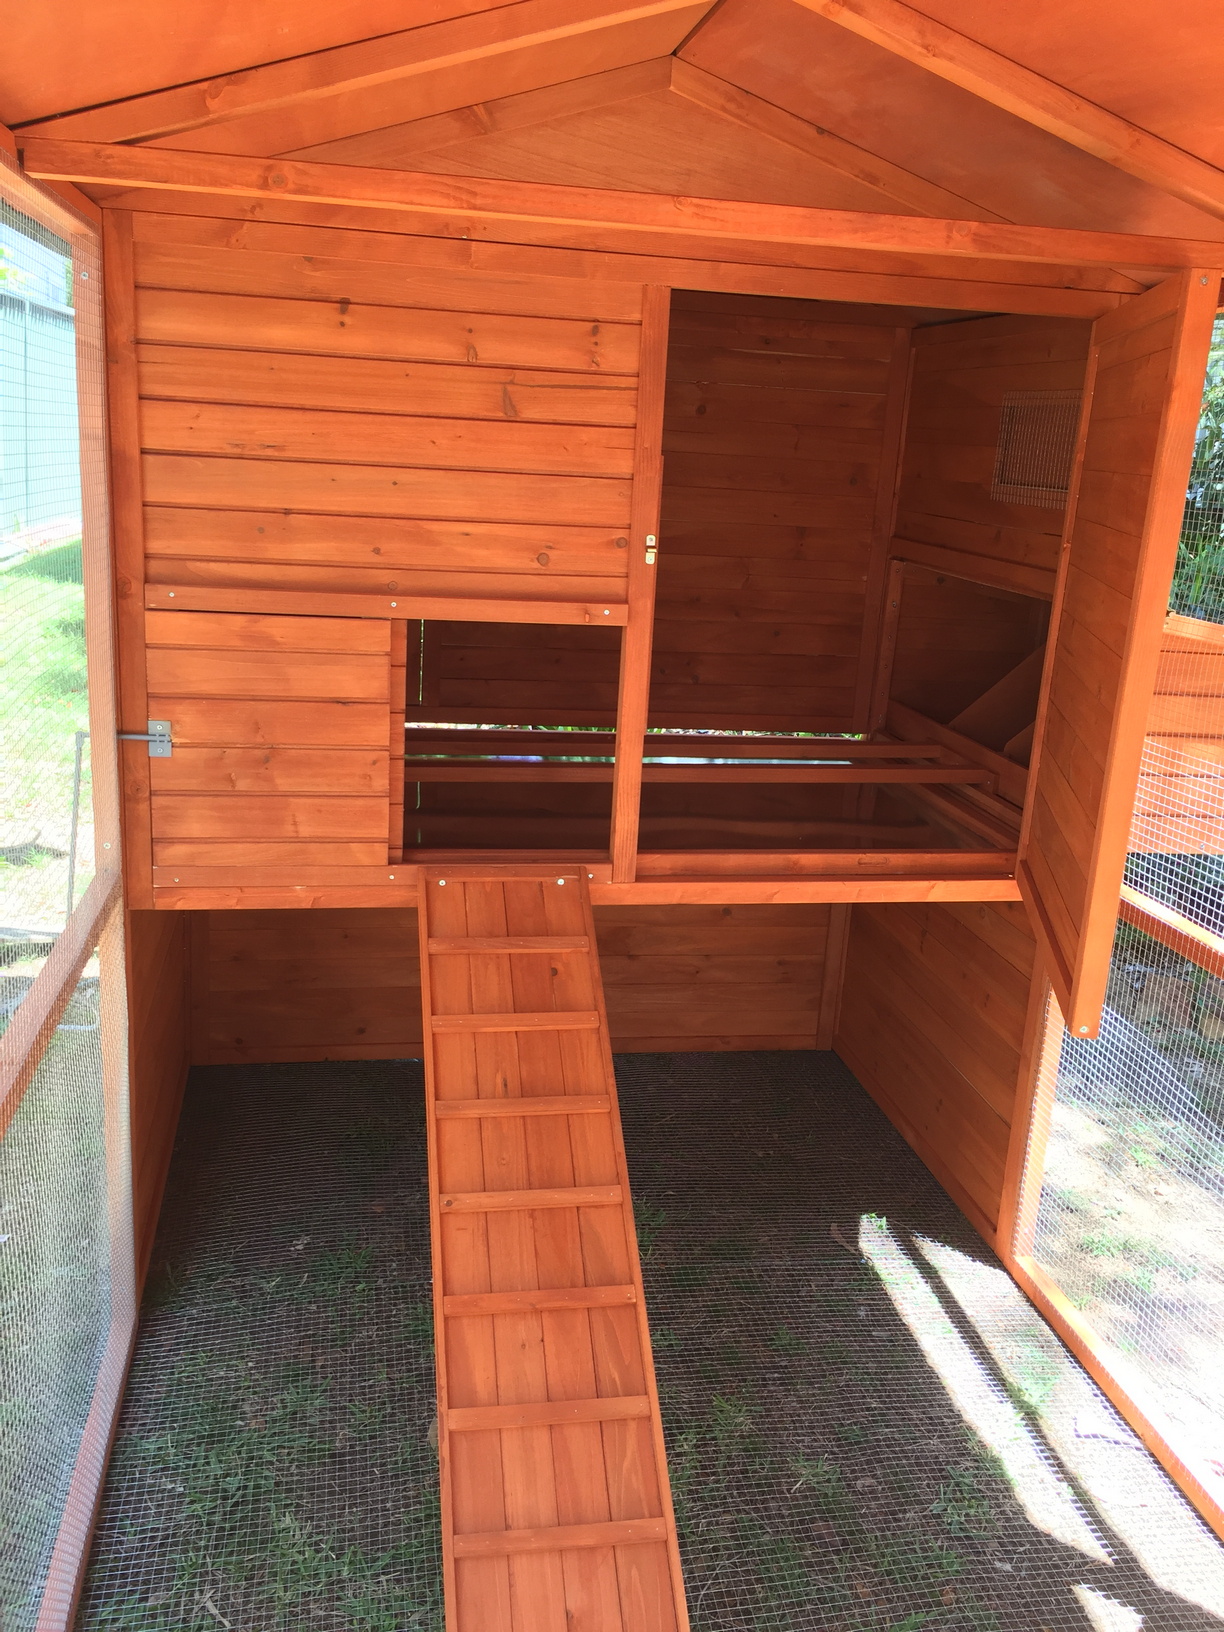
I decided against putting the wire mesh flooring into the coop, as chickens do love to scratch around in the dirt, and they dig out dust baths for themselves. This apparently is a natural way for the chickens to keep themselves free of mites and other parasites and is how they keep clean, by removing excess oils etc from their skin and feathers. If you do not have somewhere for the chickens to dig their own dust baths, you need to provide an artificial one for them. A large bowl filled with sand will do, but then you need to maintain it and keep the sand clean… too difficult. I opted to let the chickens manage this themselves.
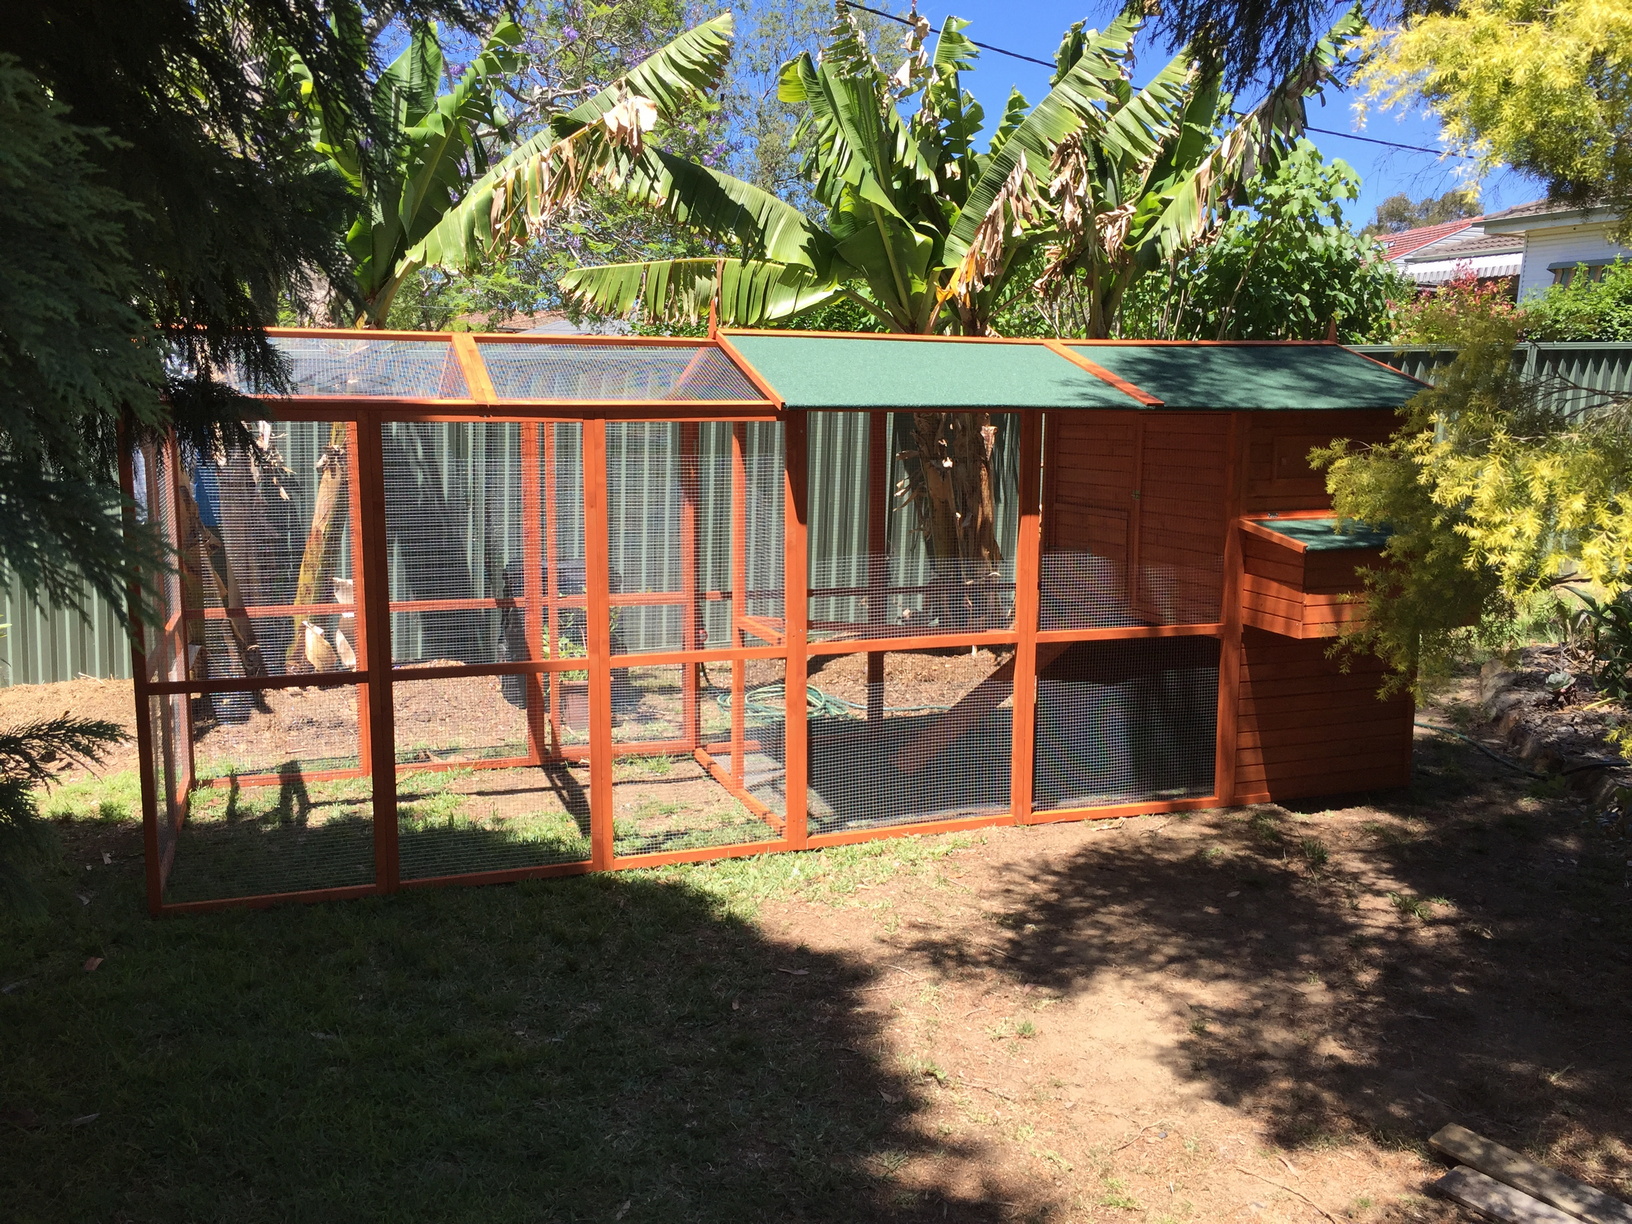
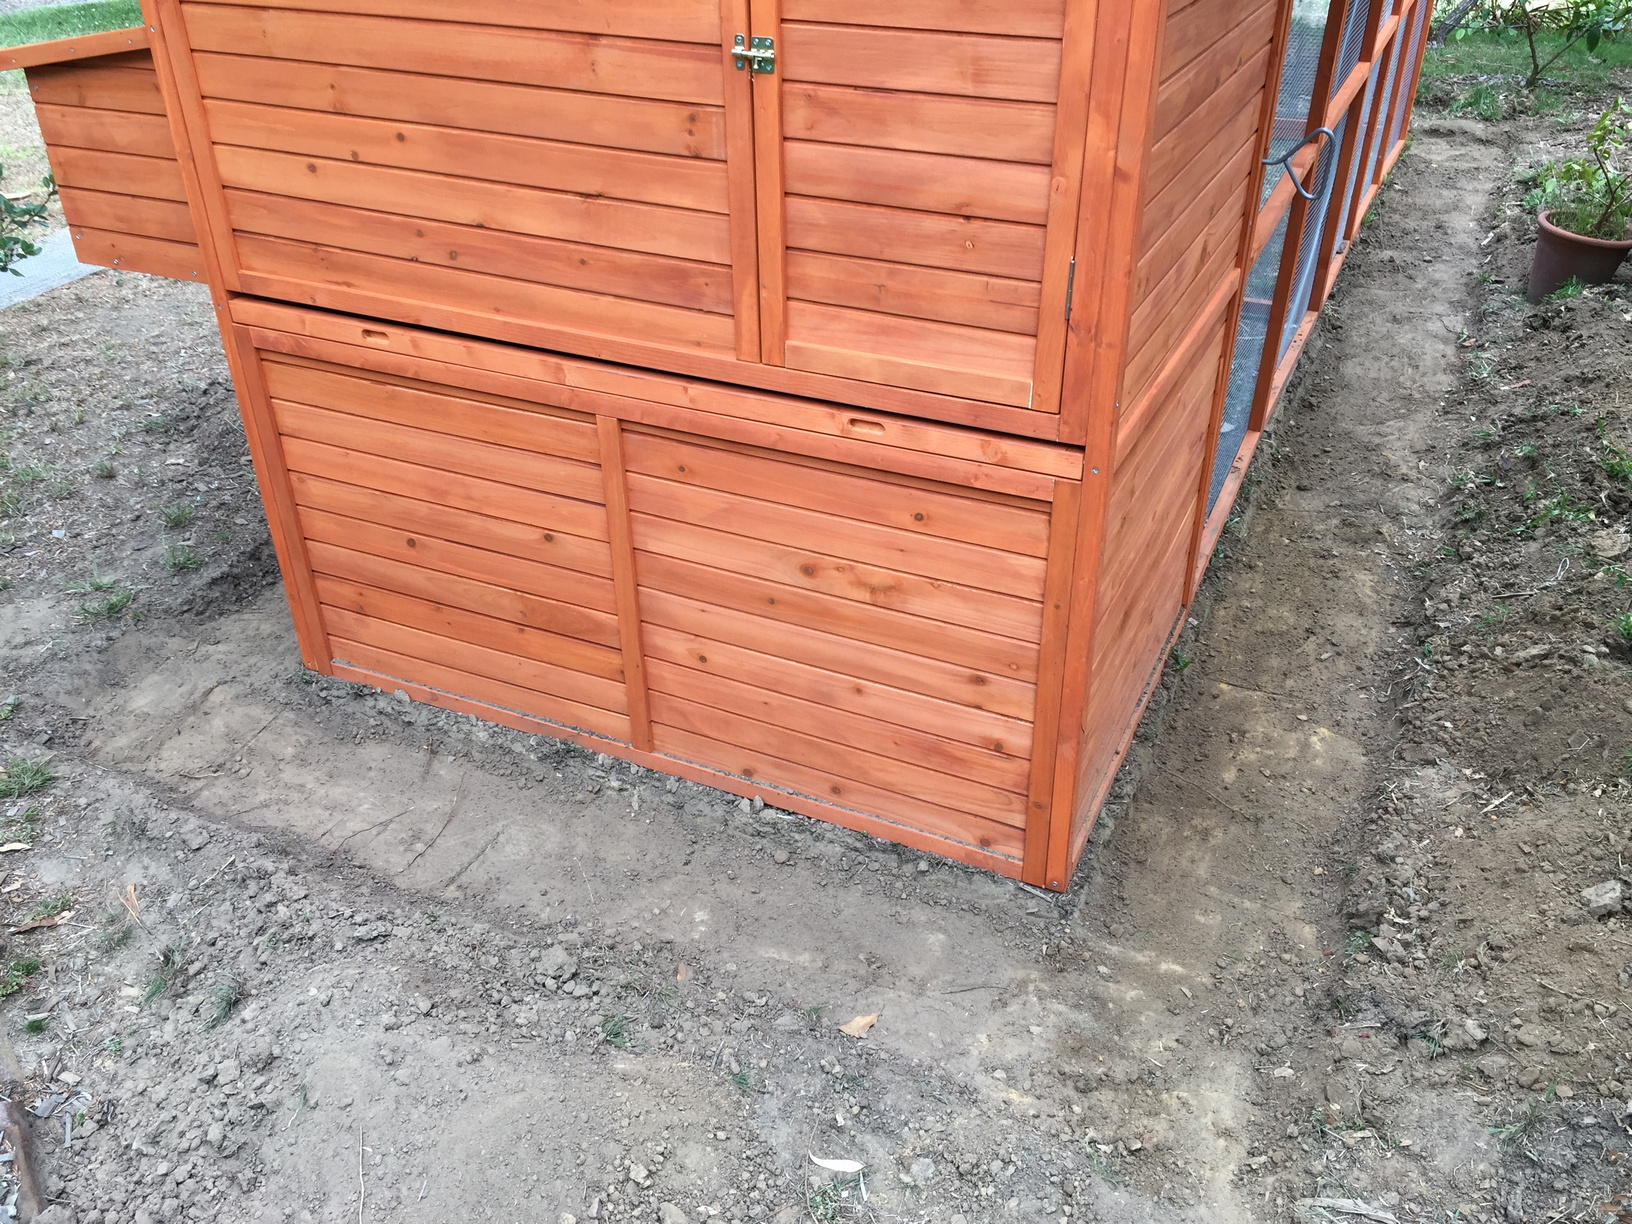
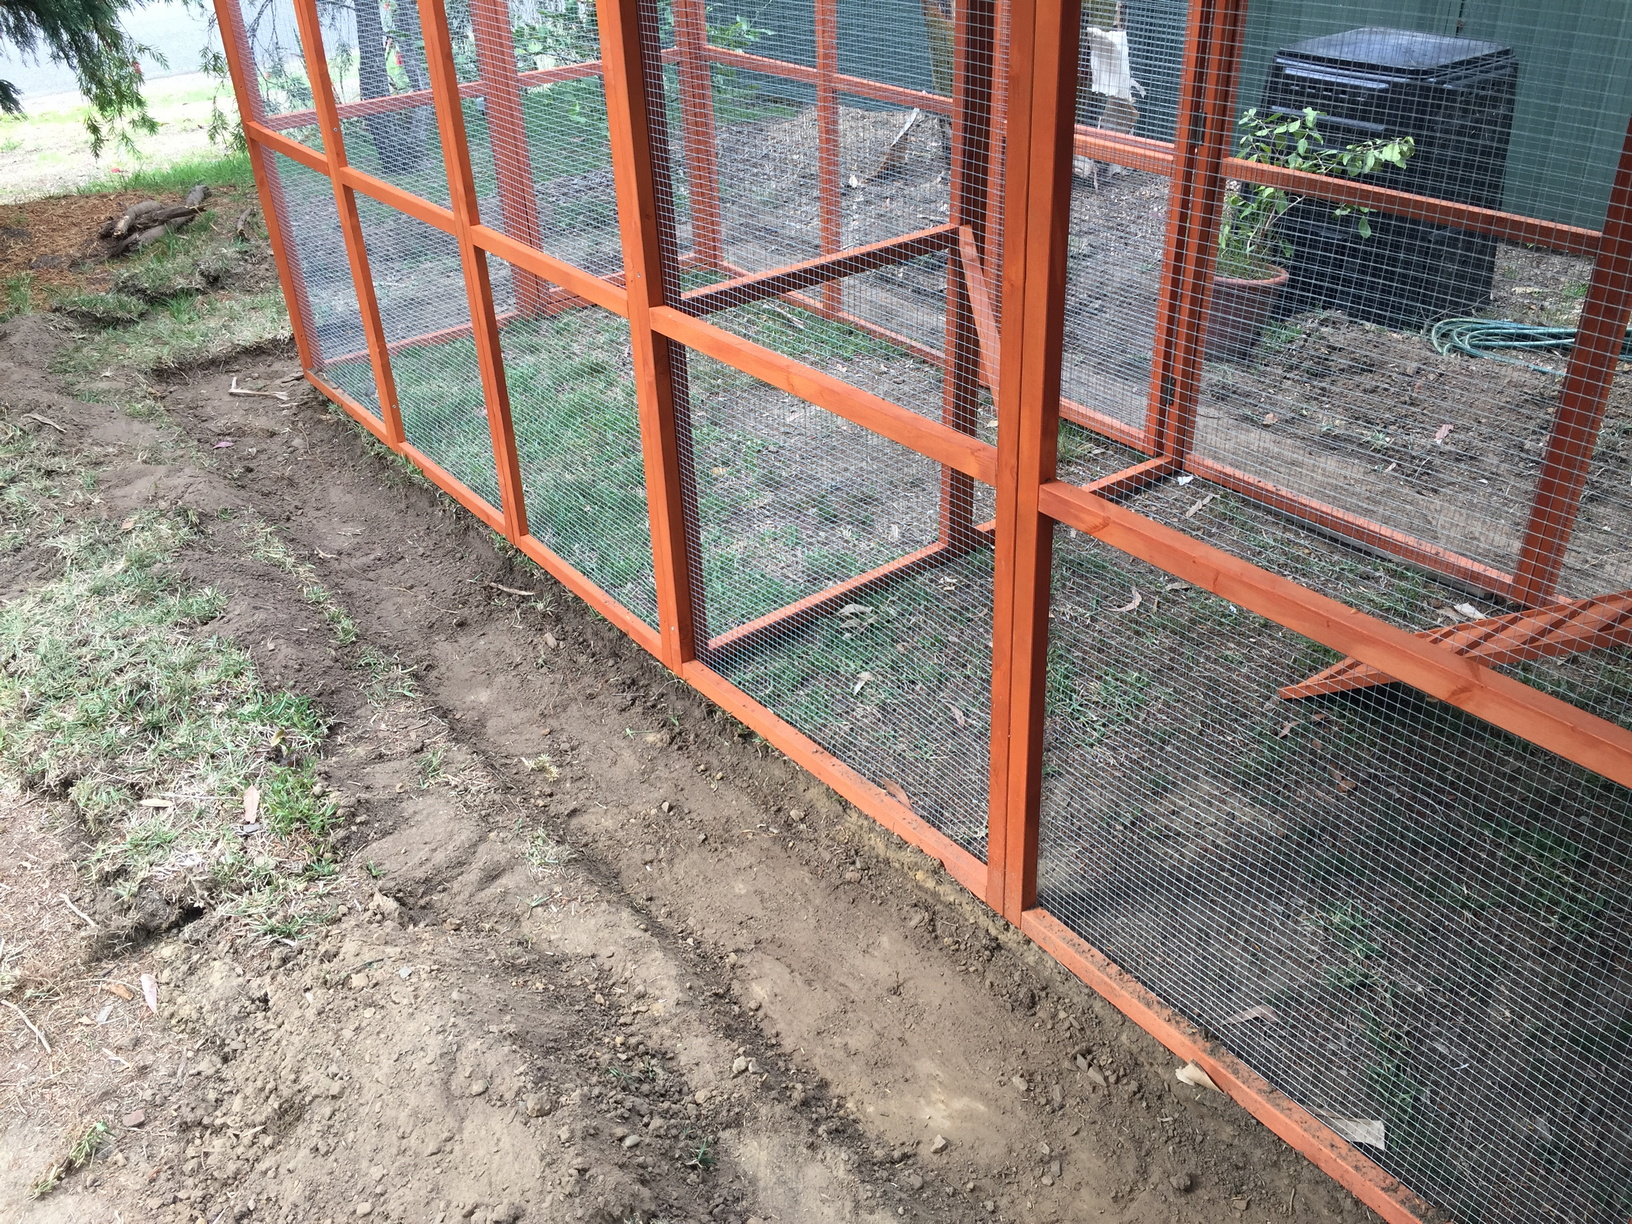
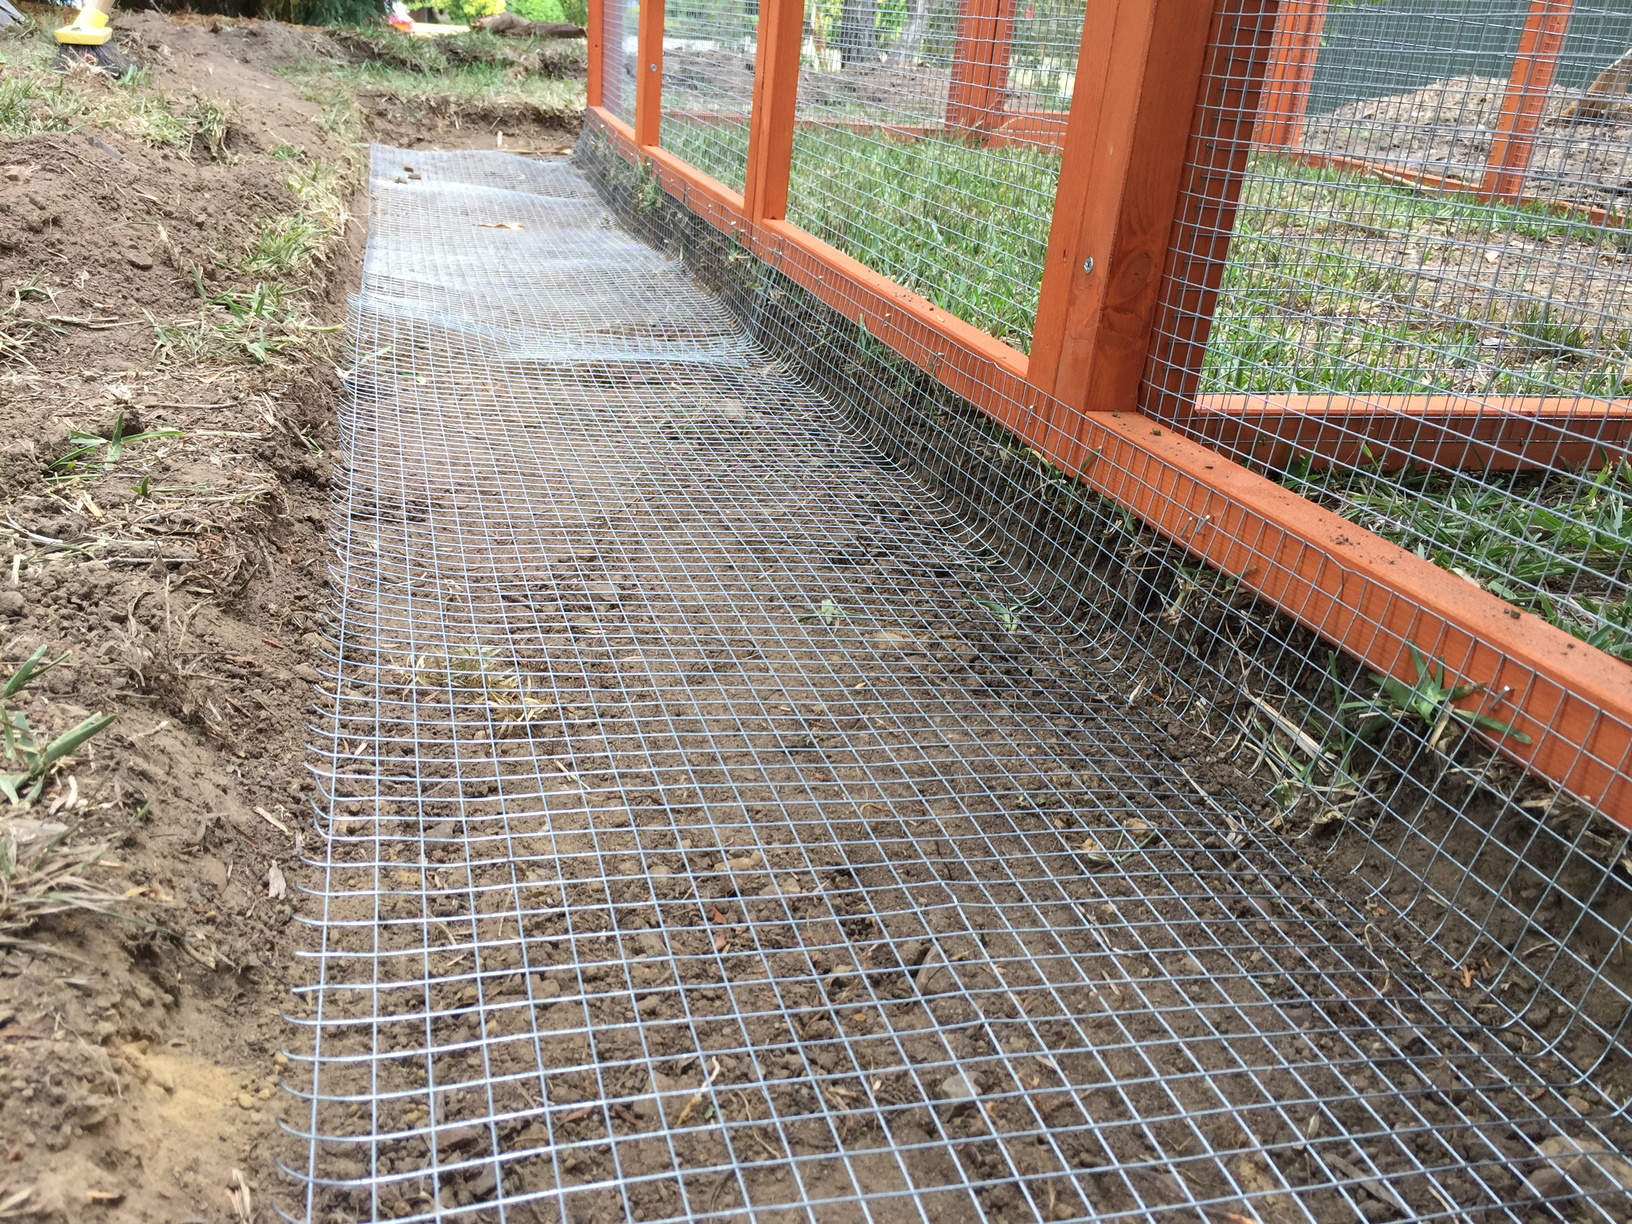
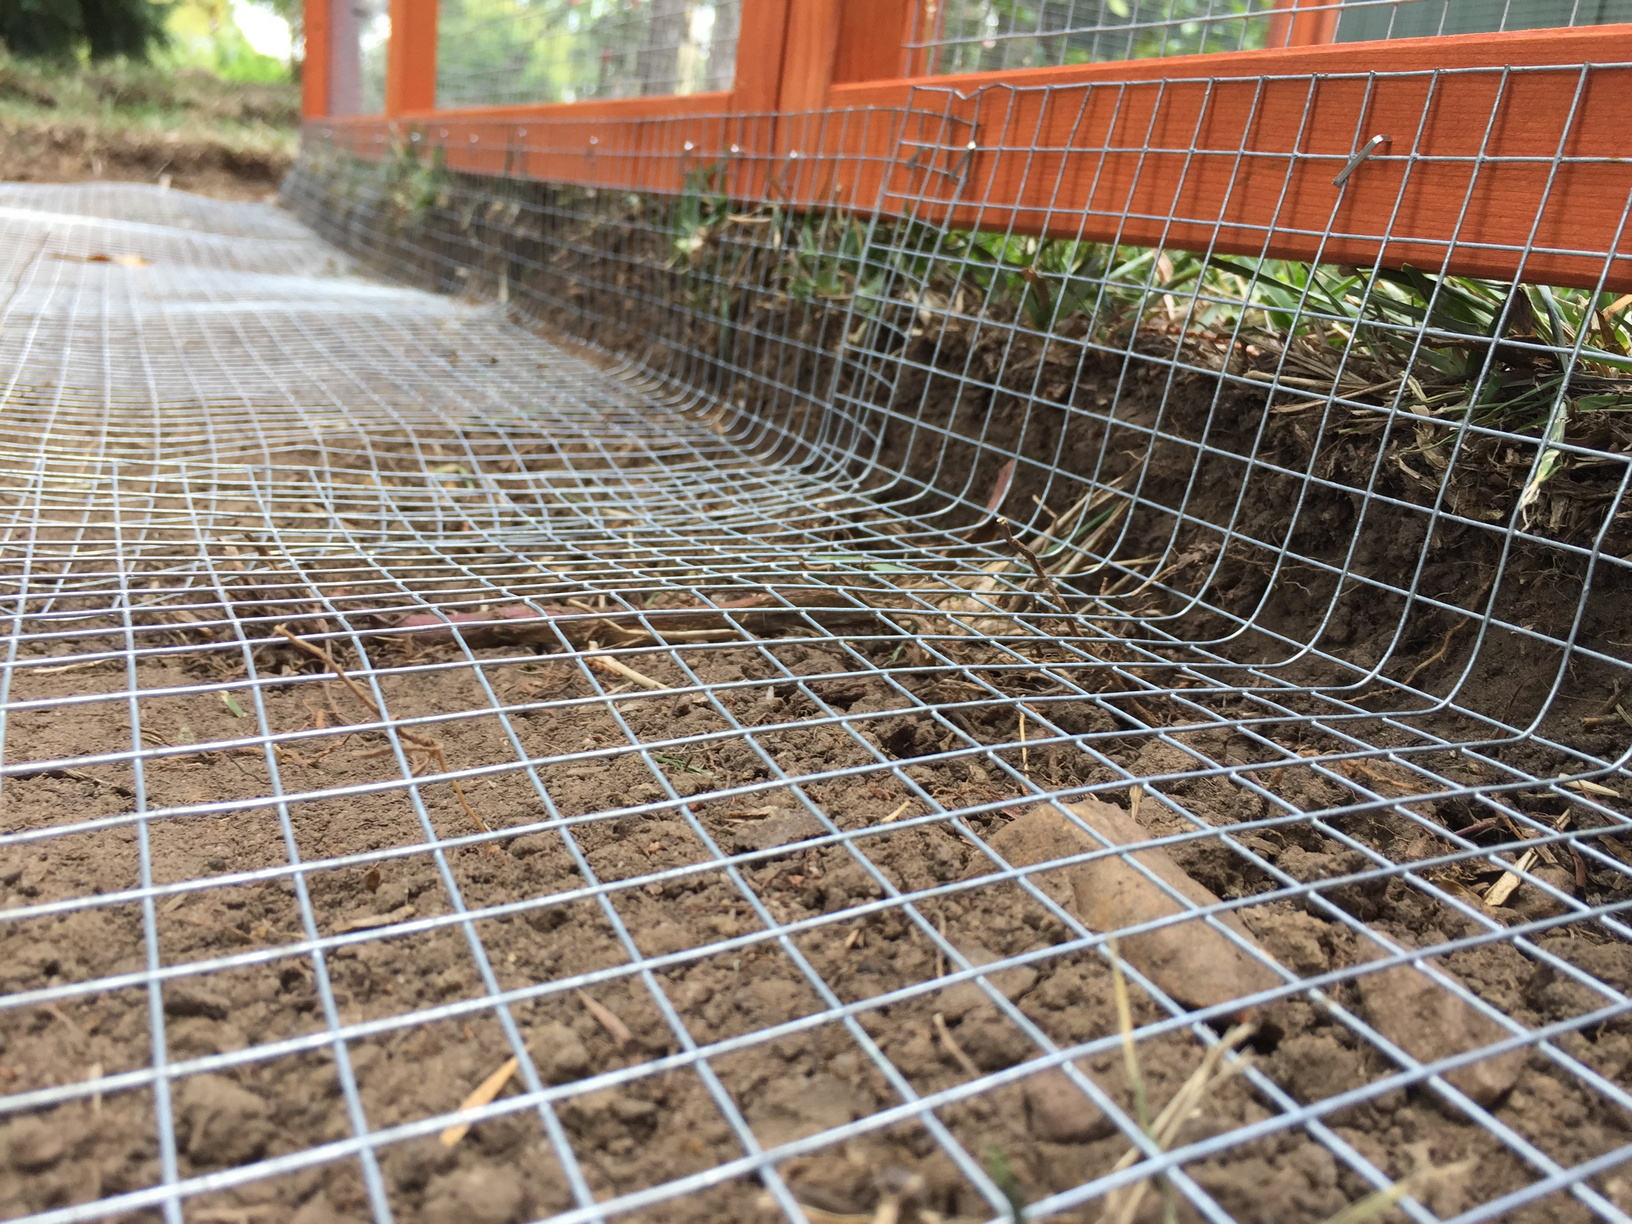
The mesh flooring was instead used to reinforce the outside of the coop.
I dug a shallow trench (~100mm deep) around the outside of the coop, then cut lengths of the flooring up, around 40cm wide, and attached this to the outside of the coop with a staple-gun, ensuring that there were no gaps where something like a snake might be able to squeeze through. The mesh was then laid into the trench and covered over.
There definitely have been foxes around Berowra. I remember driving home late one night and thinking “That looks like weird dog crossing the road…” As I got closer, I realised it was a large red fox.
We do get pythons and other snakes in our area occasionally, and we also get plenty brush turkeys. I’ve read some disturbing things about brush turkeys and chickens. Google “brush turkey and chickens” and you’ll see what I mean. It seems male brush turkeys can be attracted to chickens, especially chickens with dark plumage, like my ones. They will apparently have their way with any chickens they can get hold of, and the chickens will lay fertilised eggs that can produce chicken/brush turkey hybrids if left to hatch! No thanks.
Hopefully my chickens will be safe and sound in their reinforced chicken palace.
 |
 |
 |
 |
 |
The Water Bucket
I watched a lot of YouTube videos prior to getting chickens and found a particularly interesting video showing a very easy way to give the chickens water. The setup requires minimal ongoing effort in terms of cleaning, and the best part is, you don’t need to ever go into the coop to fill up the water.
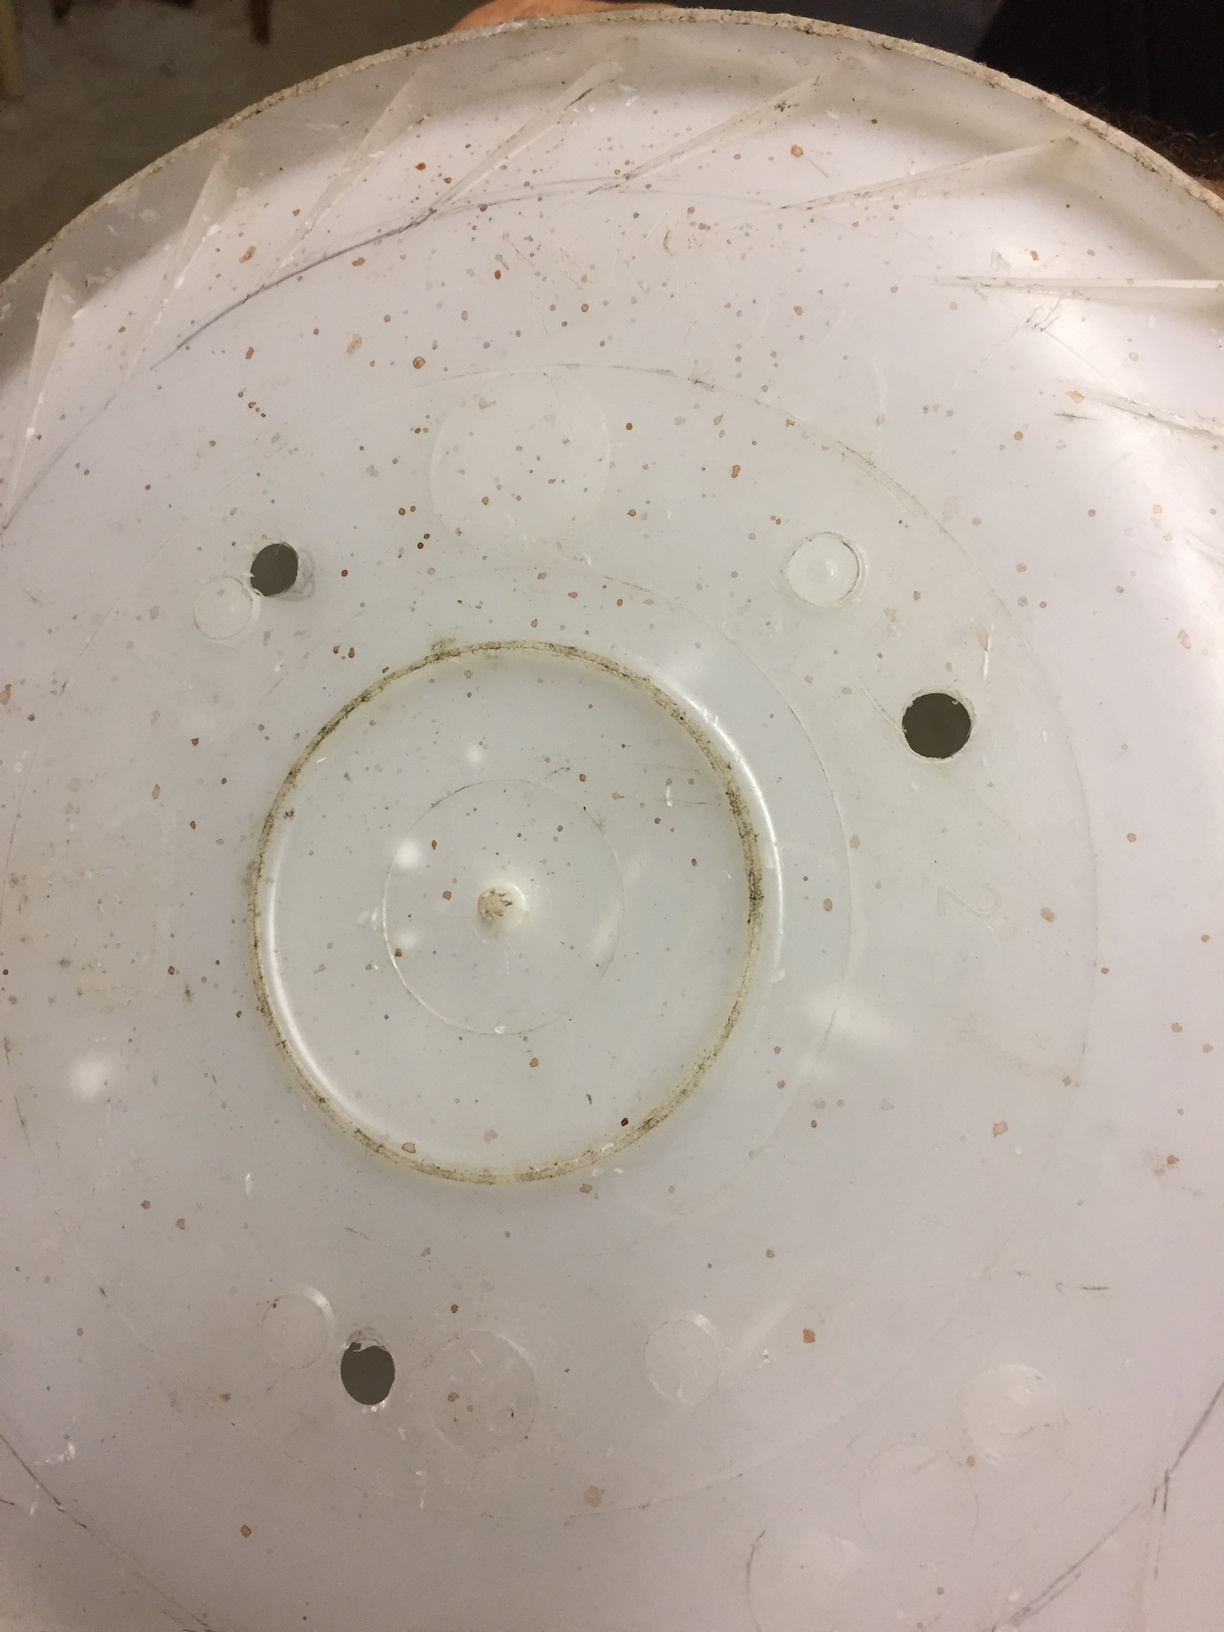
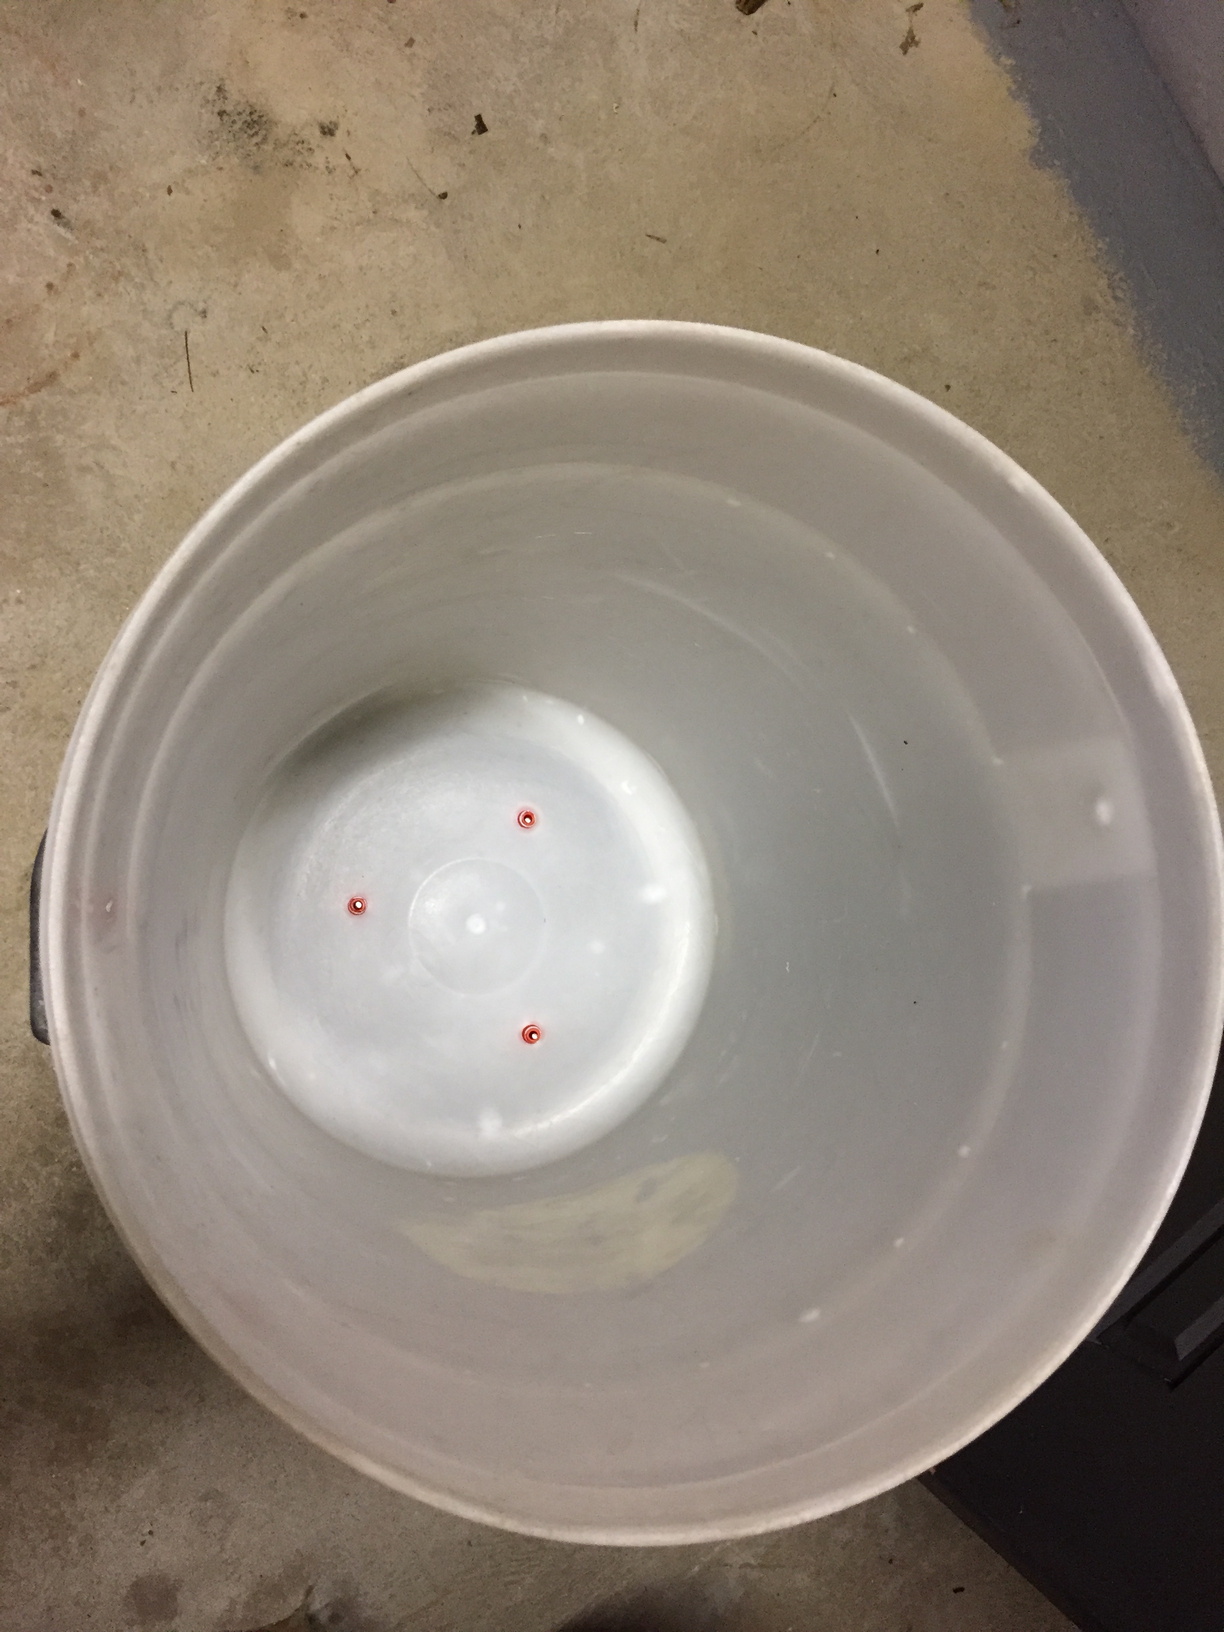
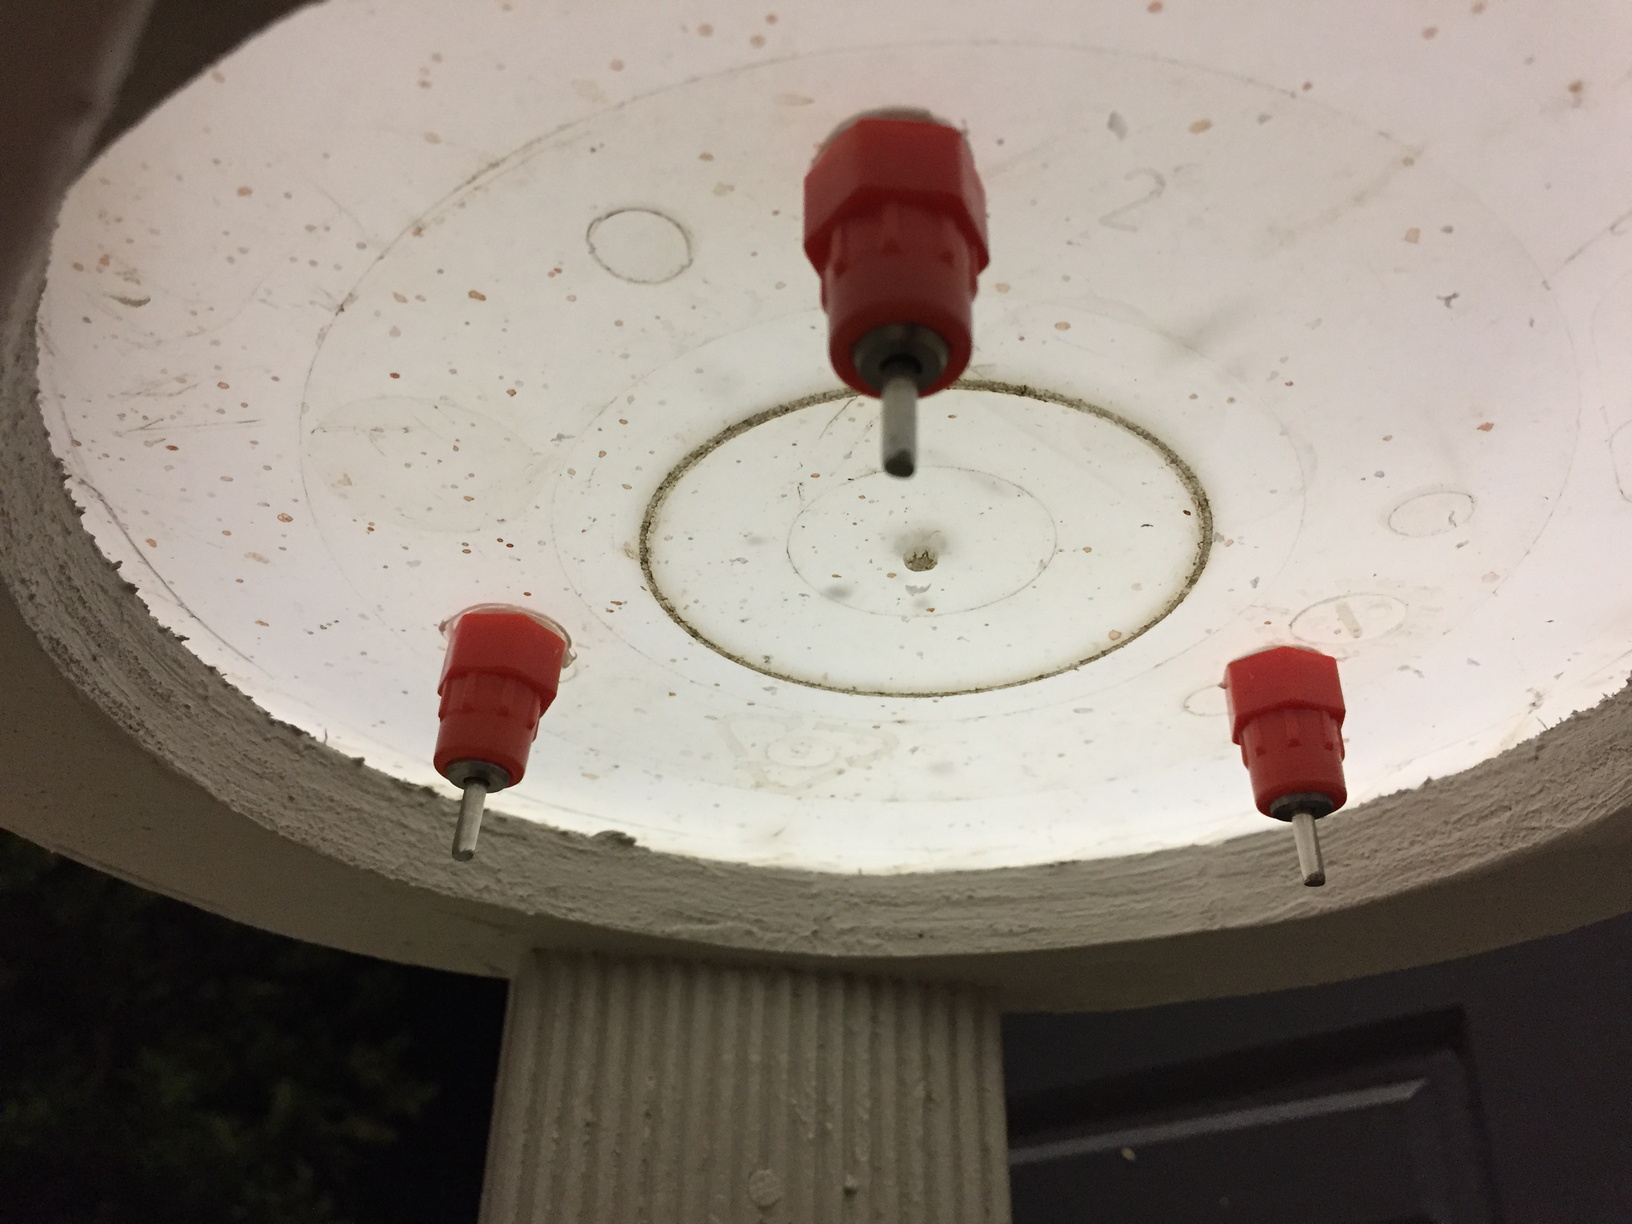
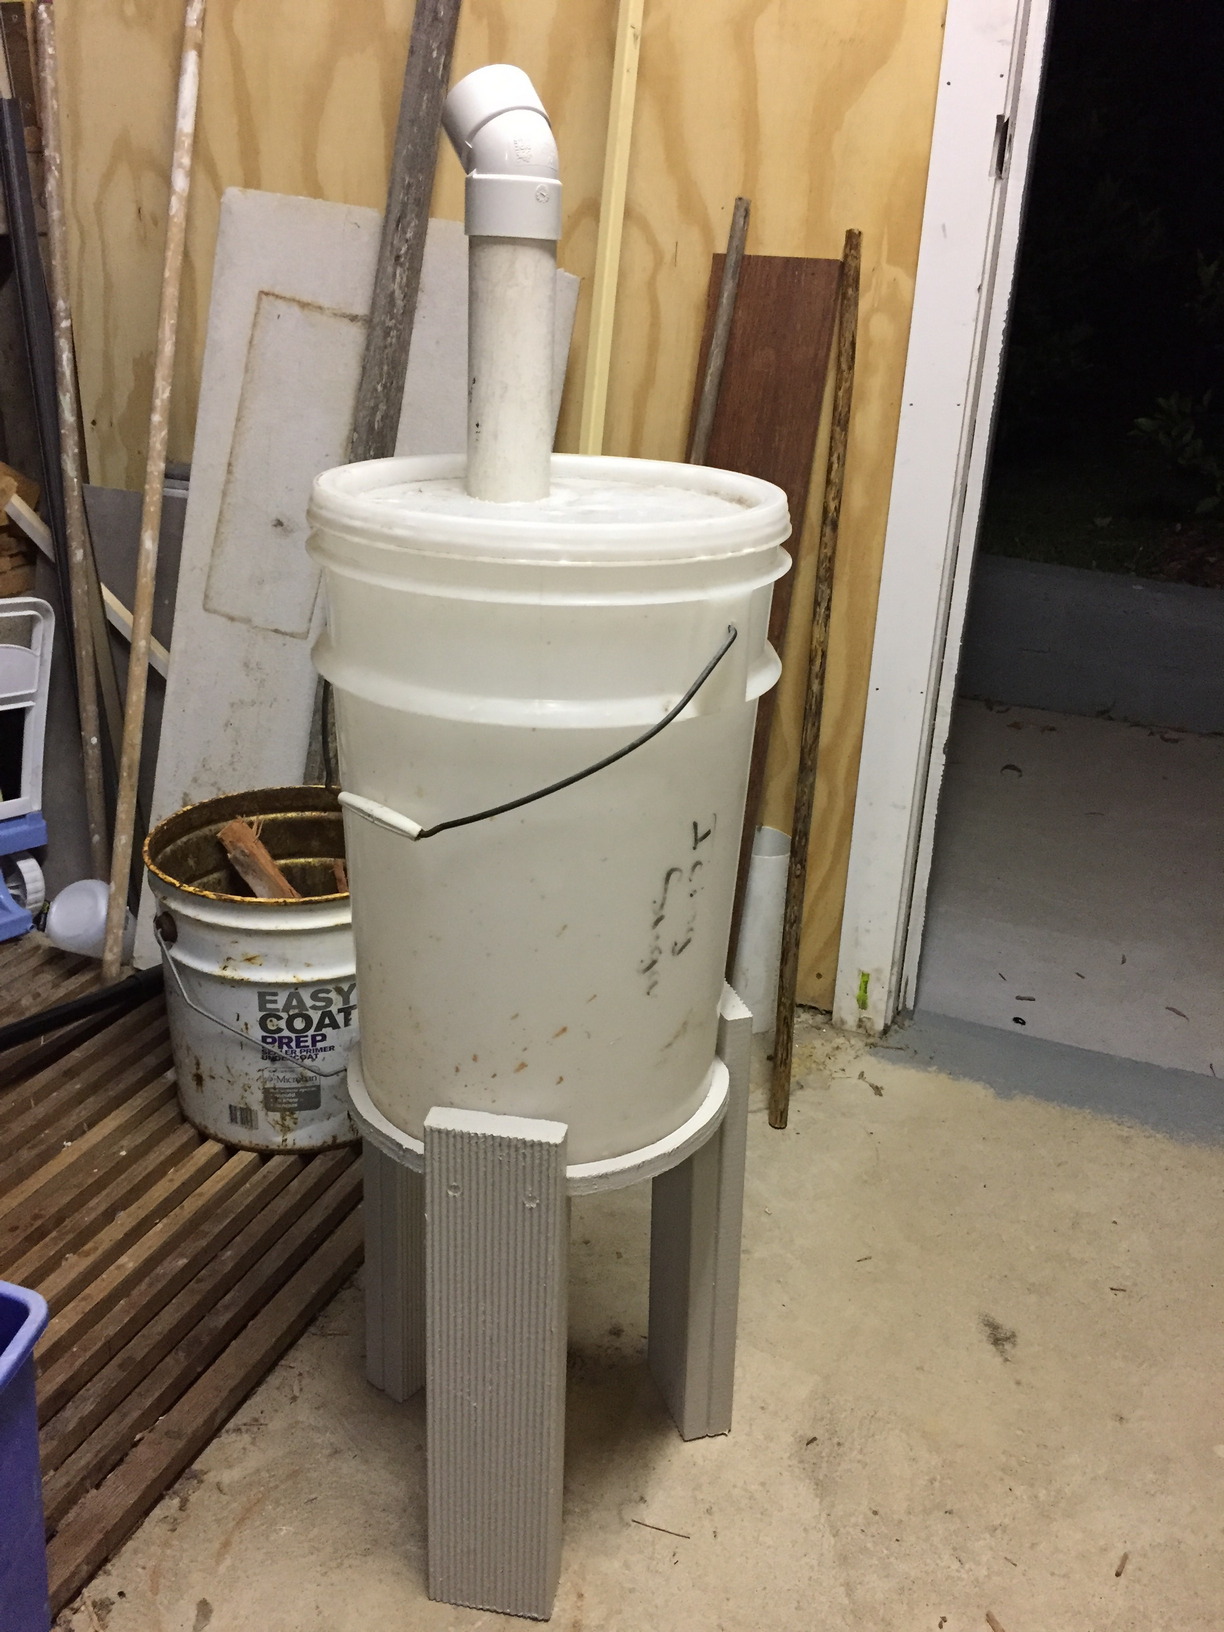
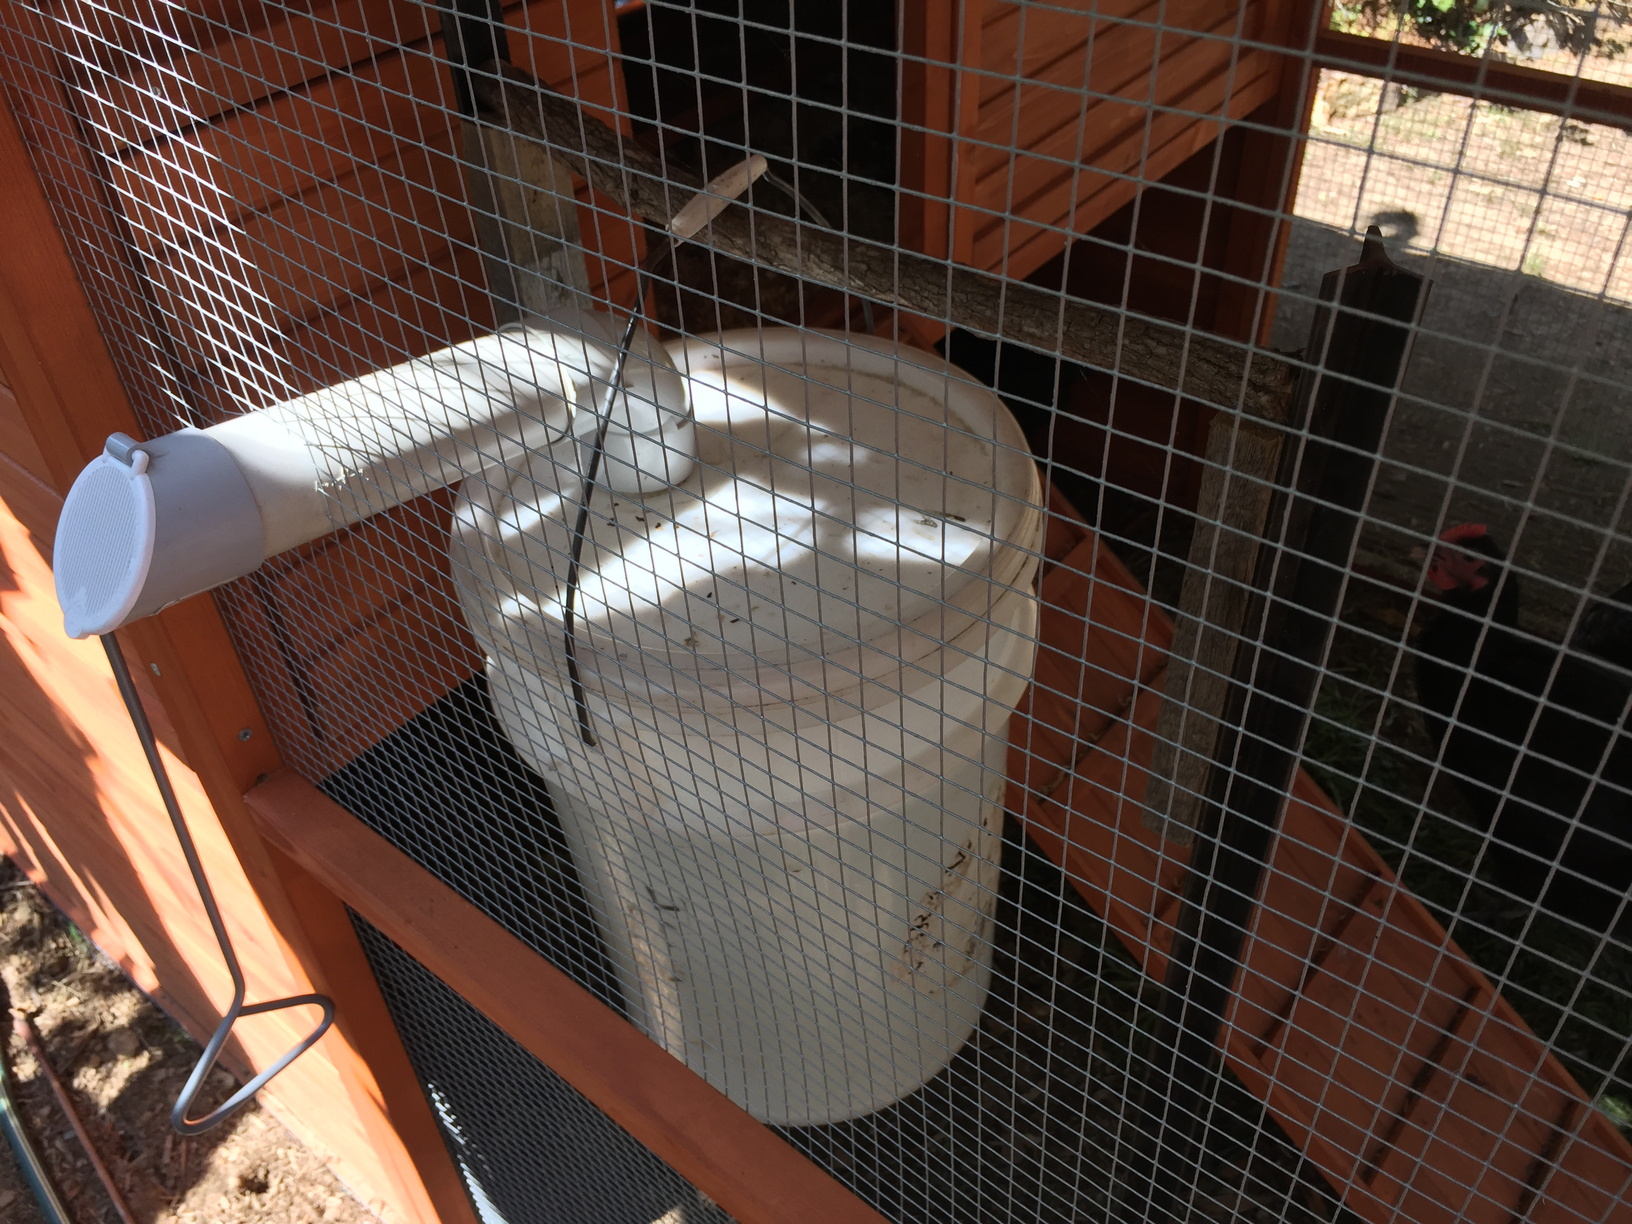
Essentially, you take a 20L bucket with a lid, cut a hole in the top of the lid to run a 50mm PVC pipe into it, put a 45 degree elbow on the pipe and run another length of PVC pipe out through the cage. You then put a hinged lid onto the PVC pipe end outside the cage to stop any dirt or creatures getting into it and fouling the water. Then when you want to fill the bucket, you lift the flap, insert your garden hose and fill the bucket through the pipe. Very much like putting petrol into a car.
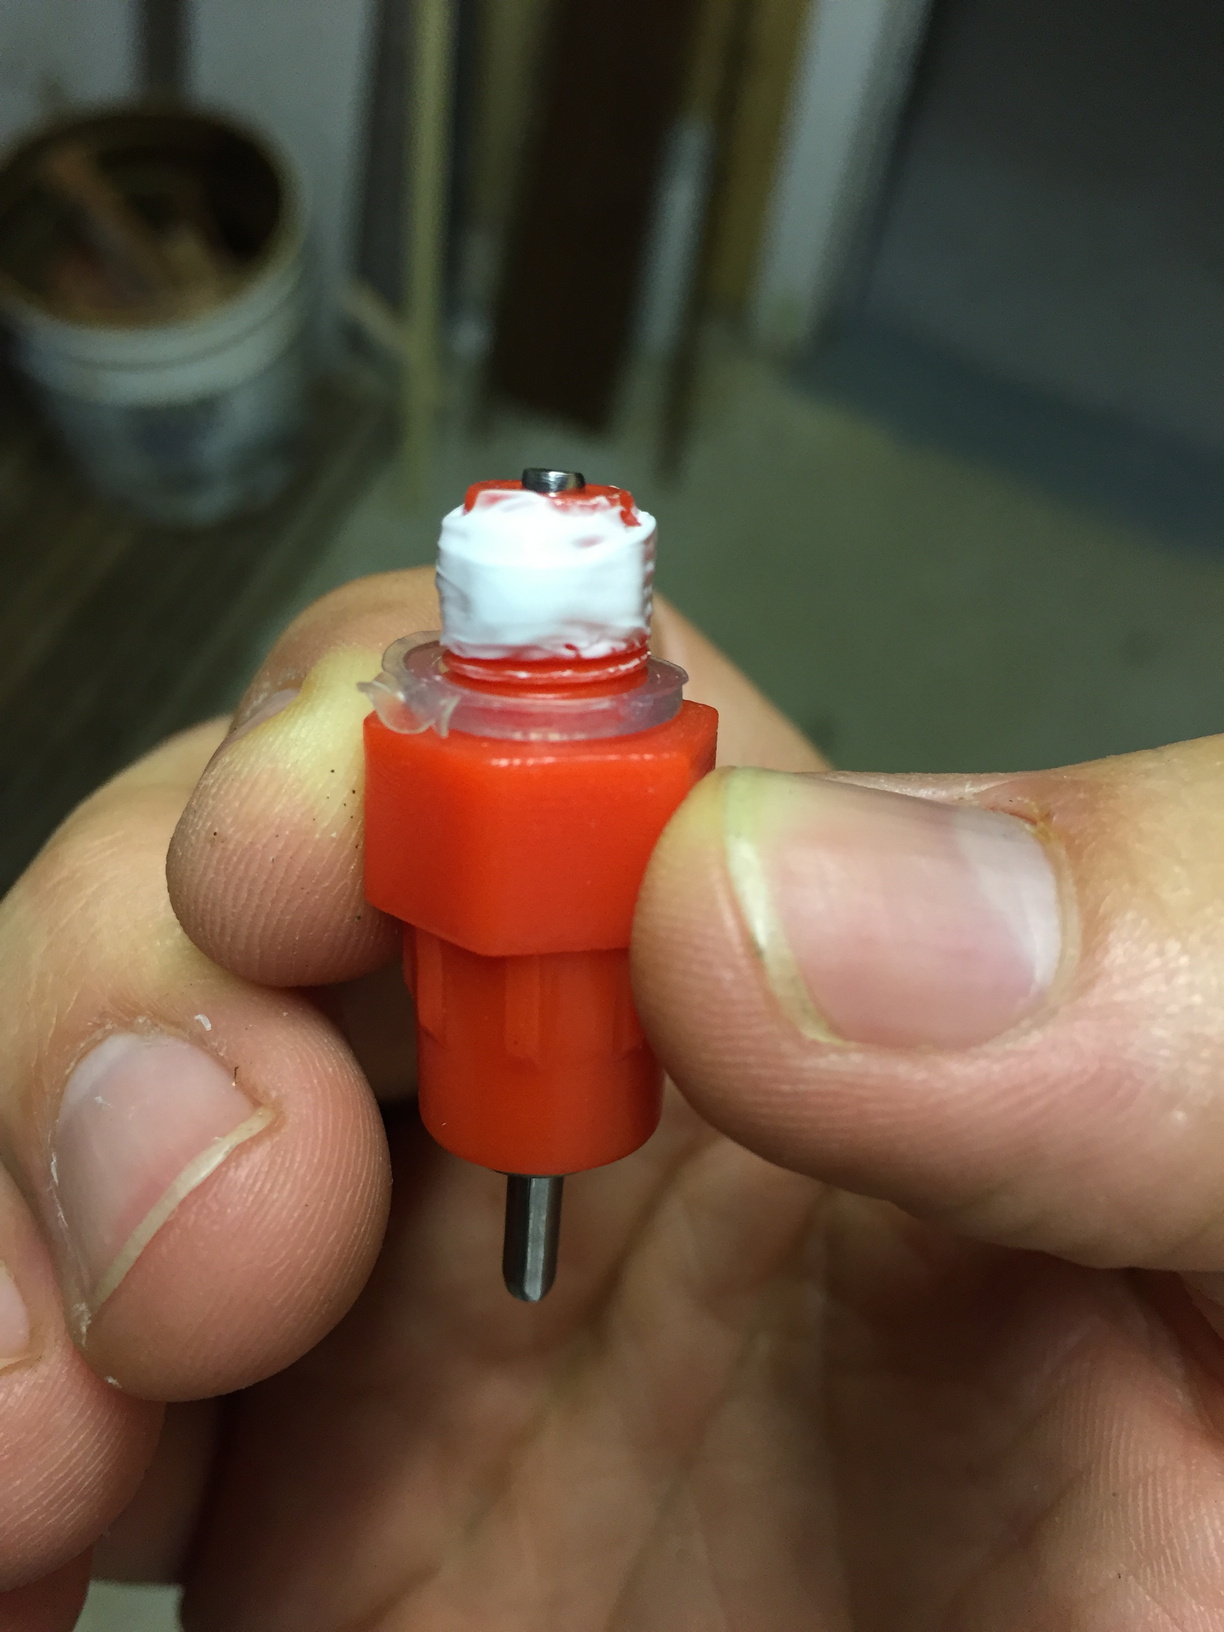
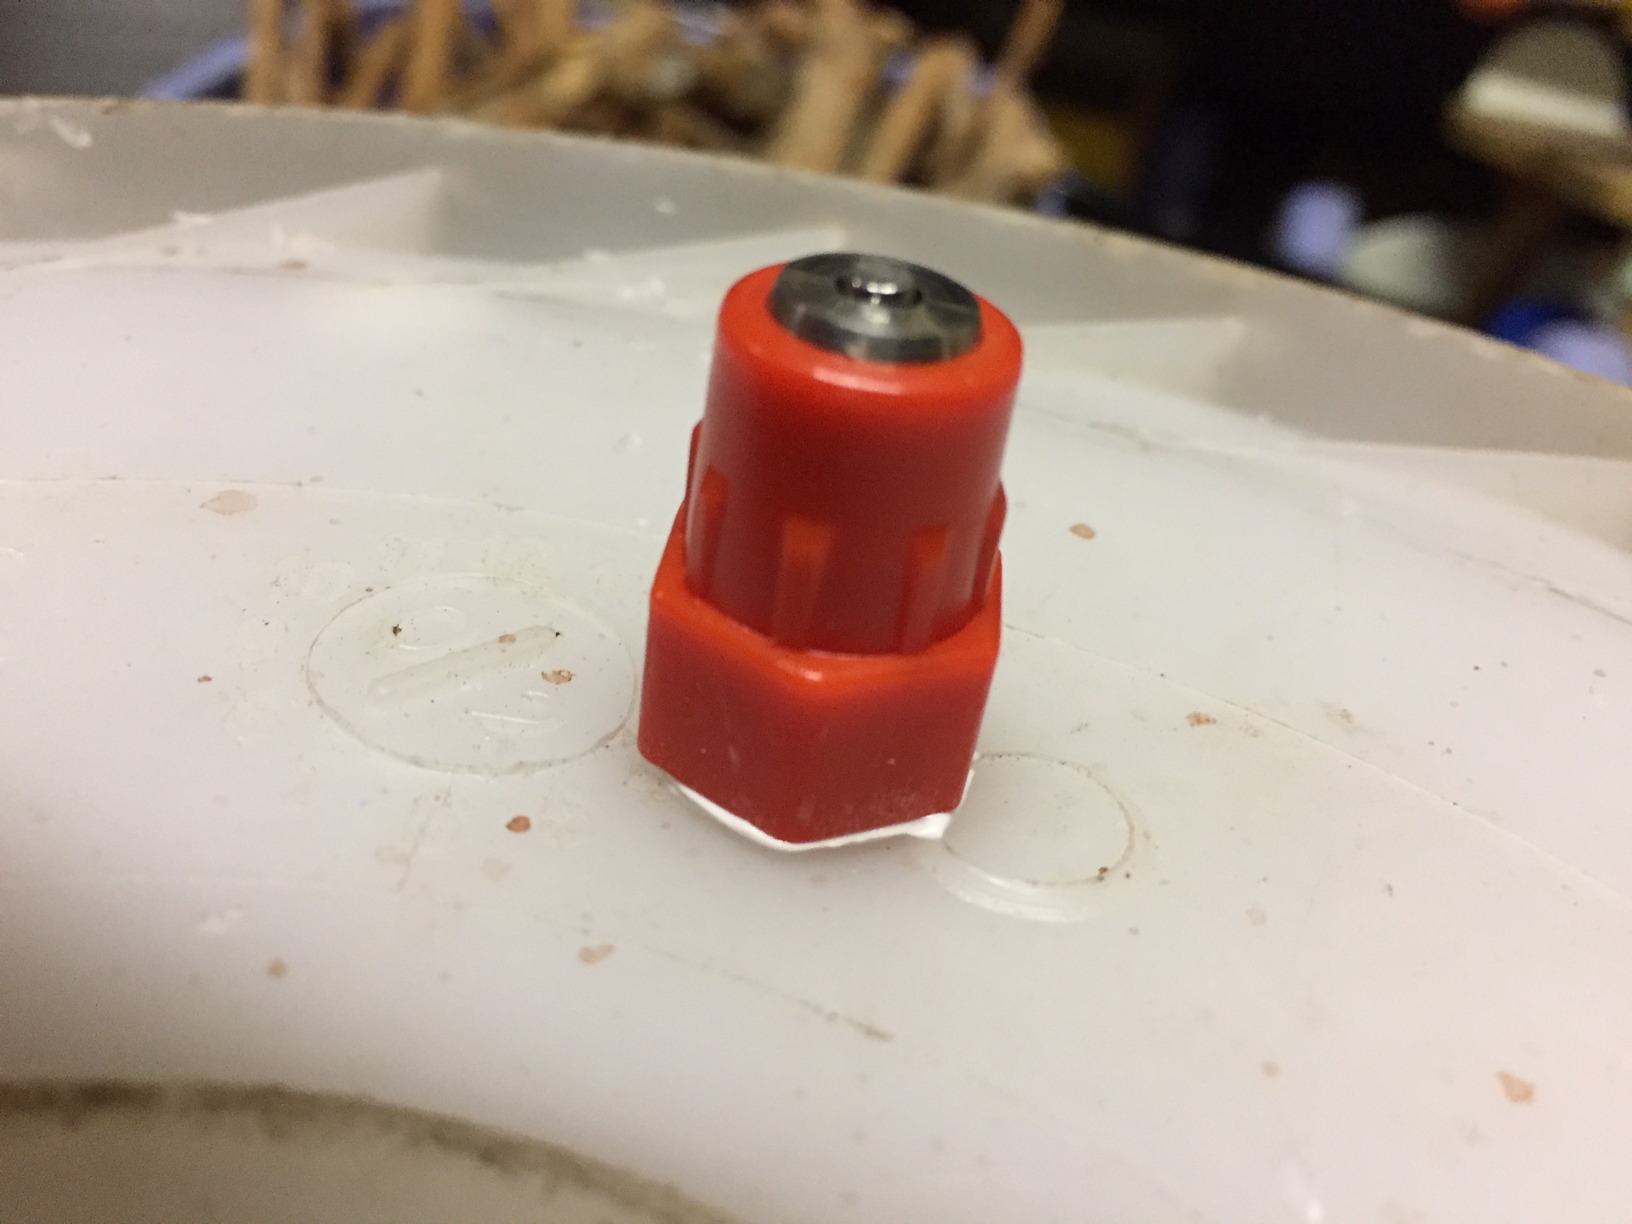
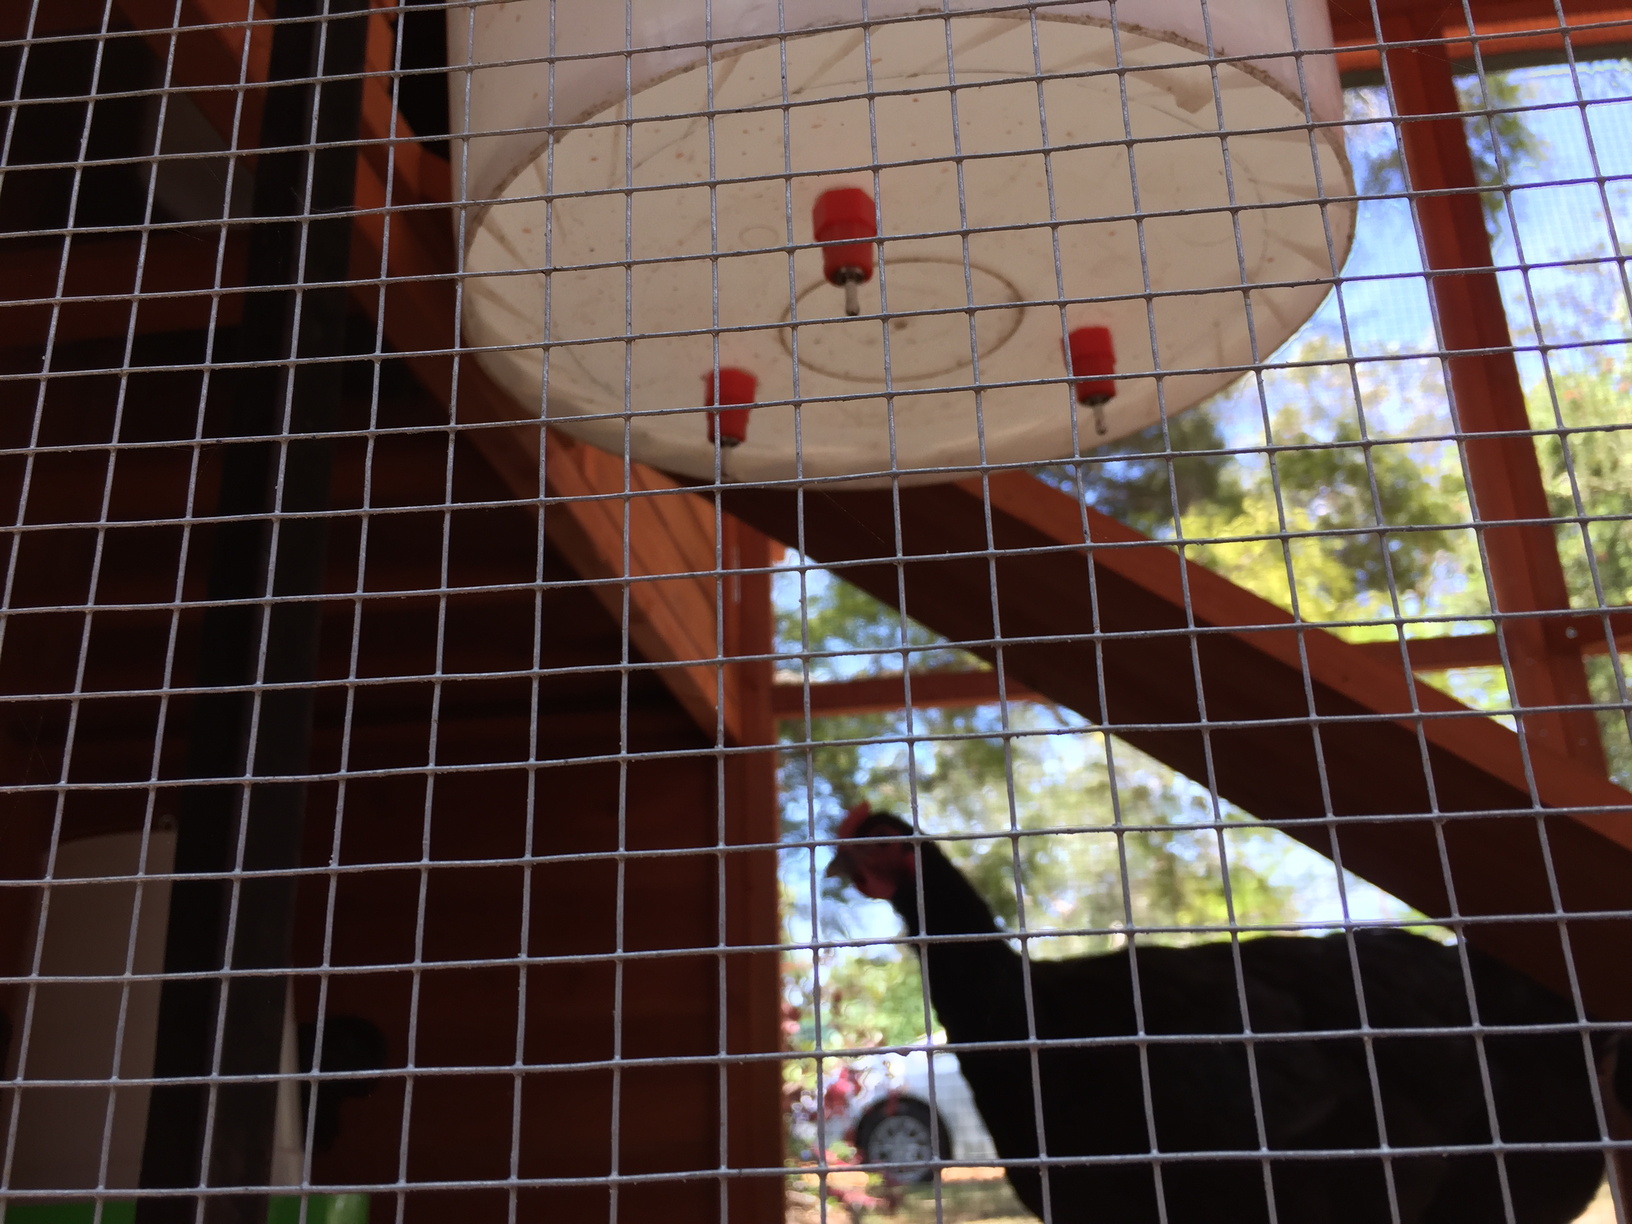
Into the bottom of the bucket, you install some chicken nipples… (I know, weird mental image). The chickens simply peck at the nipples when they want water. You do need to teach the chickens how to use them though. I used a stick that I poked through the chicken mesh and poked at the nipples to show them that water comes out when you do that. It took a couple of days for them to completely figure it out, but once one chicken figured it out, the rest followed pretty quickly.
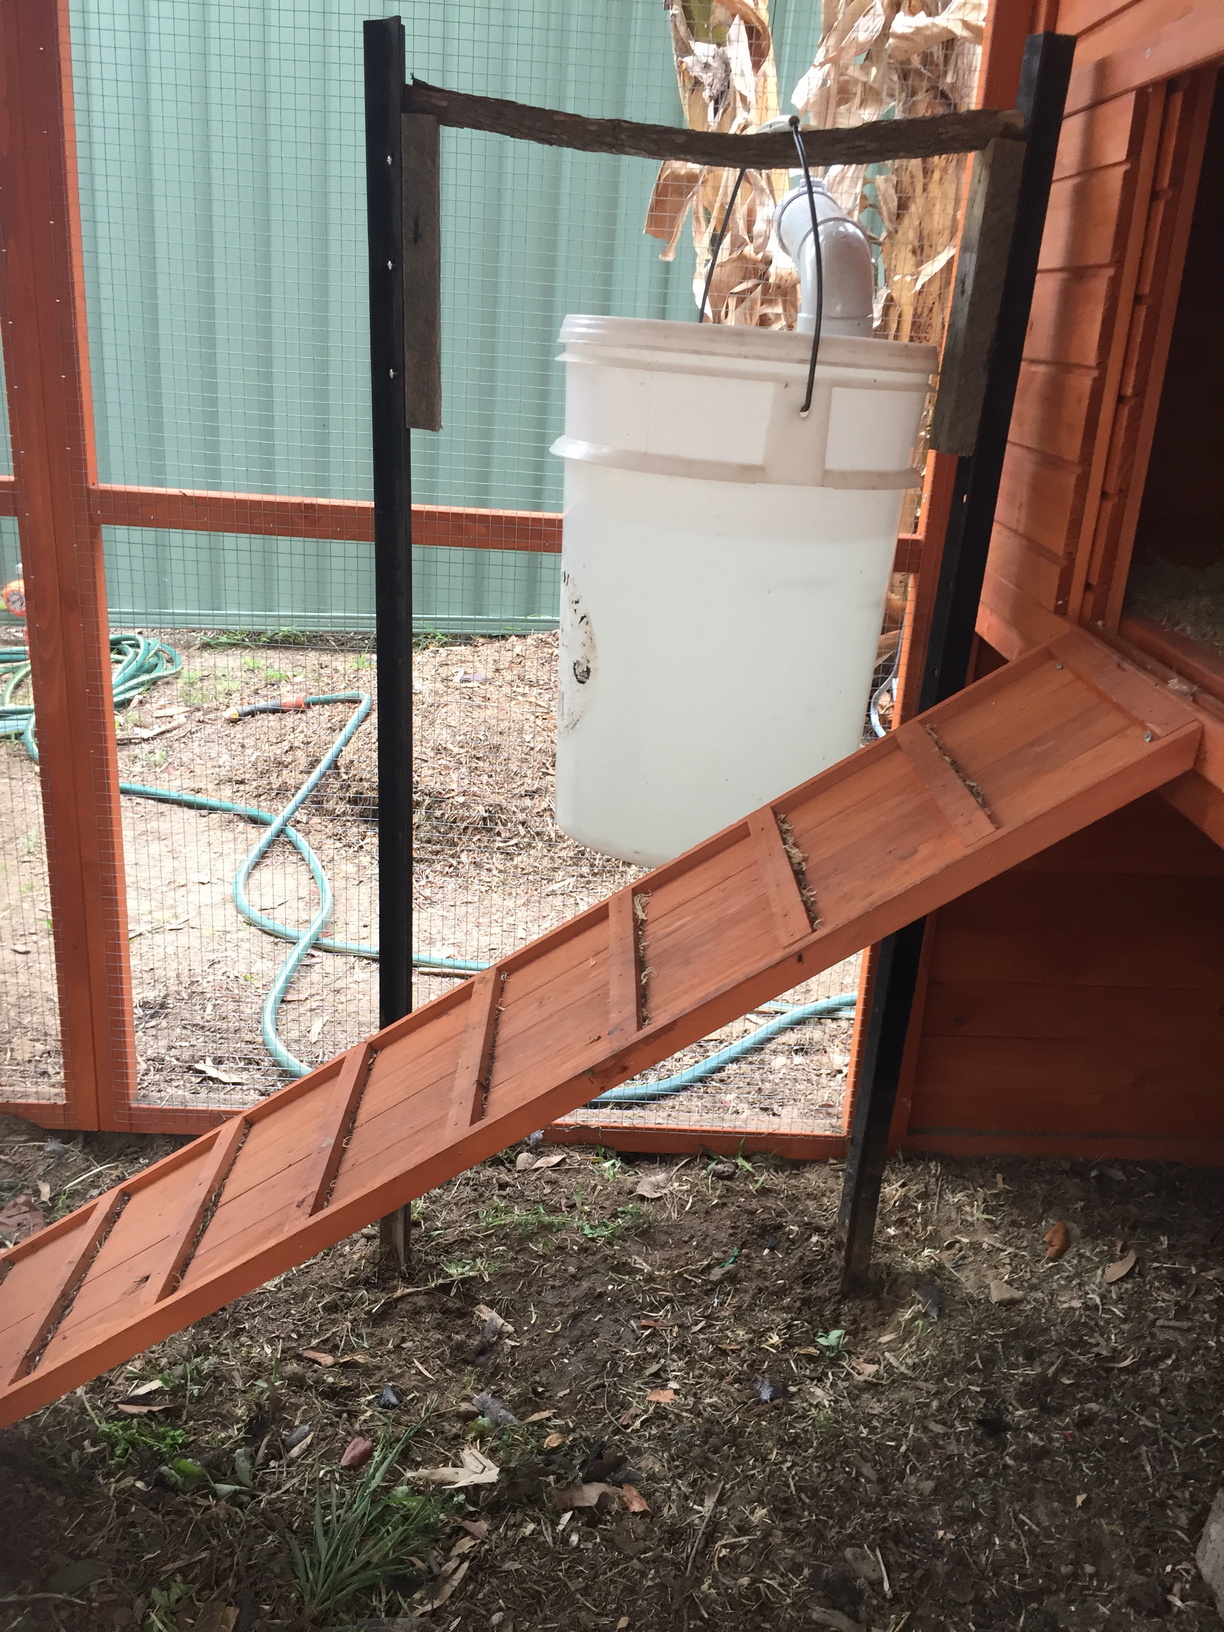
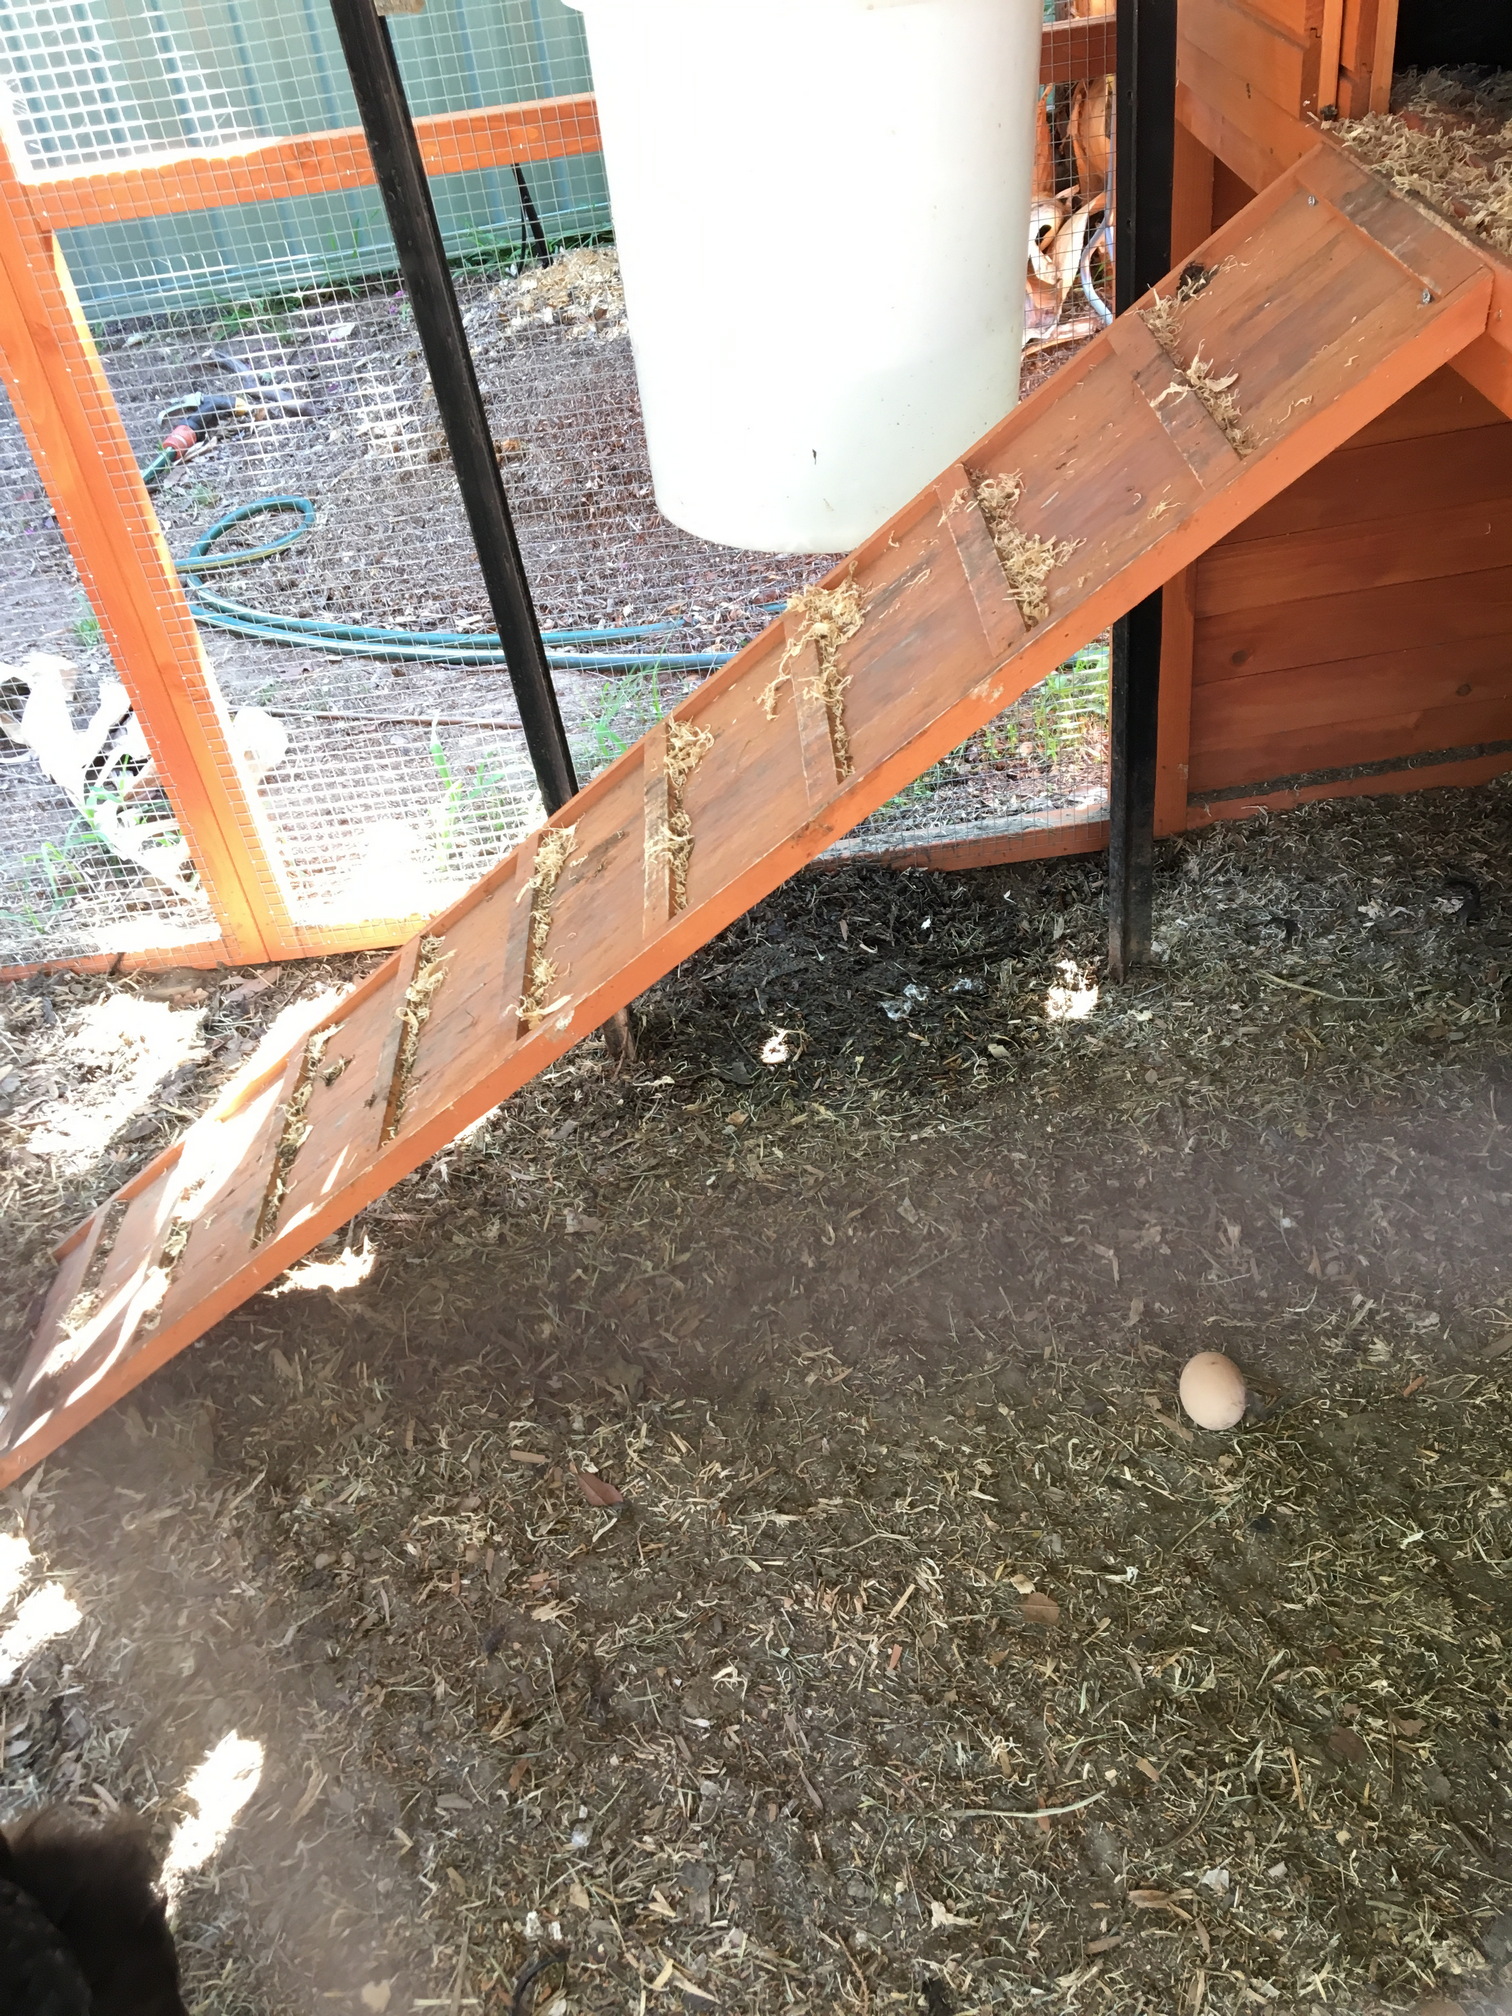
My father-in-law very kindly built me a wooden stand for the chicken bucket, but it was unfortunately a bit too low and the rim blocked the view of the nipples from the chickens. They didn’t seem to be getting the idea. I ended up replacing the stand with a couple of star-pickets with piece of wood screwed into each. Each piece of wood has a notch cut out of it to hold a stick running between the two. The bucket hangs on the stick in between.
Once the chickens were in, they decided that a good place to dig out one of their dust baths would be right around one of the star pickets holding up the water bucket. They can dig down further than you would think, and they eroded the ground around the star picket so that the whole water bucket setup started leaning. I had to get in there and fill in their dust bath and hammer the star pickets in deeper. Thankfully they have made another dust bath on the opposite side of the coop, away from the water bucket.
 |
 |
 |
 |
 |
 |
 |
 |
 |
The Chickens
Who knew there were so many breeds of chicken to choose from? I did a lot of reading about which were the best breeds of chickens. Turns out there are hybrid and pure-bred chickens. The Isa Brown hens, which are a hybrid, are apparently the most prolific egg producers, laying an egg almost every day. These are the most common type of hen used in commercial egg production. The first two years of life are the best in terms of egg production for chickens, and the number of eggs produced each year declines slowly each year after their second year. Chickens can live up to 10 years, but usually do not lay many eggs when they are that old. Hybrid chickens usually experience a steeper decline in egg production than their pure-bred counterparts, which is why most commercial chickens are “retired” and replaced after two years.
Apparently, the difference between a hybrid chicken and a pure breed is this. If you mate an Isa Brown rooster and an Isa Brown hen, you don’t get Isa Brown chicks. You get a variant that may or may not have the characteristics of the parents.
If you mate an Australorp rooster with an Australorp hen, you get Australorp chicks. Same characteristics are their parents.
How do they make more hybrid chickens then? The answer is… it’s complicated. Best Google that if you want to find out more.
Australorp (which is short for Australian Utility Black Orpington) chickens are a breed that was developed for Australian conditions. They are an egg-laying focused breed, although are apparently a dual-purpose egg laying and meat bird… not that I plan on eating any of the chickens. Considering how comparatively expensive each bird was, it would be far more economical (and less work) to go down to the local chicken shop and pick up a BBQ chook for dinner.
Of all the chicken breeds I looked at the Australorps seemed to tick the most boxes, laying almost as frequently and producing similar sized eggs to the Isa Browns. They are indeed a very docile breed of chicken. I’ve read that Isa Browns can be a bit more aggressive, sometimes toward people, but especially to other birds. If you ever need to introduce a new bird to the flock, they can be very nasty to newcomers. Australorps have a cruisier nature.
We bought our Australorps from Evans Chickens. They were very friendly and helpful, and gave us a lot of useful tips and hints for keeping chickens.
Of course we named our chickens. We can tell them apart because when we bought them we were offered different coloured leg tags for each of the chickens, so that we could tell them apart if we wanted to name them. Great idea.
Four of the five were named with Star Wars themed names:
- Princess Layer (Red)
- Hen Solo (Blue)
- Obi-Wan Henobi (Green)
- Jabba the Cluck (Orange)
The fifth one, my daughter Olivia wanted to name. She decided to call it:
- Eggwall (Purple)
We were running out of good Star Wars themed names, so Eggwall it was!
 |
 |
Eggs!
It was around 6 weeks after buying the chickens that we got our first egg! Jabba the Cluck was the first one to lay and gave us about 5 or so eggs before the next chicken started laying. We still weren’t sure whether all the chickens were laying until the day we found 5 eggs, then we knew for sure.
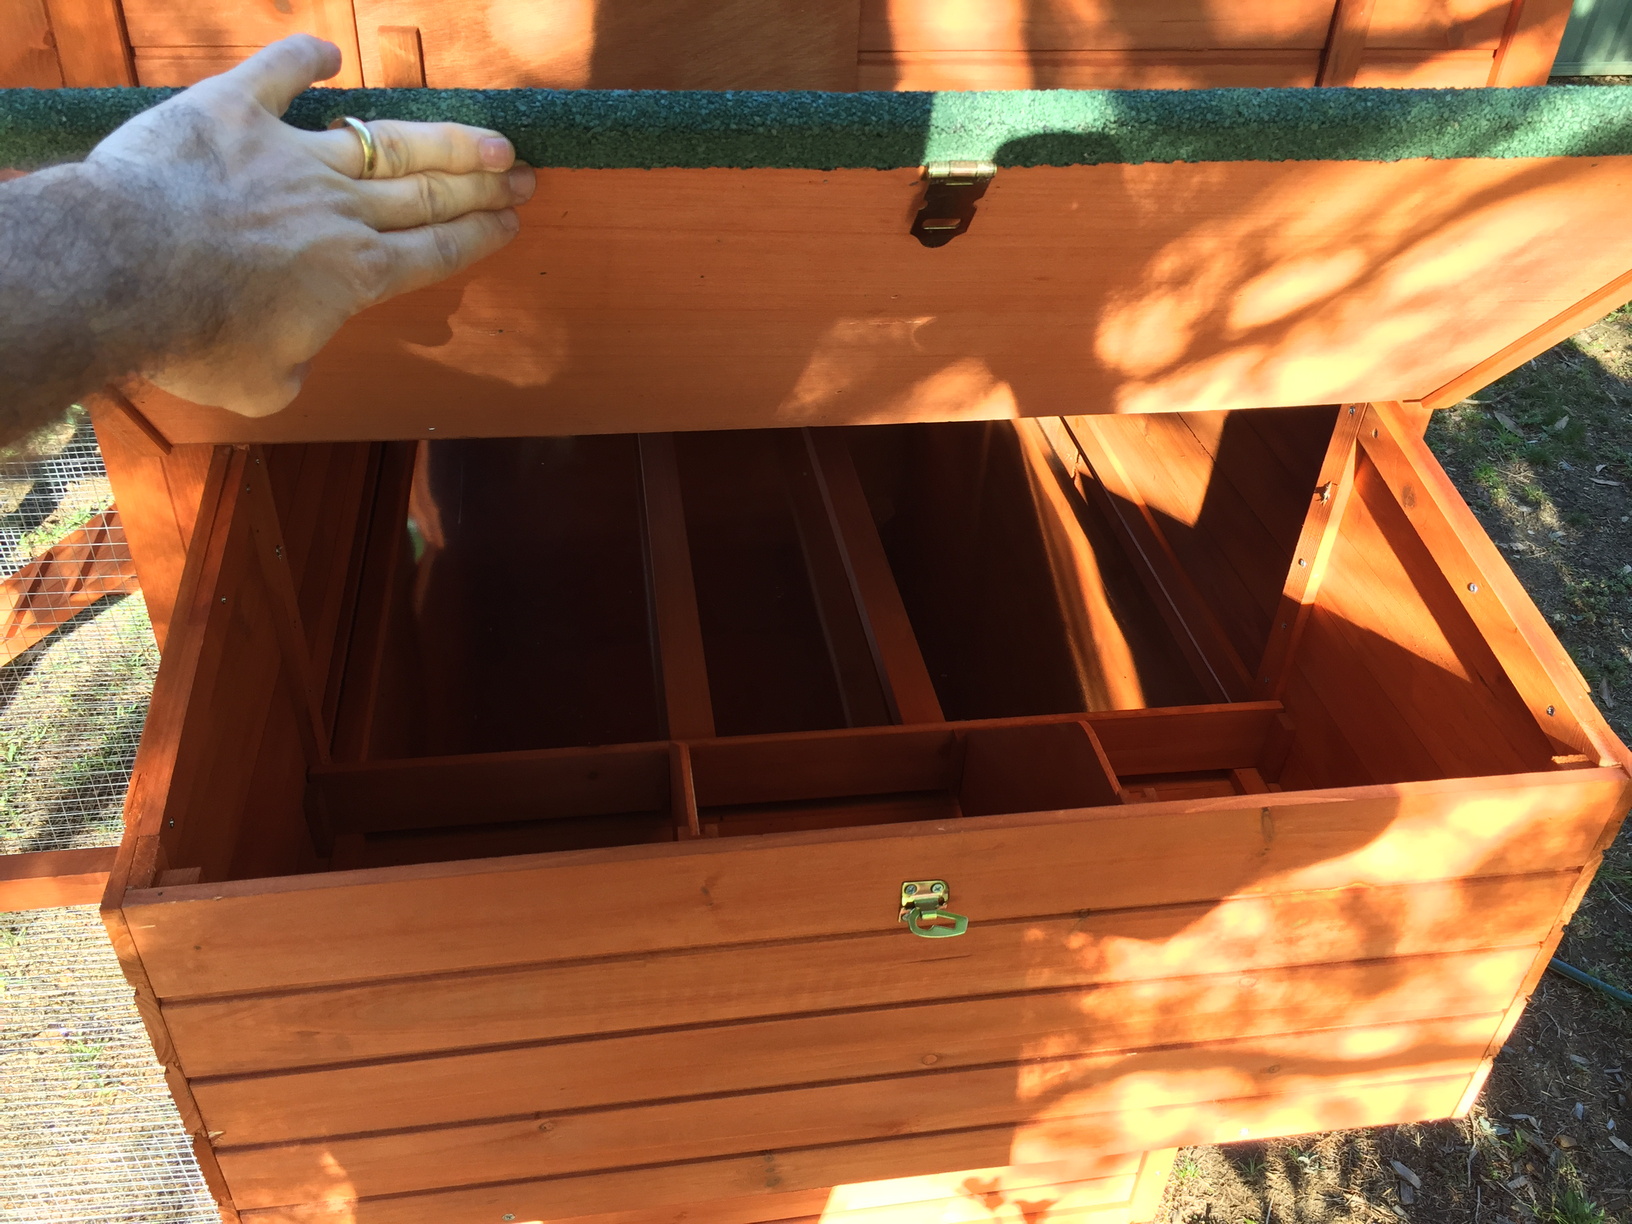
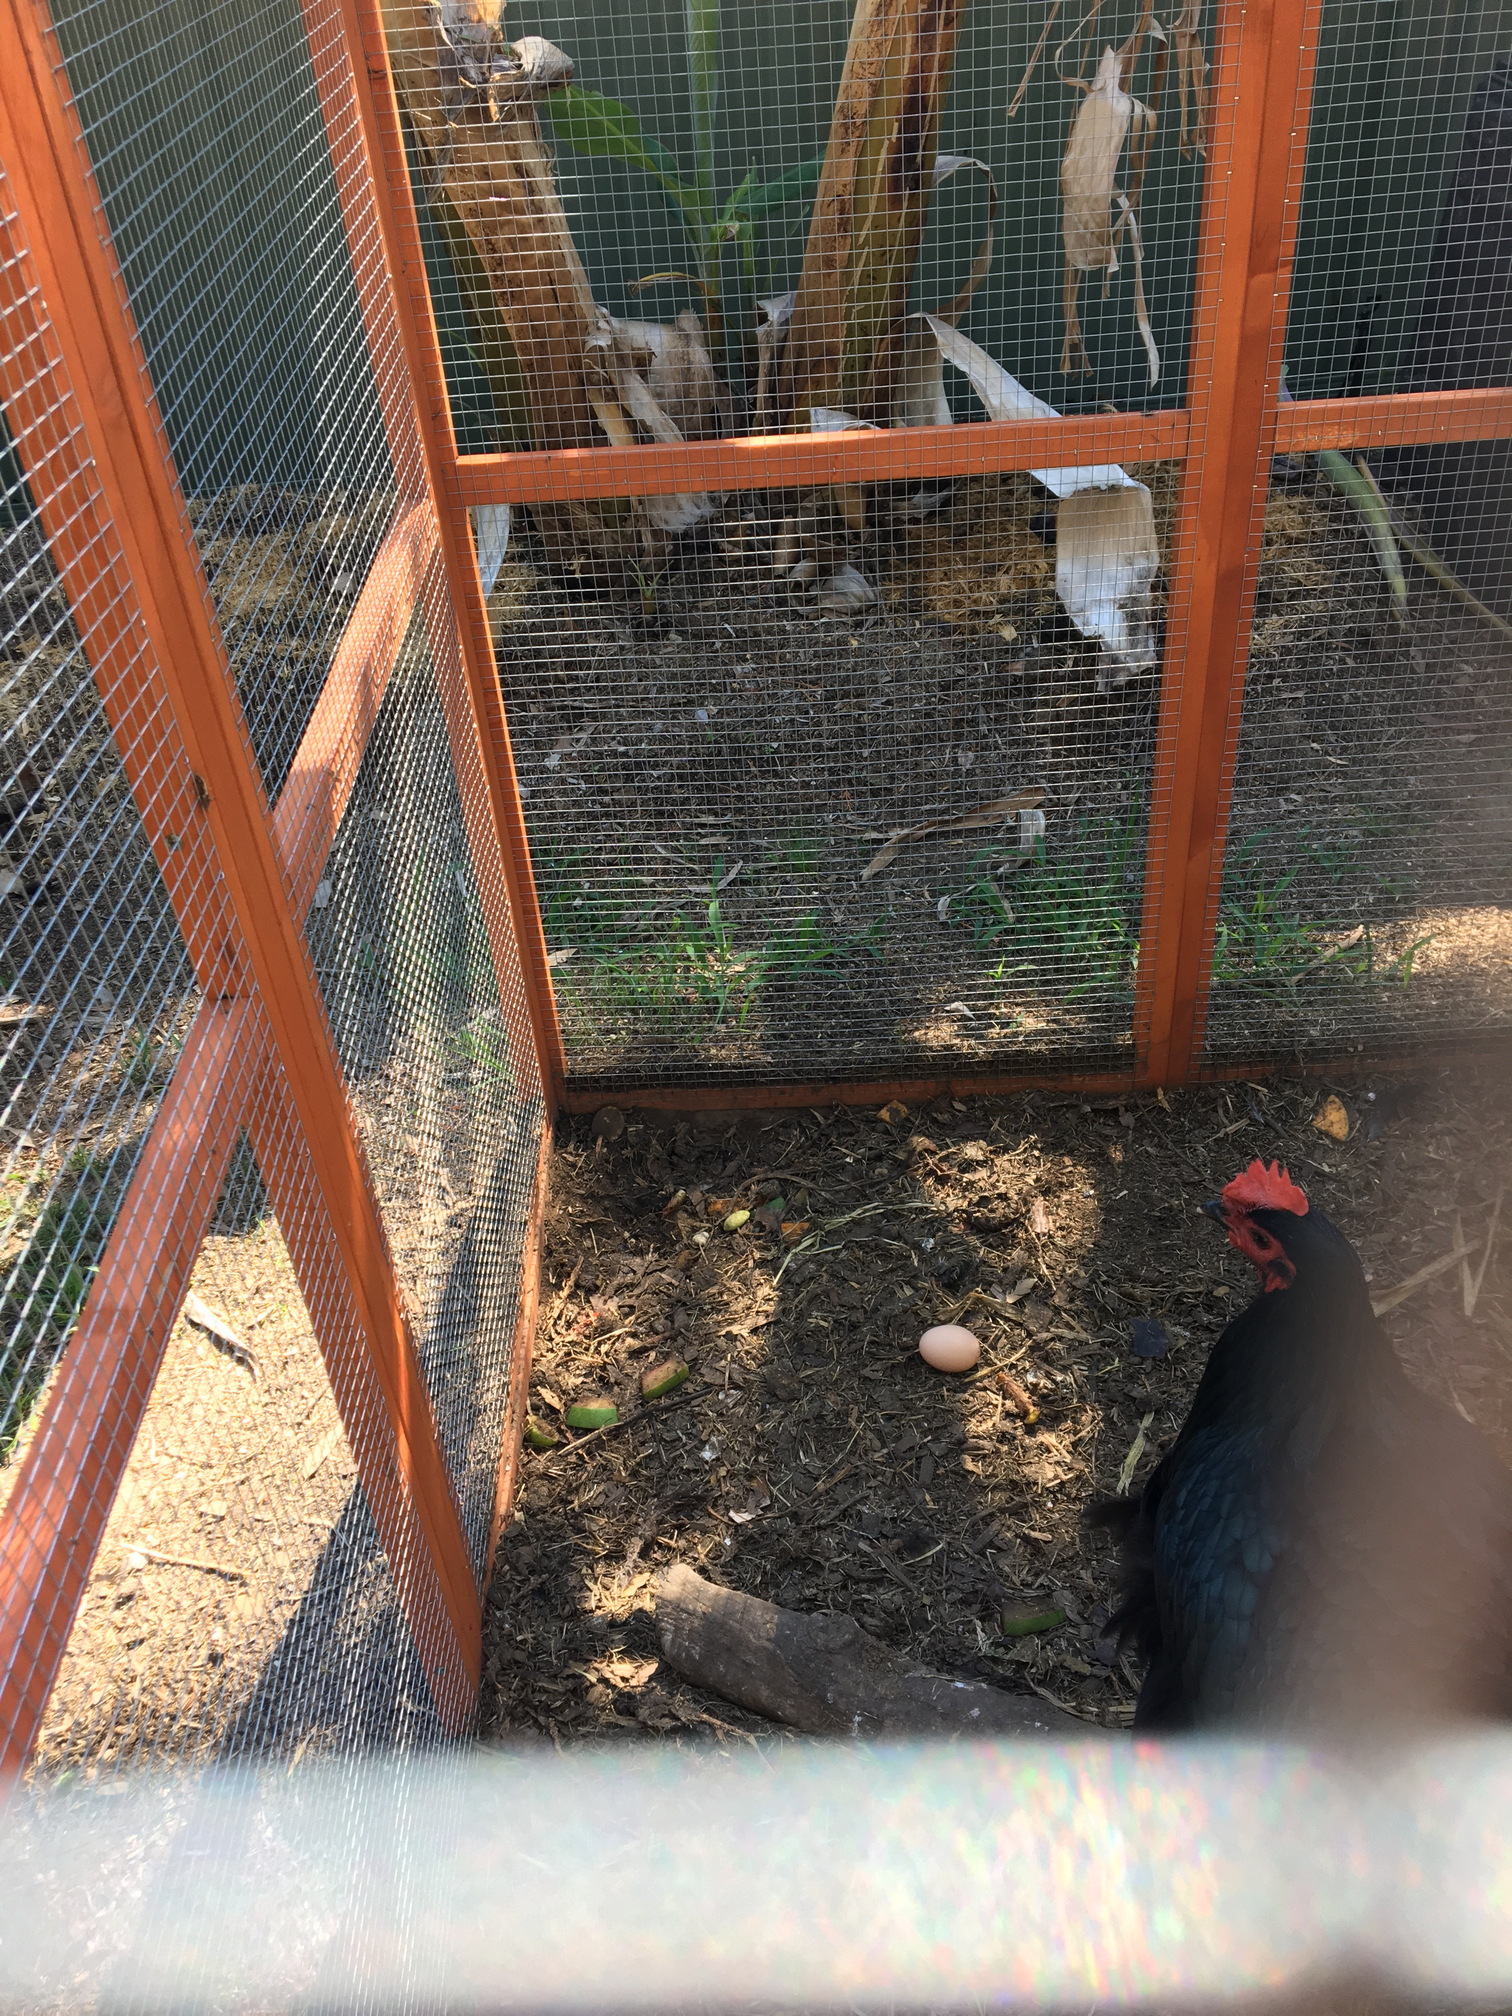
They didn’t start laying in the nesting boxes straight away. In fact, we just found eggs layed randomly around the coop. You can get a decoy egg to place into the nesting box, to fool the chickens into thinking that is where eggs should go. You can use a golf ball too, but that didn’t seem to work so well, because instead of laying an egg in the nesting box next to the golf ball, the chicken laid a turd on the golf-ball!
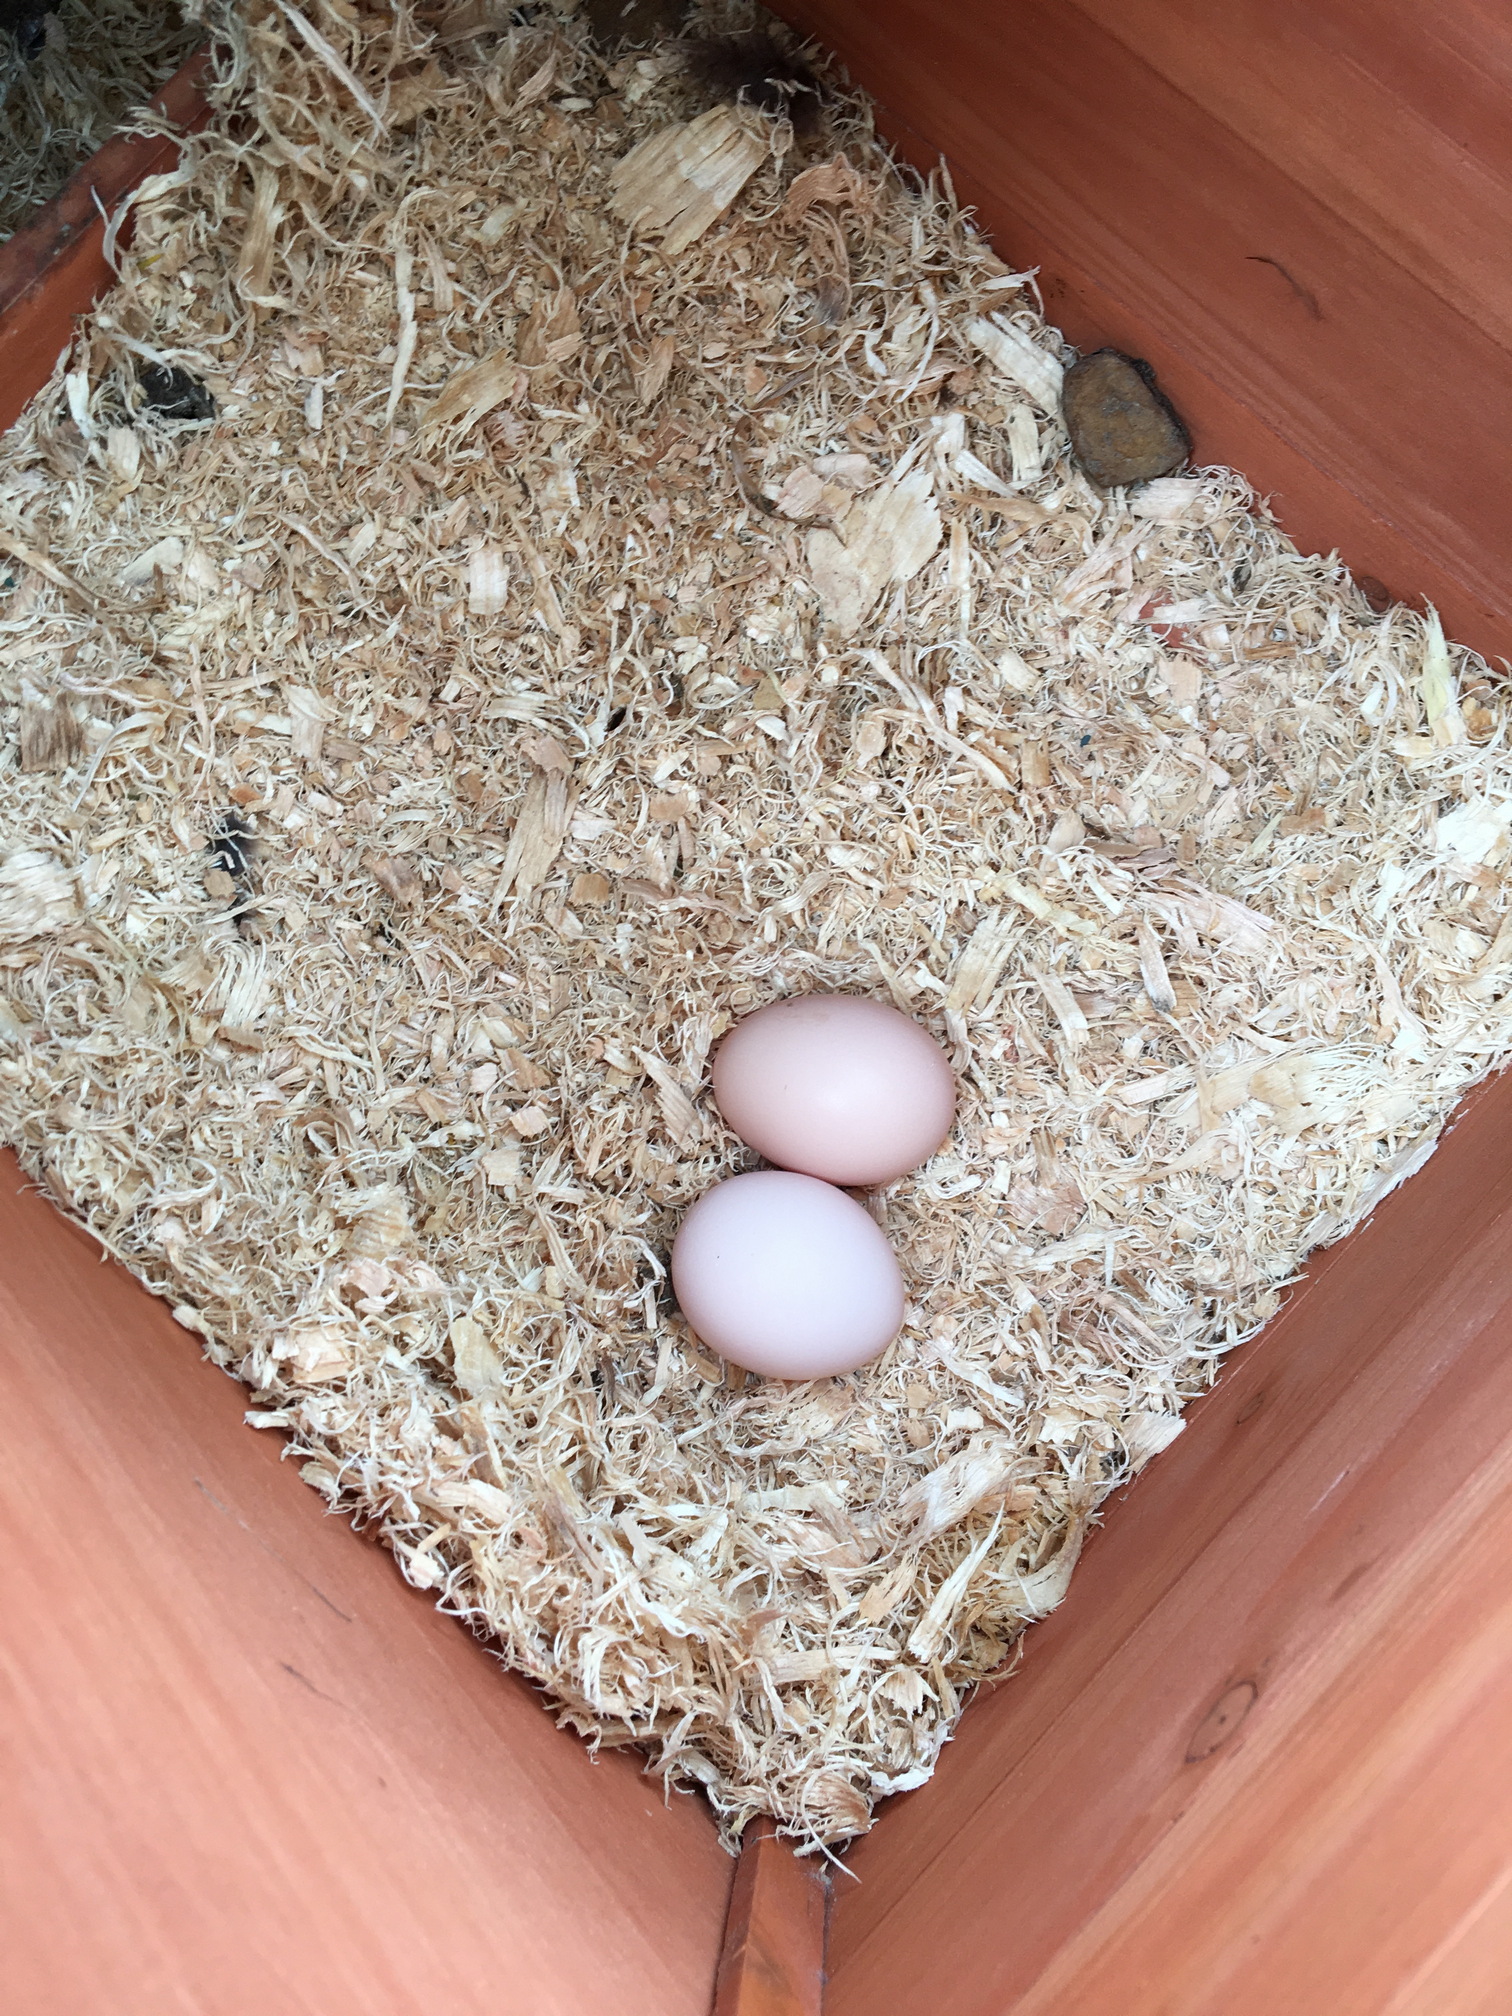
I think the trick was to put a much thicker layer of wood shavings into the nesting boxes. We still have one chicken, Jabba the Cluck, who always lays her egg in the corner of the roosting area on the opposite side of the nesting boxes. Not a big deal, as there is a door close to where she lays, so it’s pretty easy to get that egg without going into the coop.
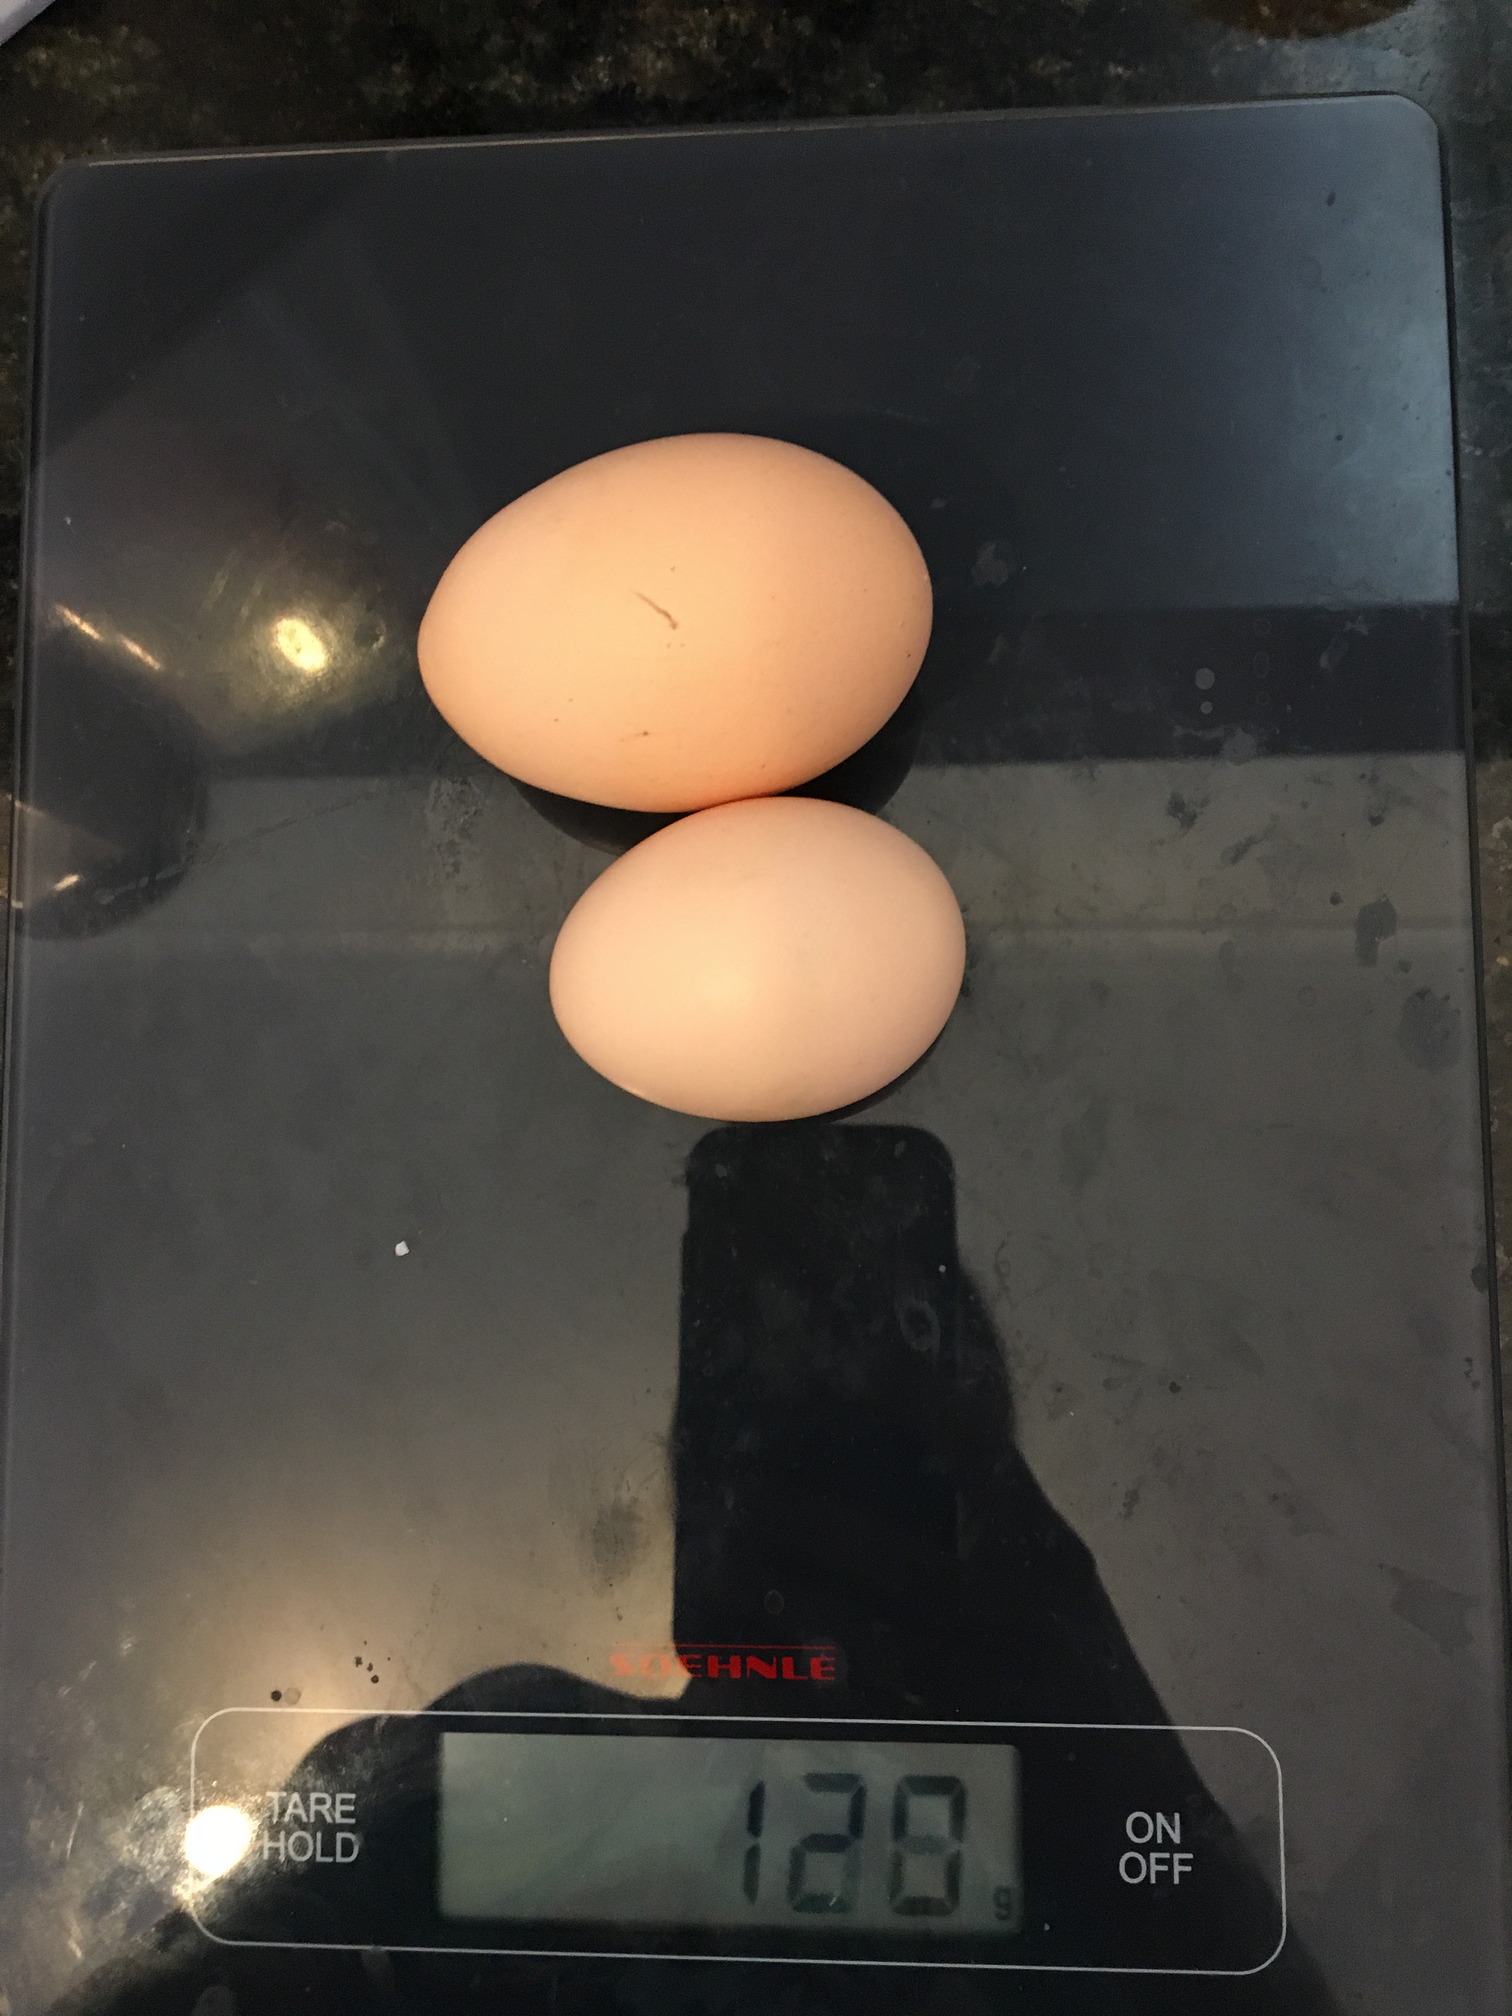
Are the eggs any better than store bought eggs? I think if you are buying the cheapest, nastiest cage eggs, then yes, probably, but I would say they are on par with the better free-range eggs one buys in the supermarket. I’m not saying they aren’t good eggs, because they definitely are, but to me they aren’t noticeably better than good store bought eggs.
I have almost perfected my egg poaching technique. Two fresh poached eggs on vegemite toast, with a layer of smashed avocado and some jalapenos is a great way to start the day!
 |
 |
 |
 |
Maintenance
I clean the poop tray out once a week. I use a wide paint scraper to scrape everything off and tip the poop and wood shavings into the compost bins near the banana trees. It has mostly dried out by the time I clean it, and the wood shavings absorb any excess liquid. The nitrogen in the chicken poop enriches the compost, speeds up decomposition and the banana trees love any excess nutrients that leech into the soil from under the compost bins.
Occasionally I put a load of poop and wood shavings directly under the banana trees, then cover it over with grass clippings.
Whenever I mow the lawn I scatter the grass clippings inside the floor of the coop. This covers up any chicken poop on the ground and any organic matter is meant to decompose and create a beneficial layer of compost on the floor. The chickens will benefit from being able to scratch up and eat any bugs/worms in the compost, and each year, you dig out the compost layer in the cage, spread it over your garden and give it a layer of mulch, compost and fertiliser all in one. This is known as the deep litter method. I feel like I need to increase the amount of organic matter though, as I don’t think the grass clippings are quite enough. I might need to get a load of leaf mulch and put some of that into the coop with the grass clippings.
I fill their feed container with chicken feed pellets around once a week, and fill the water bucket once every two weeks or so.
Each day we take out any table scraps, vegetable peelings etc and feed that to the chickens. Apparently avocado is not good for chickens, but I’ve read conflicting reports saying that they are fine to eat the flesh of avocados, but the skin and seeds are toxic to them. I’ve been avoiding giving them any scraps that have avocado in them, just in case.
You are meant to dust the chickens with a mite dust once every 3 months or so, and are meant to give them de-worming medicine in their water supply. I have not yet done either of those things. I will need to do that soon.
How much did it cost?
| Item | Cost |
|---|---|
| 1 x Super Mansion Chicken Coop | $1148 |
| 1 x Wire Mesh Flooring | $59 |
| 5 x Australorp Chickens (point of lay) | $250 |
| 1 x Chicken Feeder | $20 |
| 3 x Poultry Nipples (pack of 10, only 3 needed) | $10 |
| Chicken feed, wood shavings, and other supplies | $59 |
| Total | $1546 |
OK, so it wasn’t cheap. I could have reduced the cost of the chickens by buying younger chickens, or even chicks, but I still wouldn’t have any eggs at the time of writing this post, as it will take chicks 6 months to get to point of lay. The chickens I bought were sold as 2-4 weeks off point of lay and I’m glad I went for those rather than raising them from chicks.
The wood shavings, feed and shell grit are obviously ongoing costs, but they aren’t very expensive. I think I worked it out that with the savings of not having to buy almost 2 dozen eggs a week (which is what my family seems to go through on average), that it would take around 2 years to have paid off the initial investment.
Was it worth it?
From a cost perspective… probably not, but there is a certain satisfaction that one gets from being able to go out and collect 3-5 eggs each day. It is also very nice knowing that any food scraps that can’t go into the compost are no longer going in the bin, and are instead feeding the chickens and being turned into eggs.