I really wanted to start making use of the unused vertical real-estate in my garden to grow climbing edible plants, such as grapes, passionfruit, cane berries, climbing beans and any other edible plants that lend themselves to growing vertically. I decided it was time to install some trellises along the fences in my garden. I did a lot of looking into various methods for trellissing and decided that the sturdiest, longest-lasting method would be to install stainless steel cable that is usually used in ballustrading along decks and stair-cases.
Wooden fence
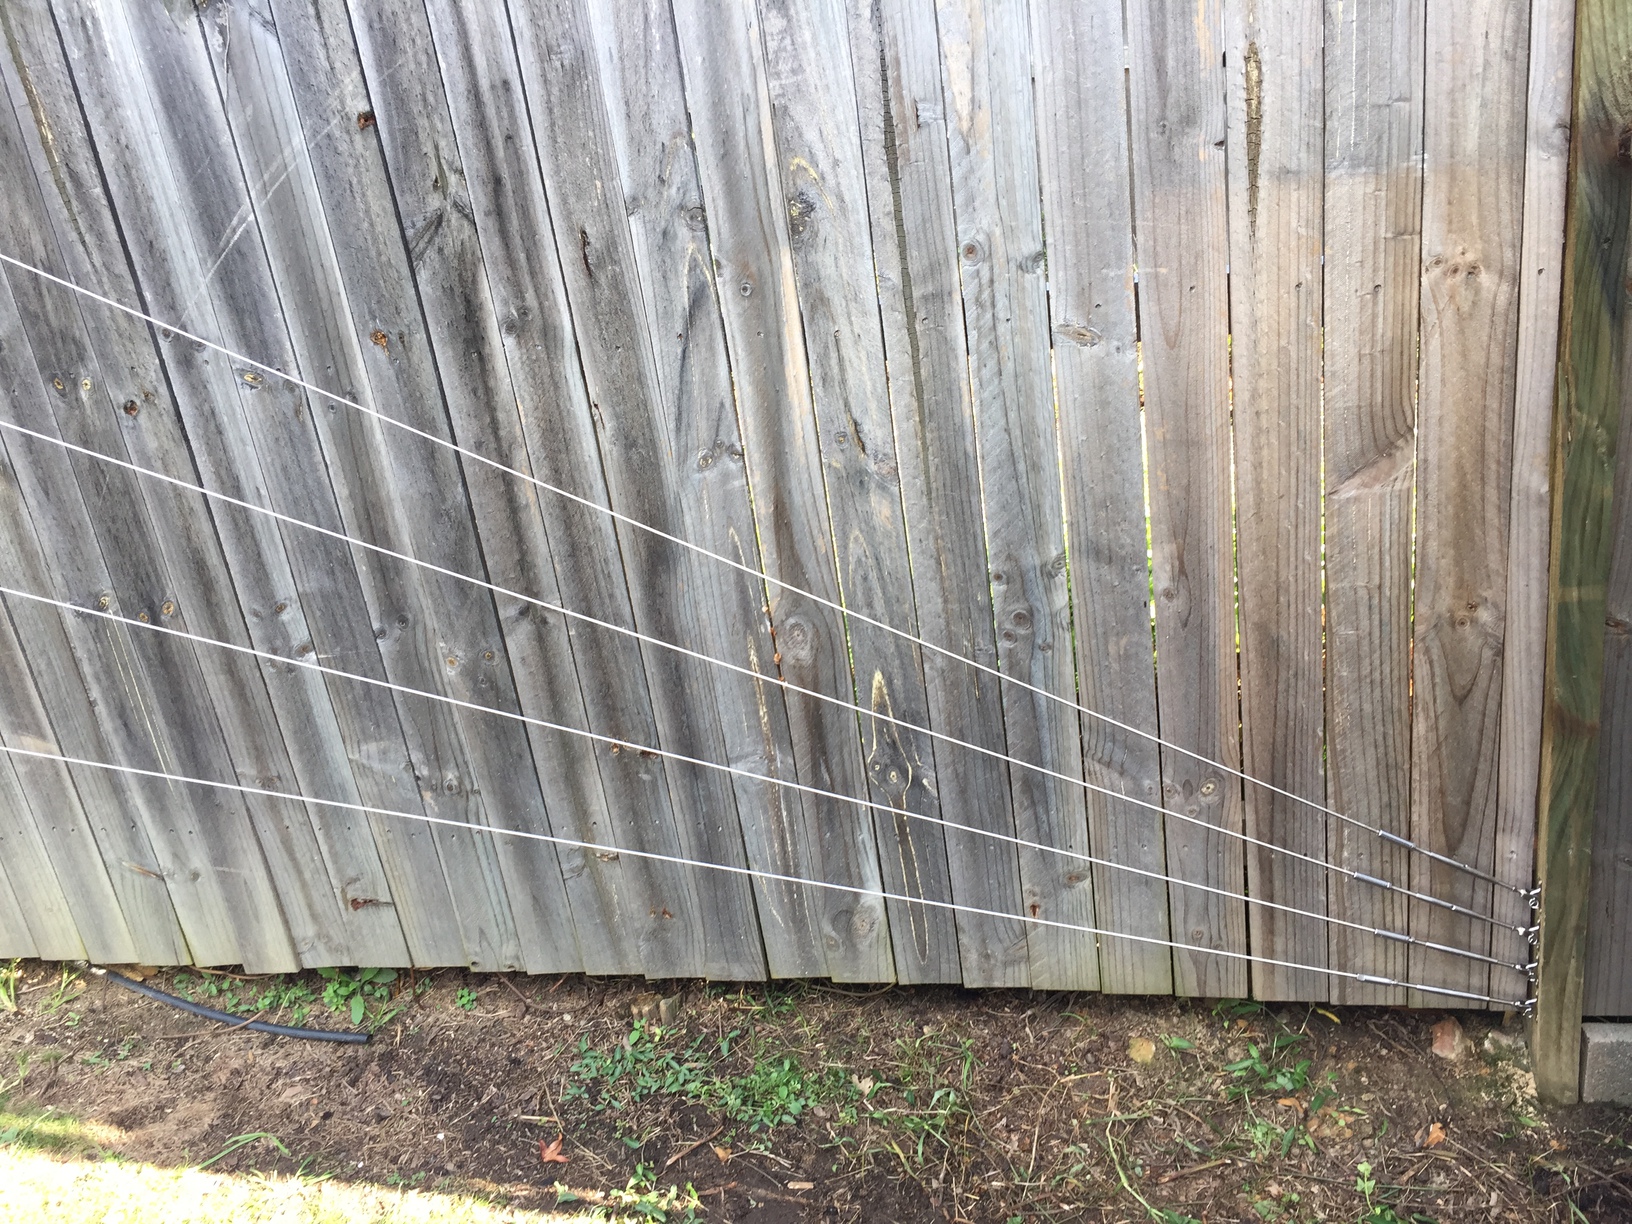
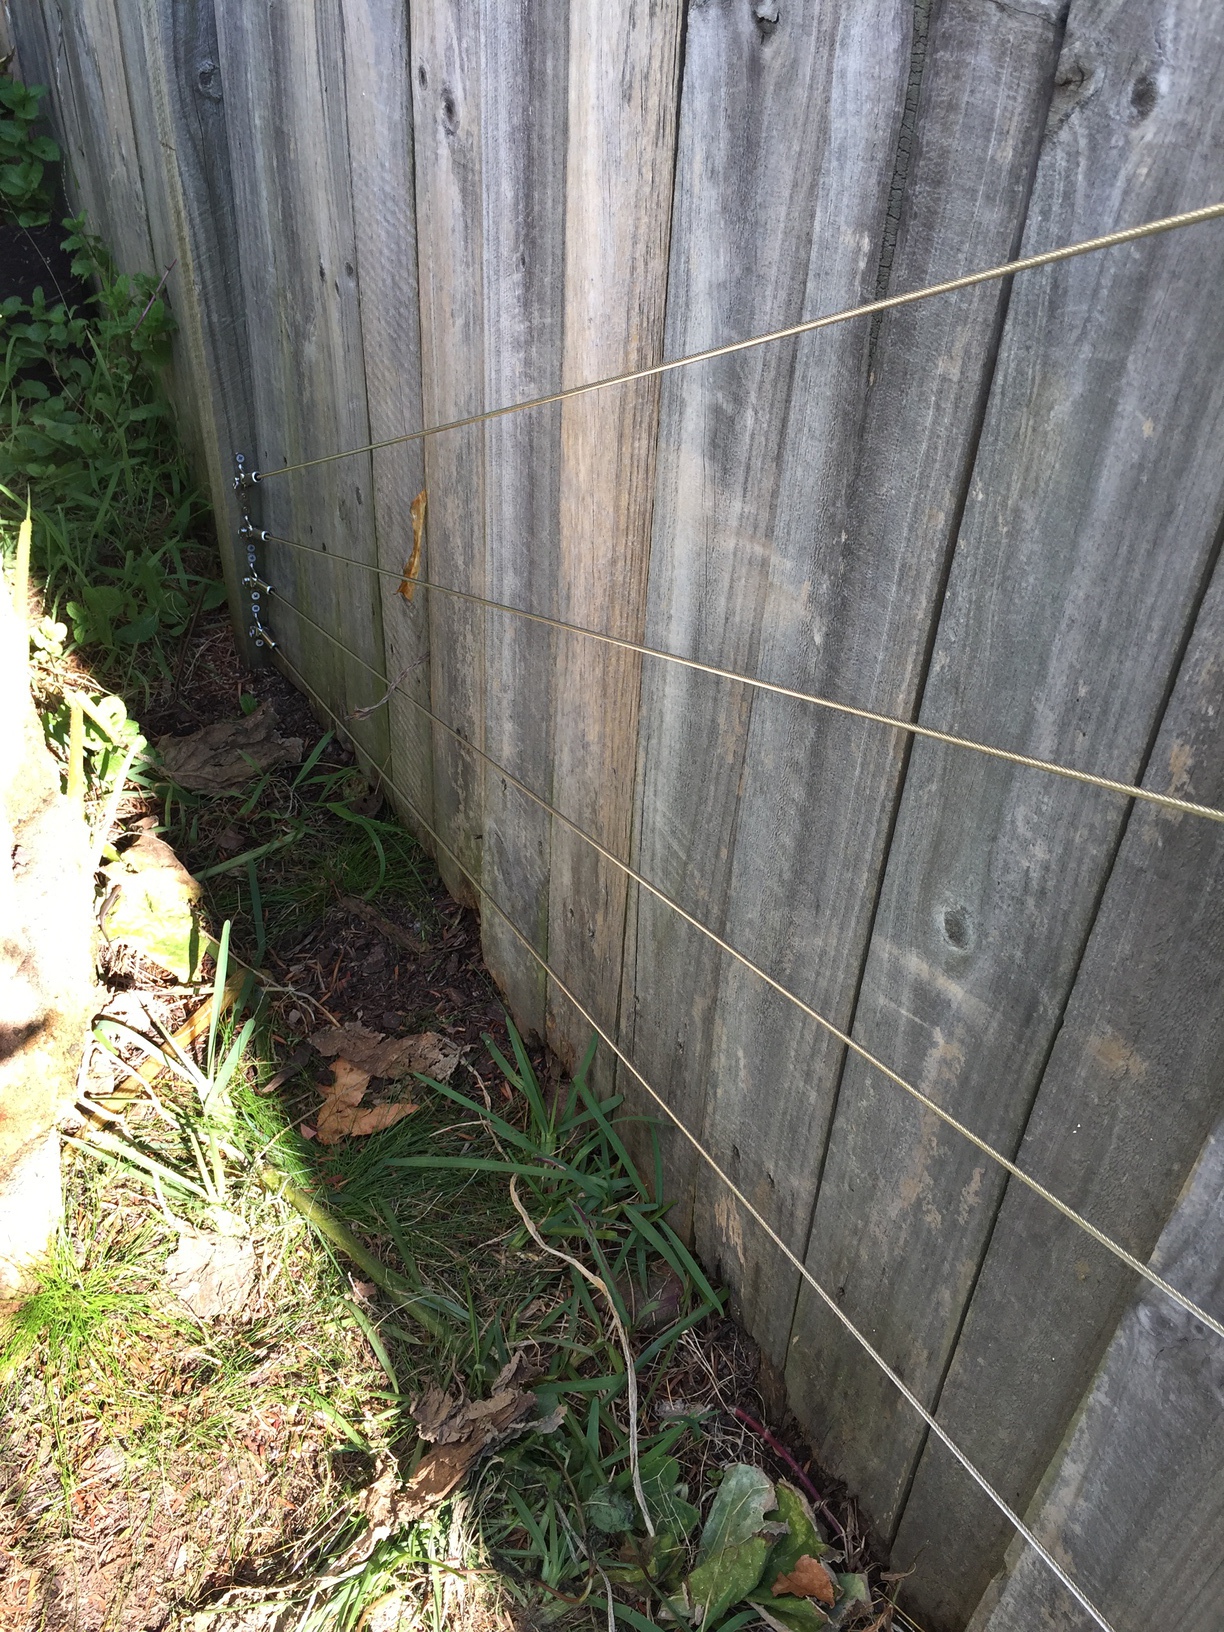
The wooden fence behind my vegetable garden beds was the first fence to have a trellis installed. I ordered the ballustrading parts from Hammersmith, opting to go for the the 3.2mm steel cable, and the QuickLok system, which does not require any additional tools to connect the various parts to the stainless steel cable.
This worked very nicely and the setup was relatively easy. I measured out four lines, marking out the spots on the posts where I would drill in each of the eye-bolts (coach screws). I then drilled the holes and screwed the eye-bolts directly into the posts. I installed the four saddles, that the terminal forks at the end of each line connect to, on the inside of the posts. This is the only way you can attach them, as there isn’t enough room for the terminal fork connections to turn 90 degrees inside the saddle. They need to go perpendicular to the saddle.
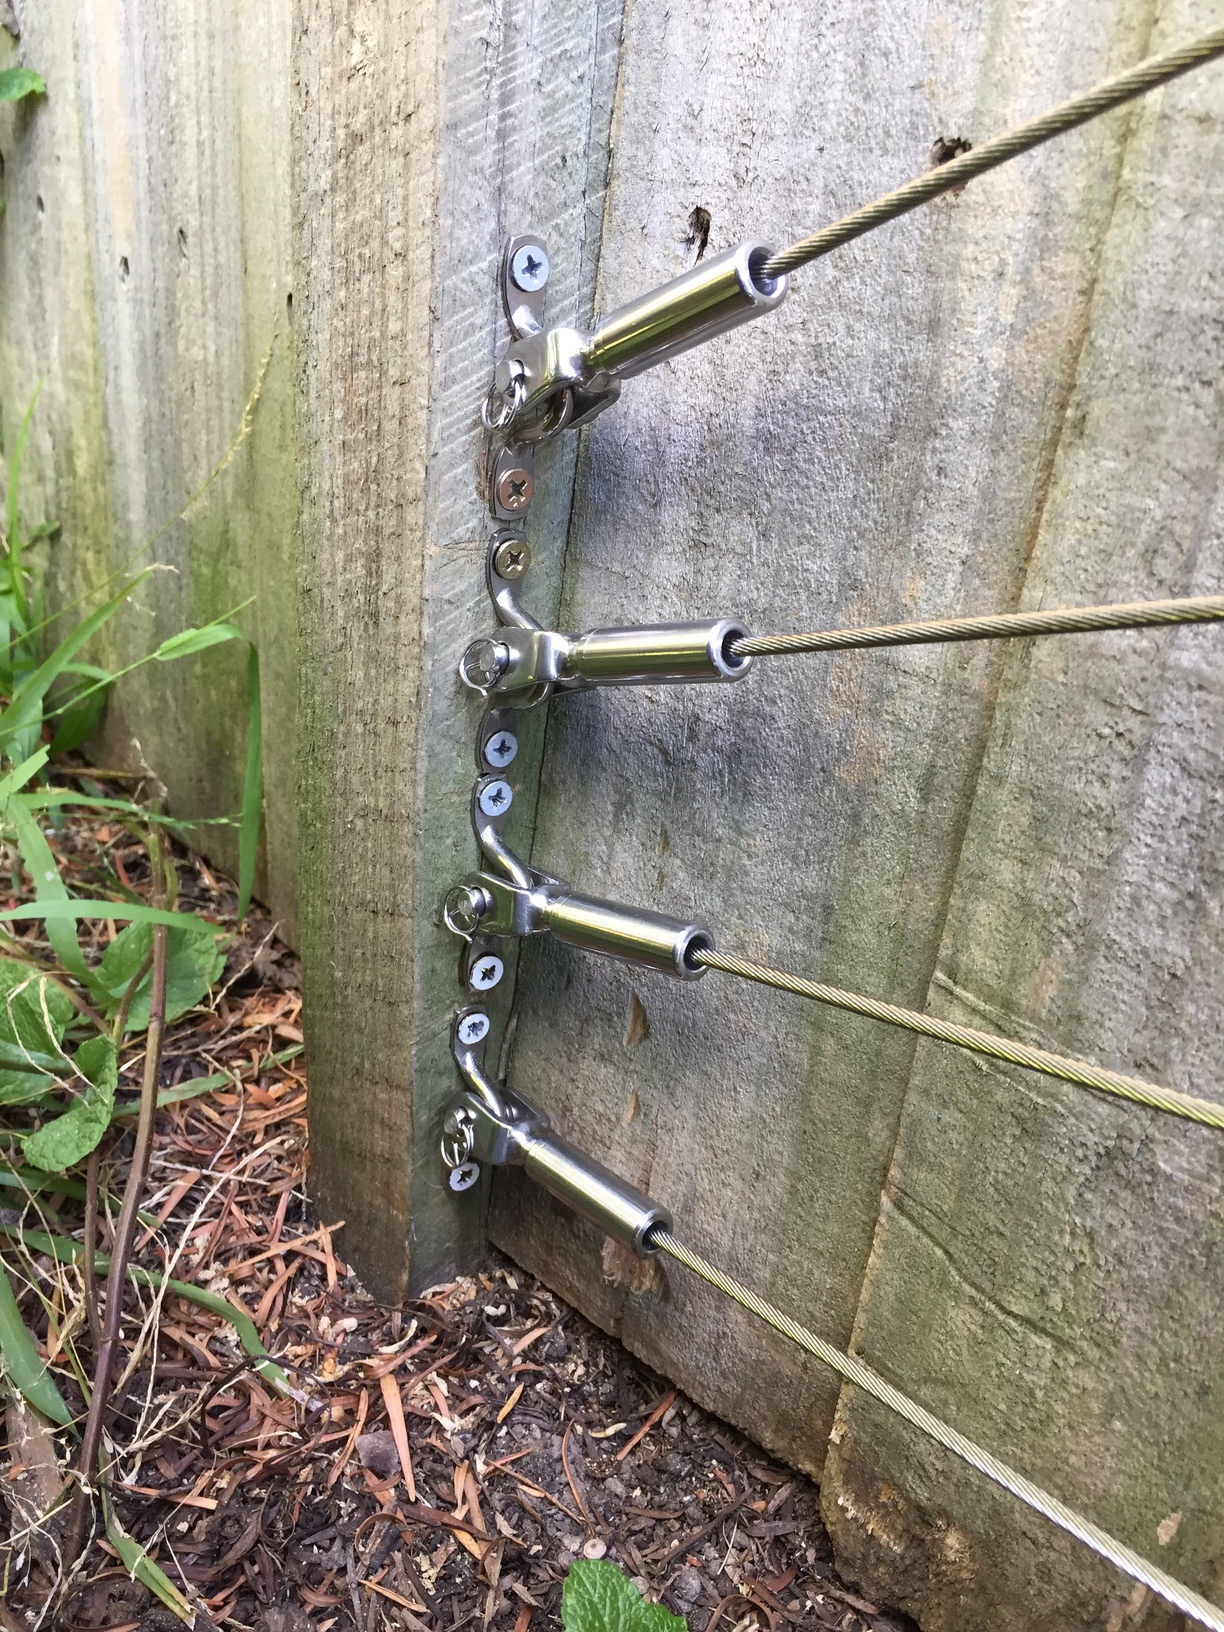
The other side has the bottle-screw terminals (tensioning pieces) connected to another four saddles. The saddles were installed near the bottom of each ending post to ensure the minimum inward pressure near the top of the posts…. I don’t want to tighten the cables and have them pull the top of the posts inward at either end.
Trellis lines anchored on saddles on the inside of the post, as low as possible to prevent pulling the top of the post inward
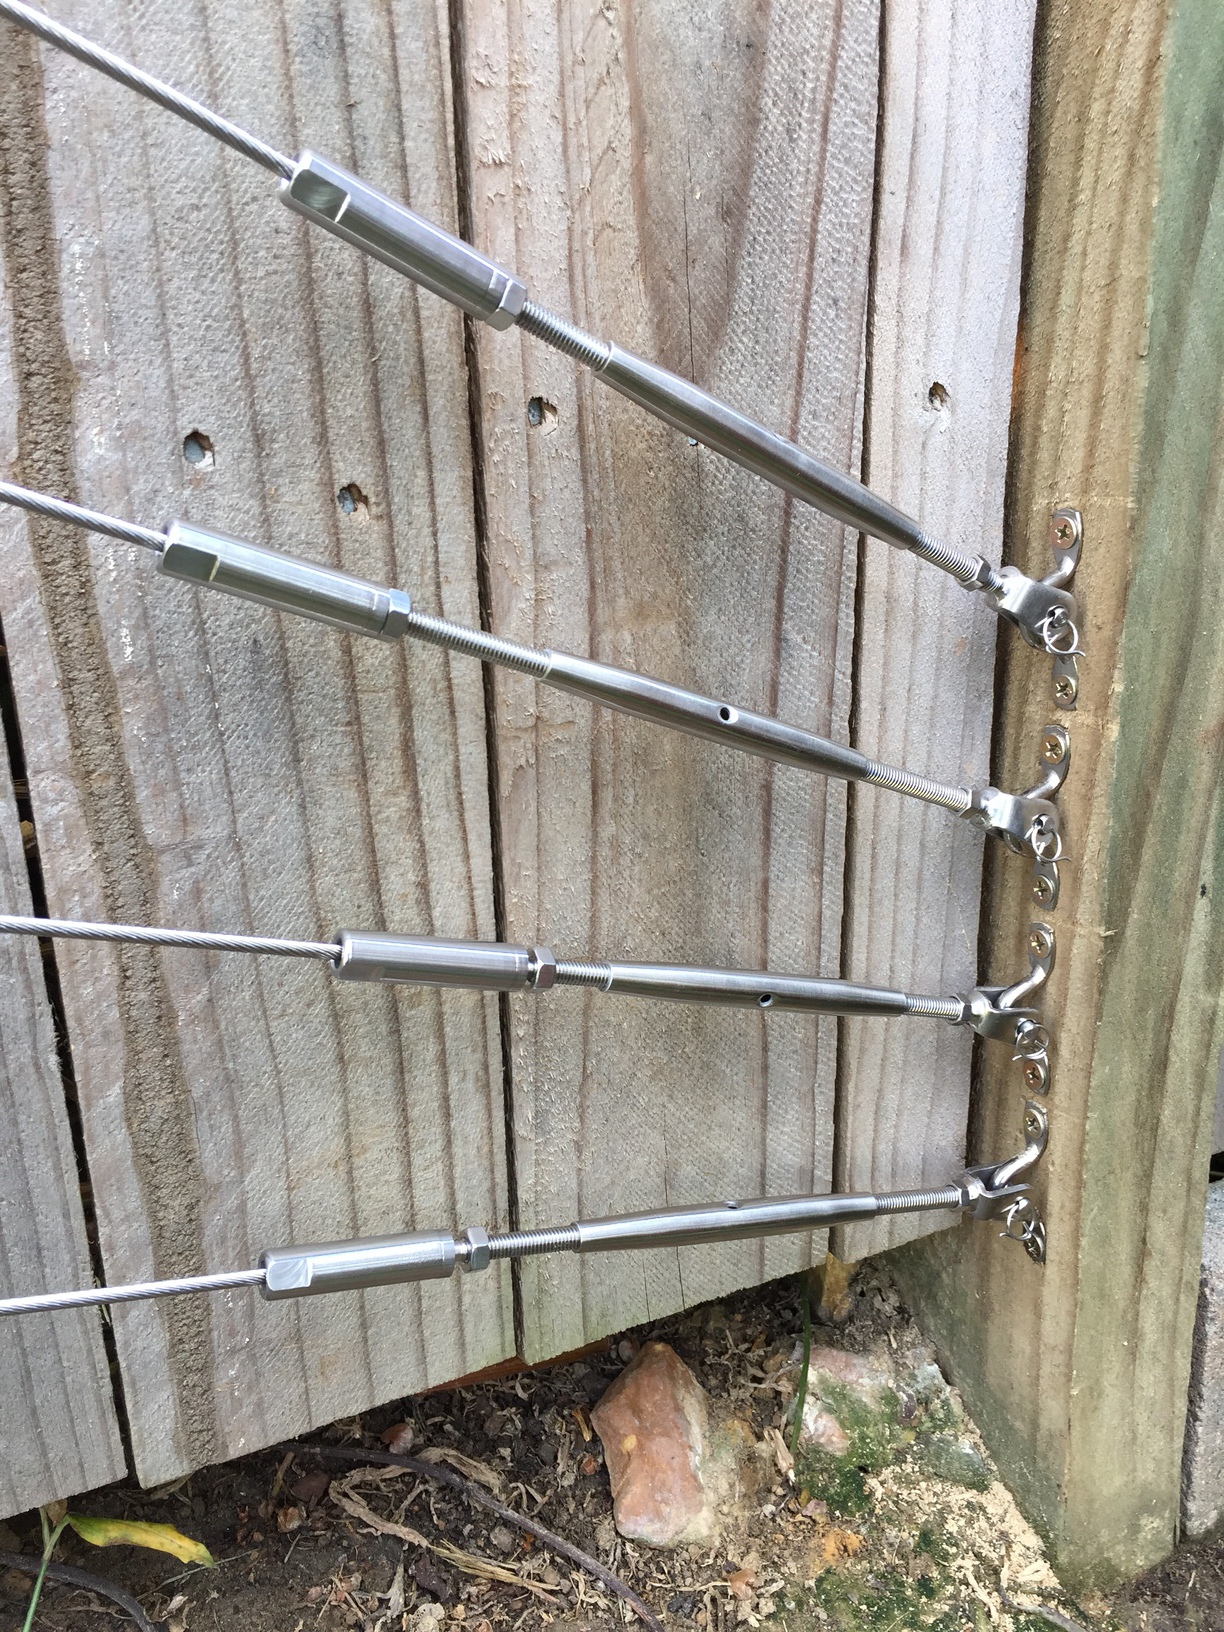
A closer look at the Quicklok bottle-screws attached to the saddles on the post. These are used for tensioning the lines.
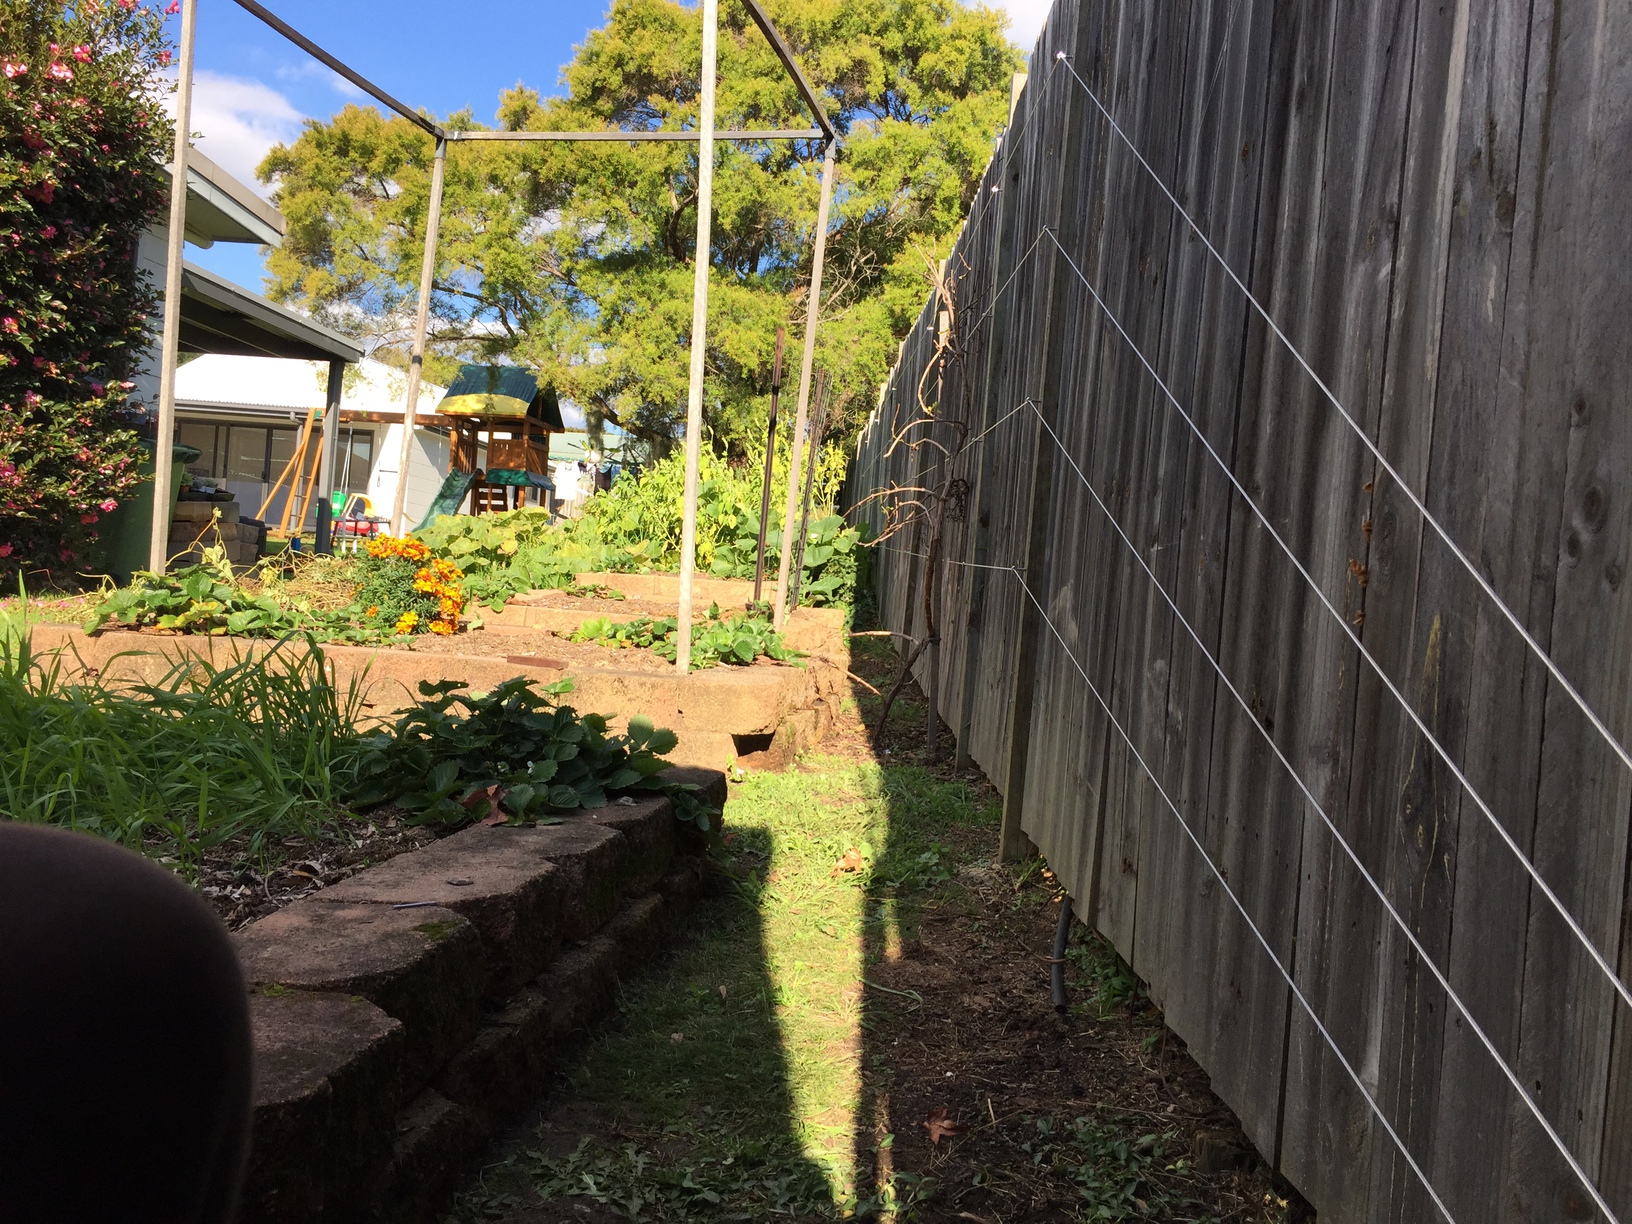
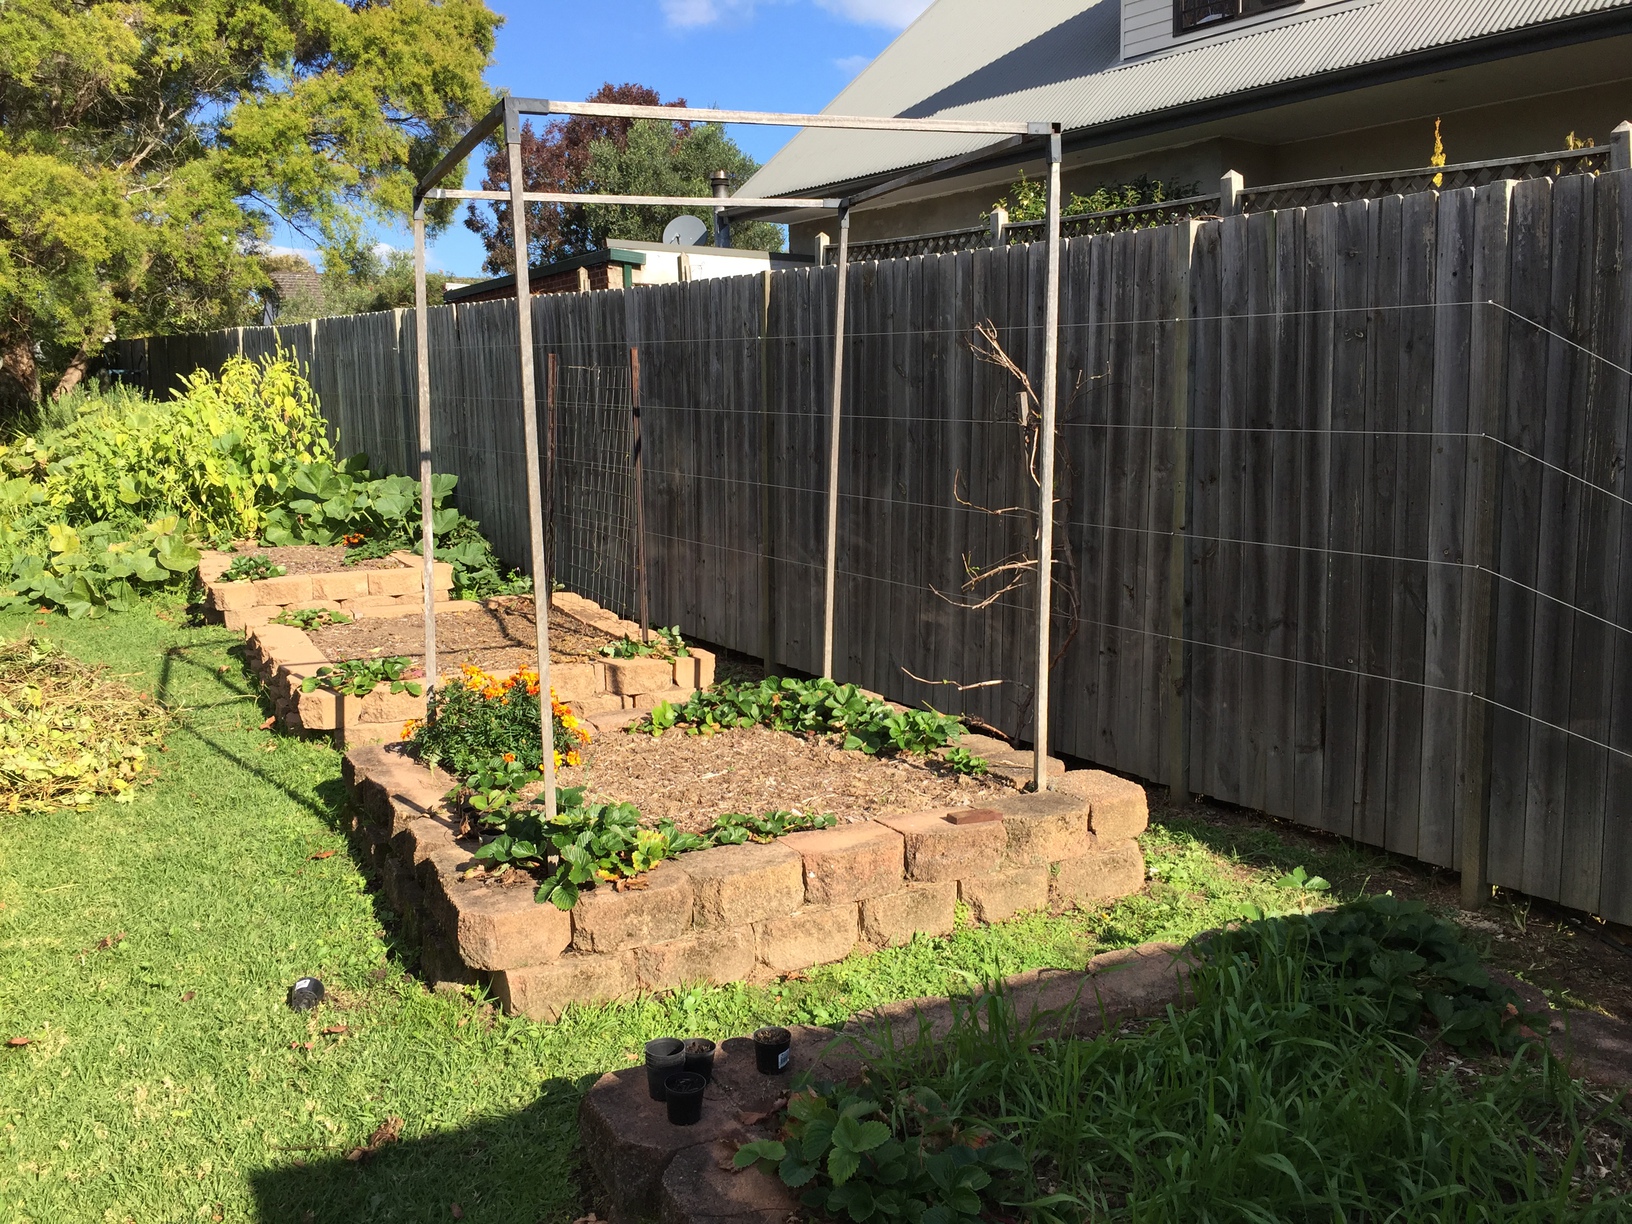
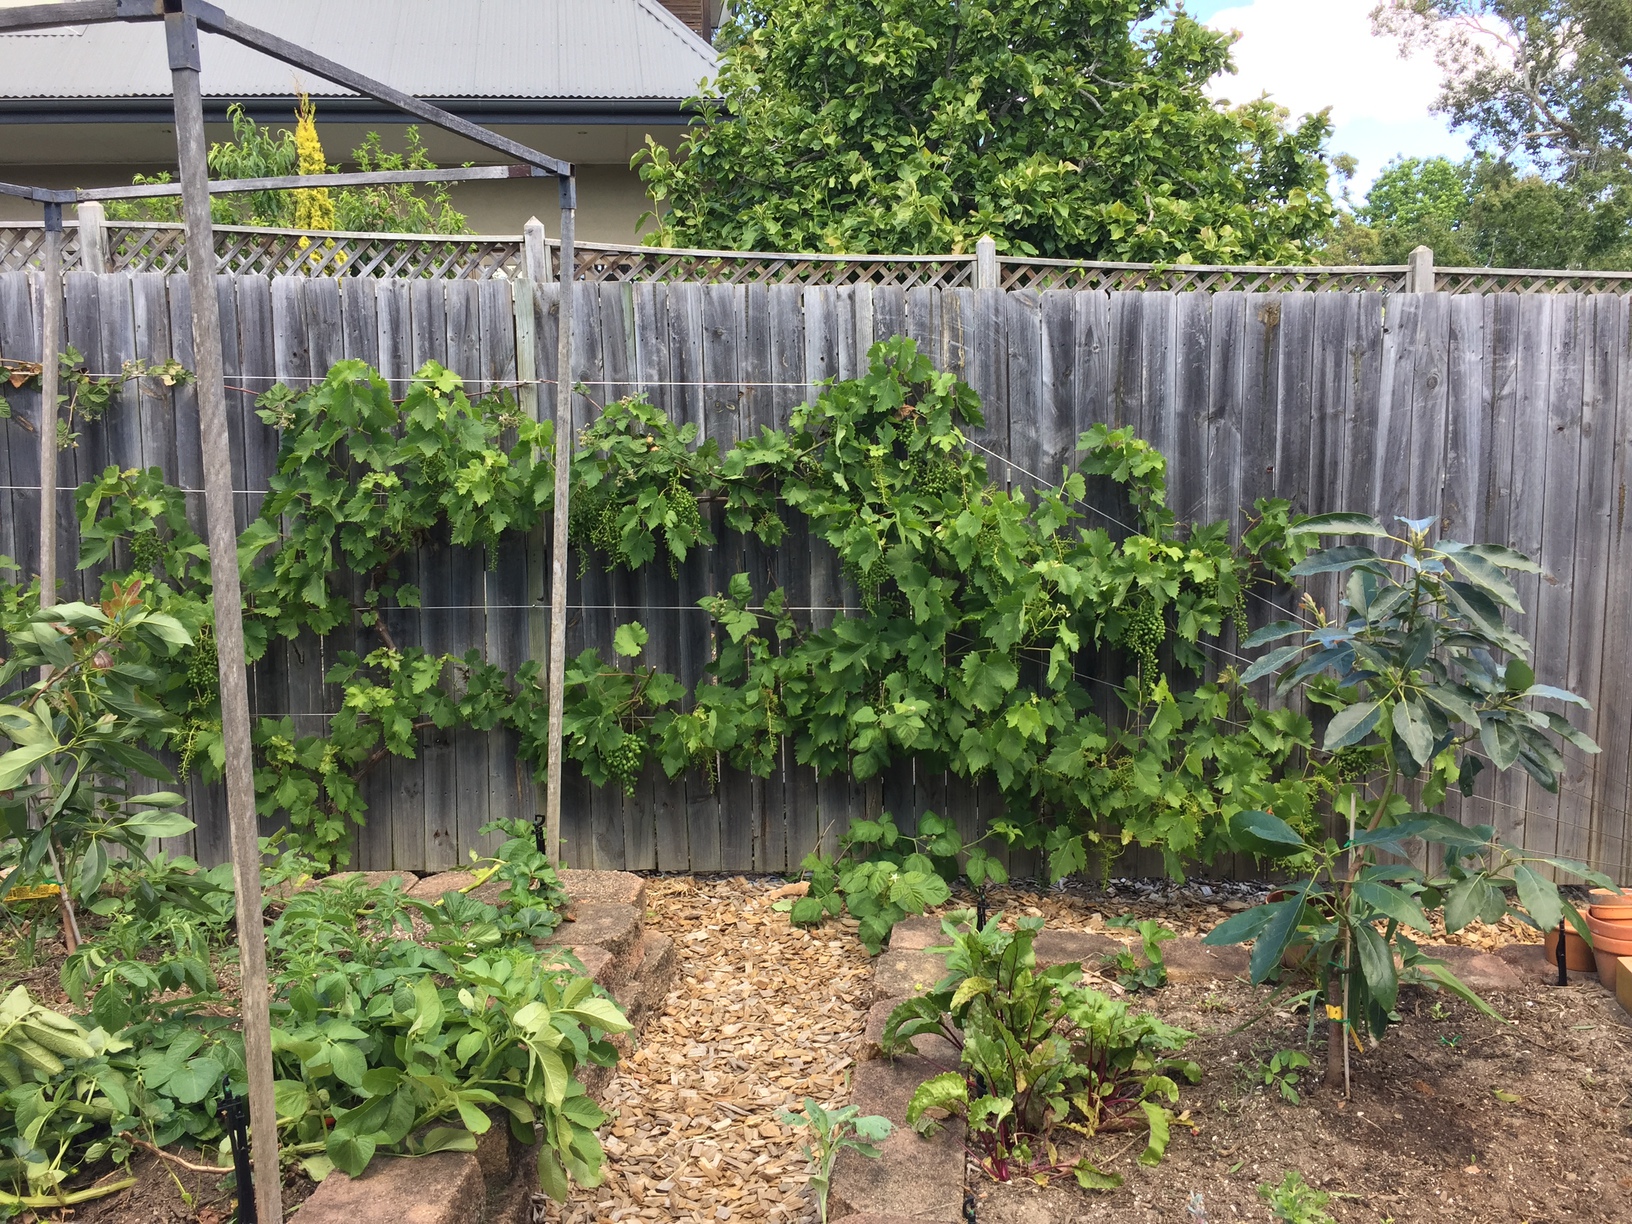
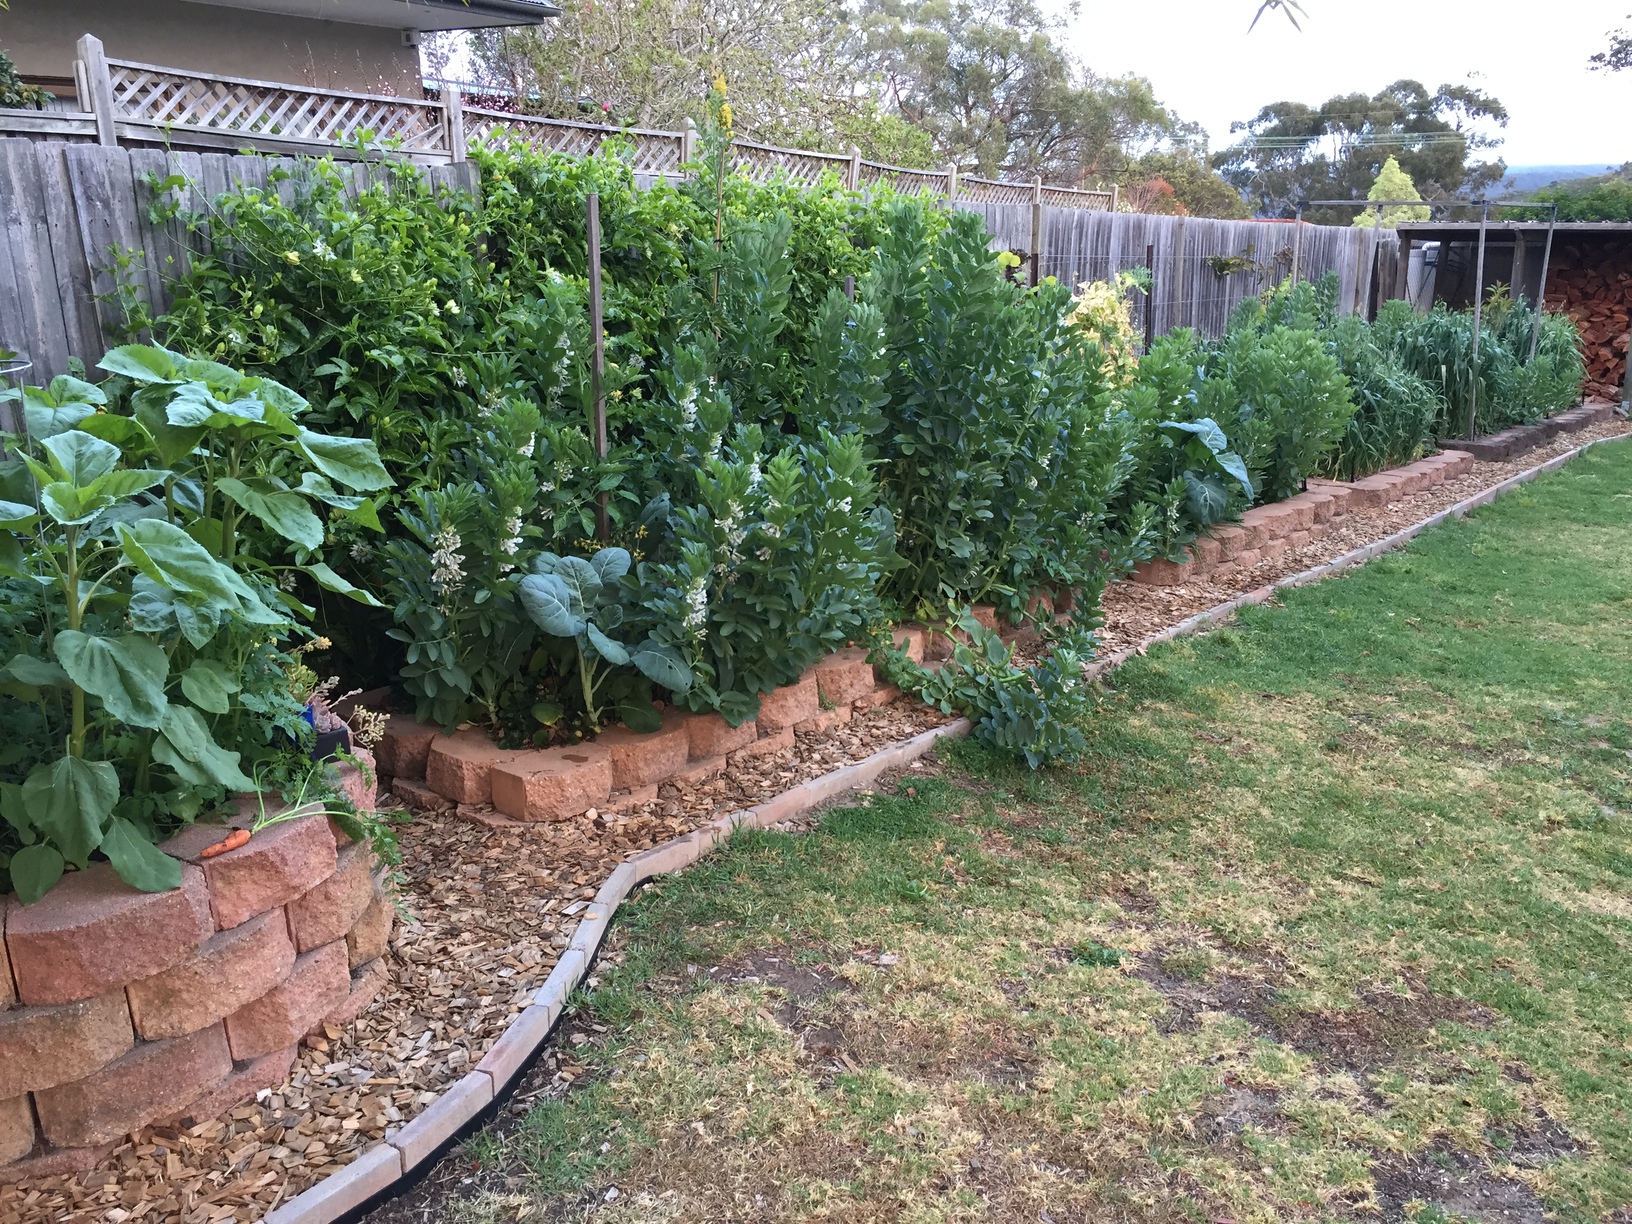
Trellis lines running along the fence, behind the veggie beds. You can see the grape vine haphazardly standing up against the trellis. This was planted a year or so before the trellis was put in. It has since been pruned and trained.
Wider view of the trellis lines
The opposite end of the trellis lines, terminating down low
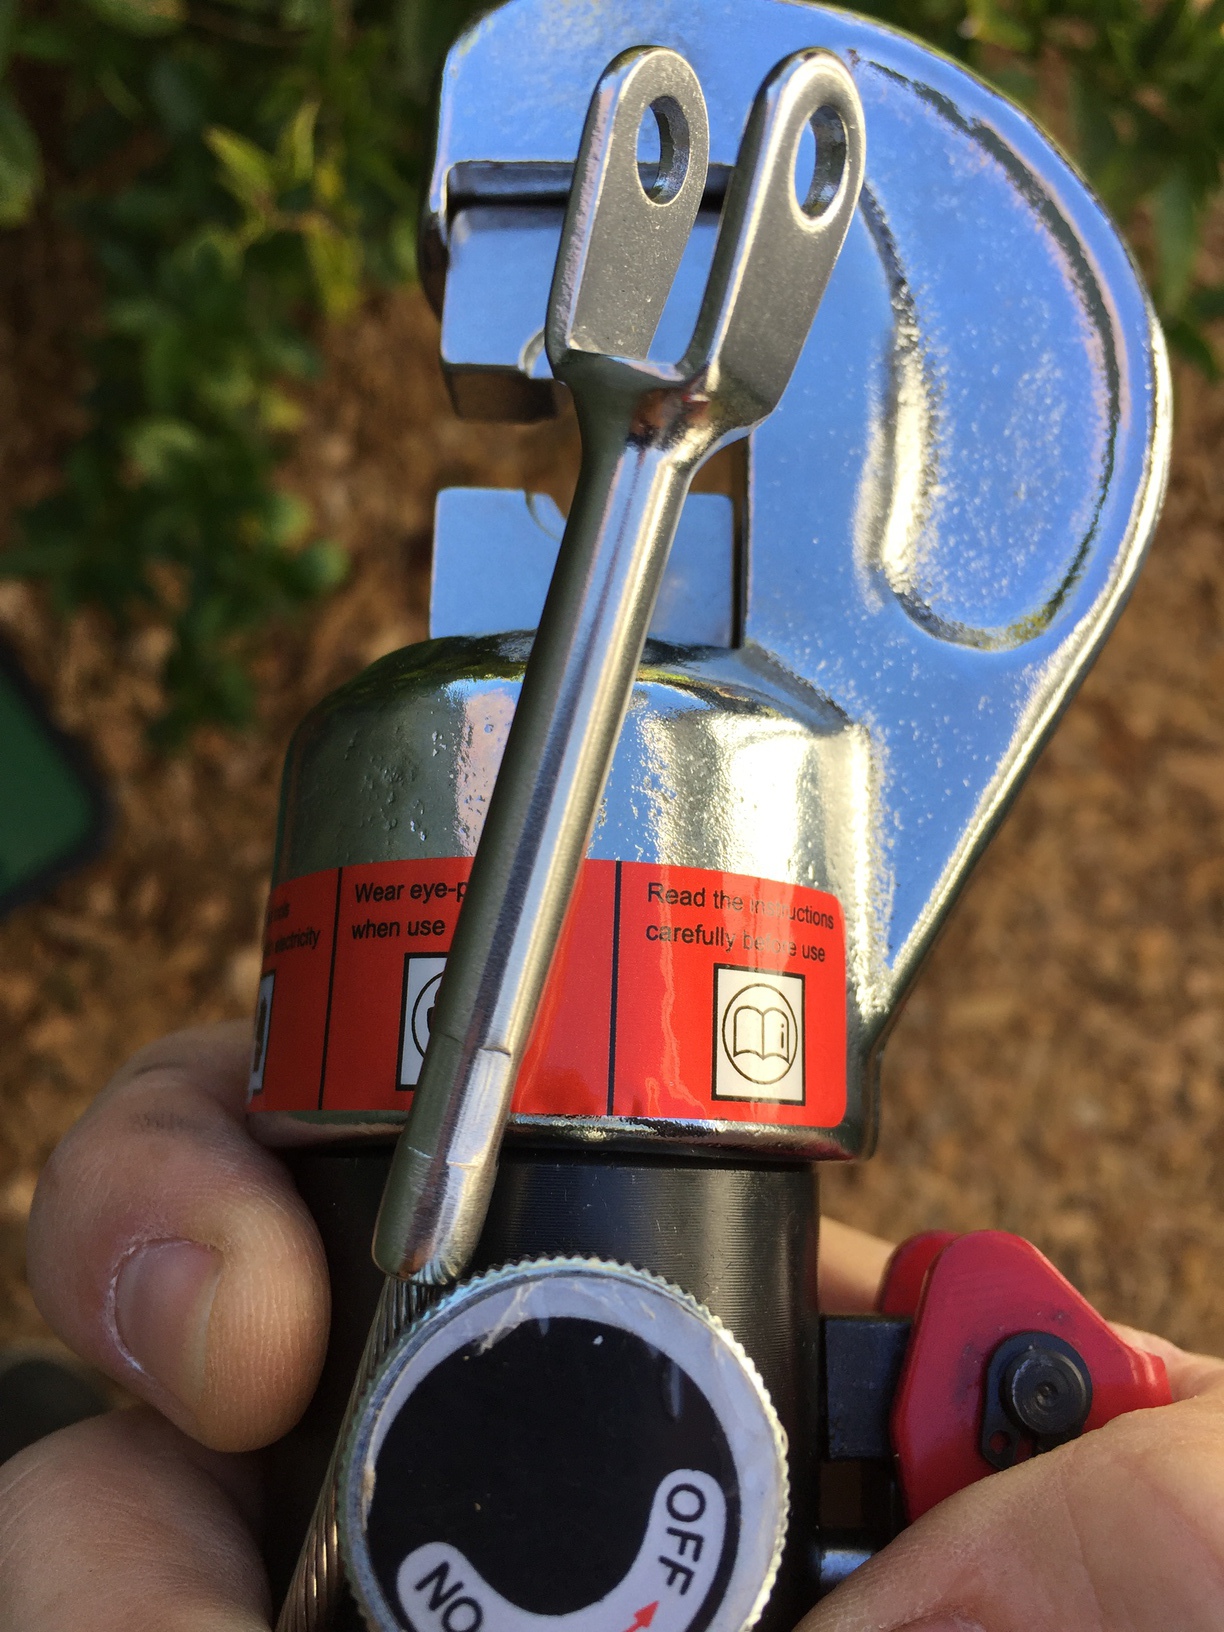
A closer look at the fork terminals. These simply attach to the saddles, and the lines are tightened at the opposite side using the bottle-screws.
Colorbond fence
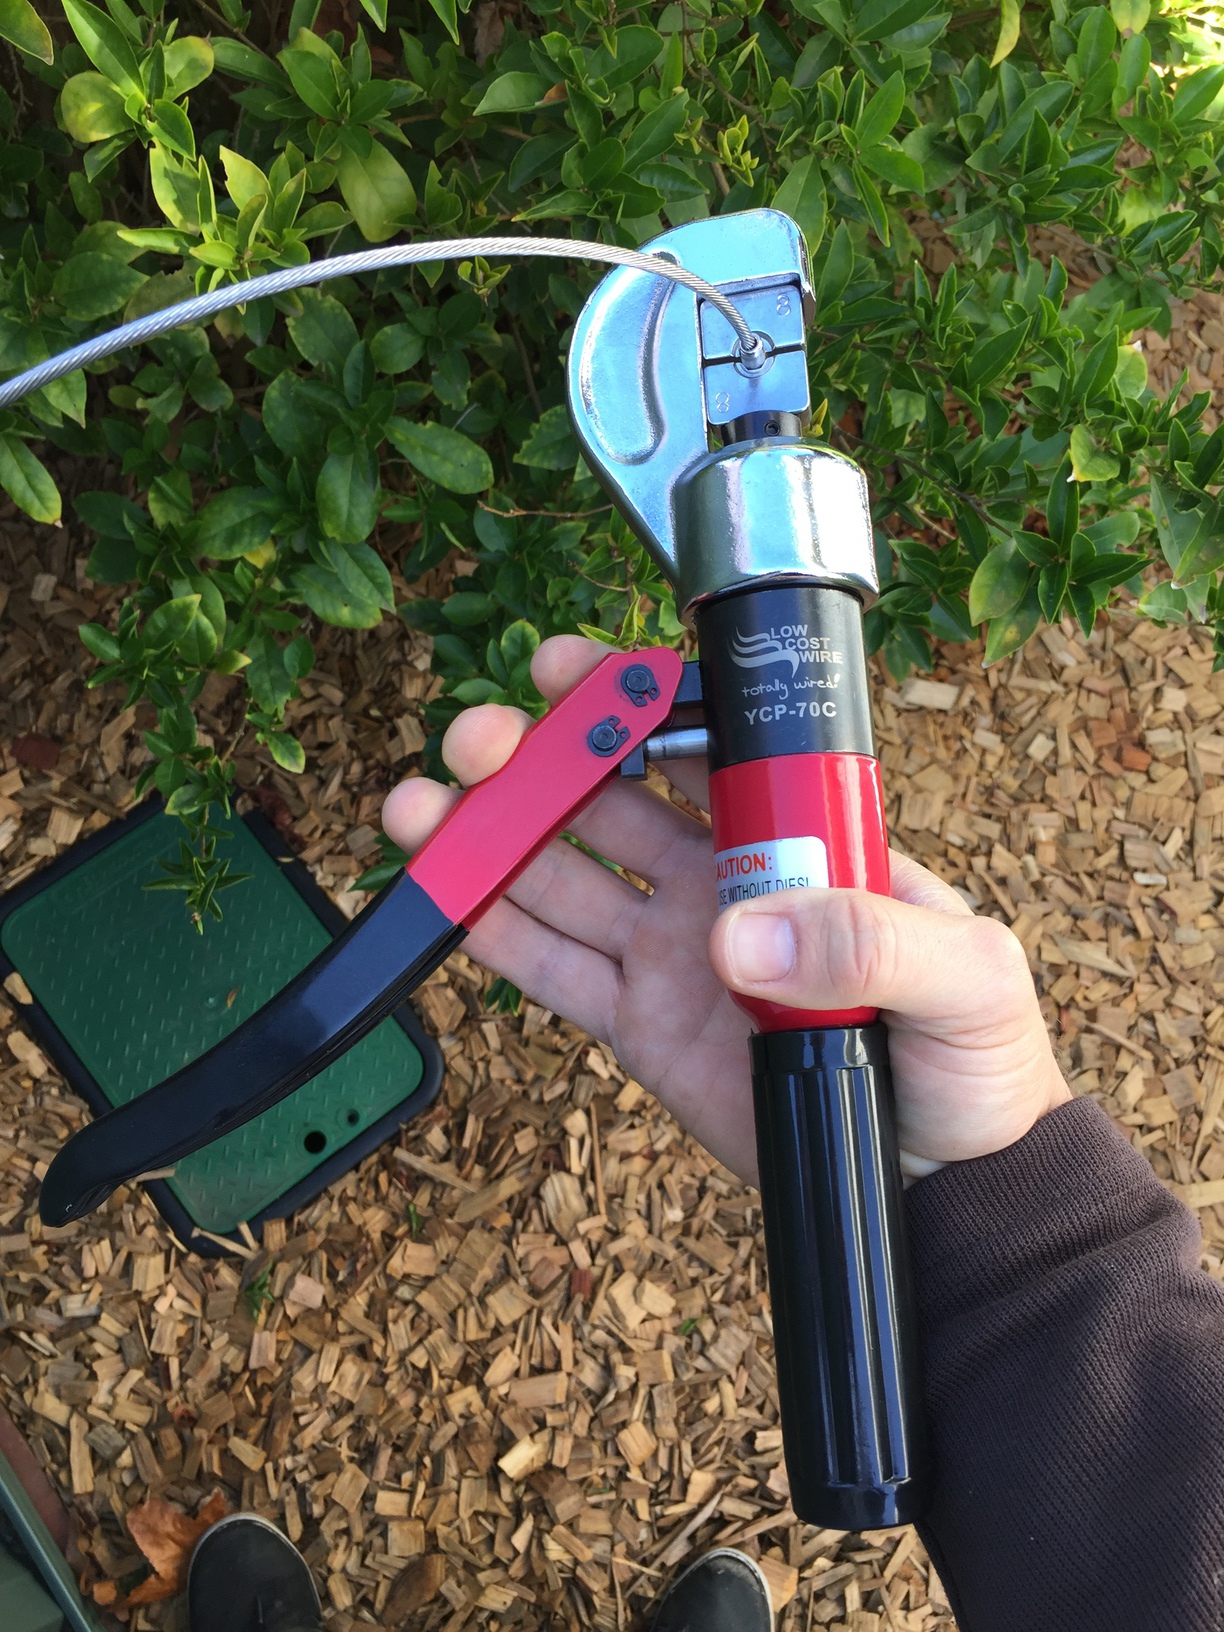
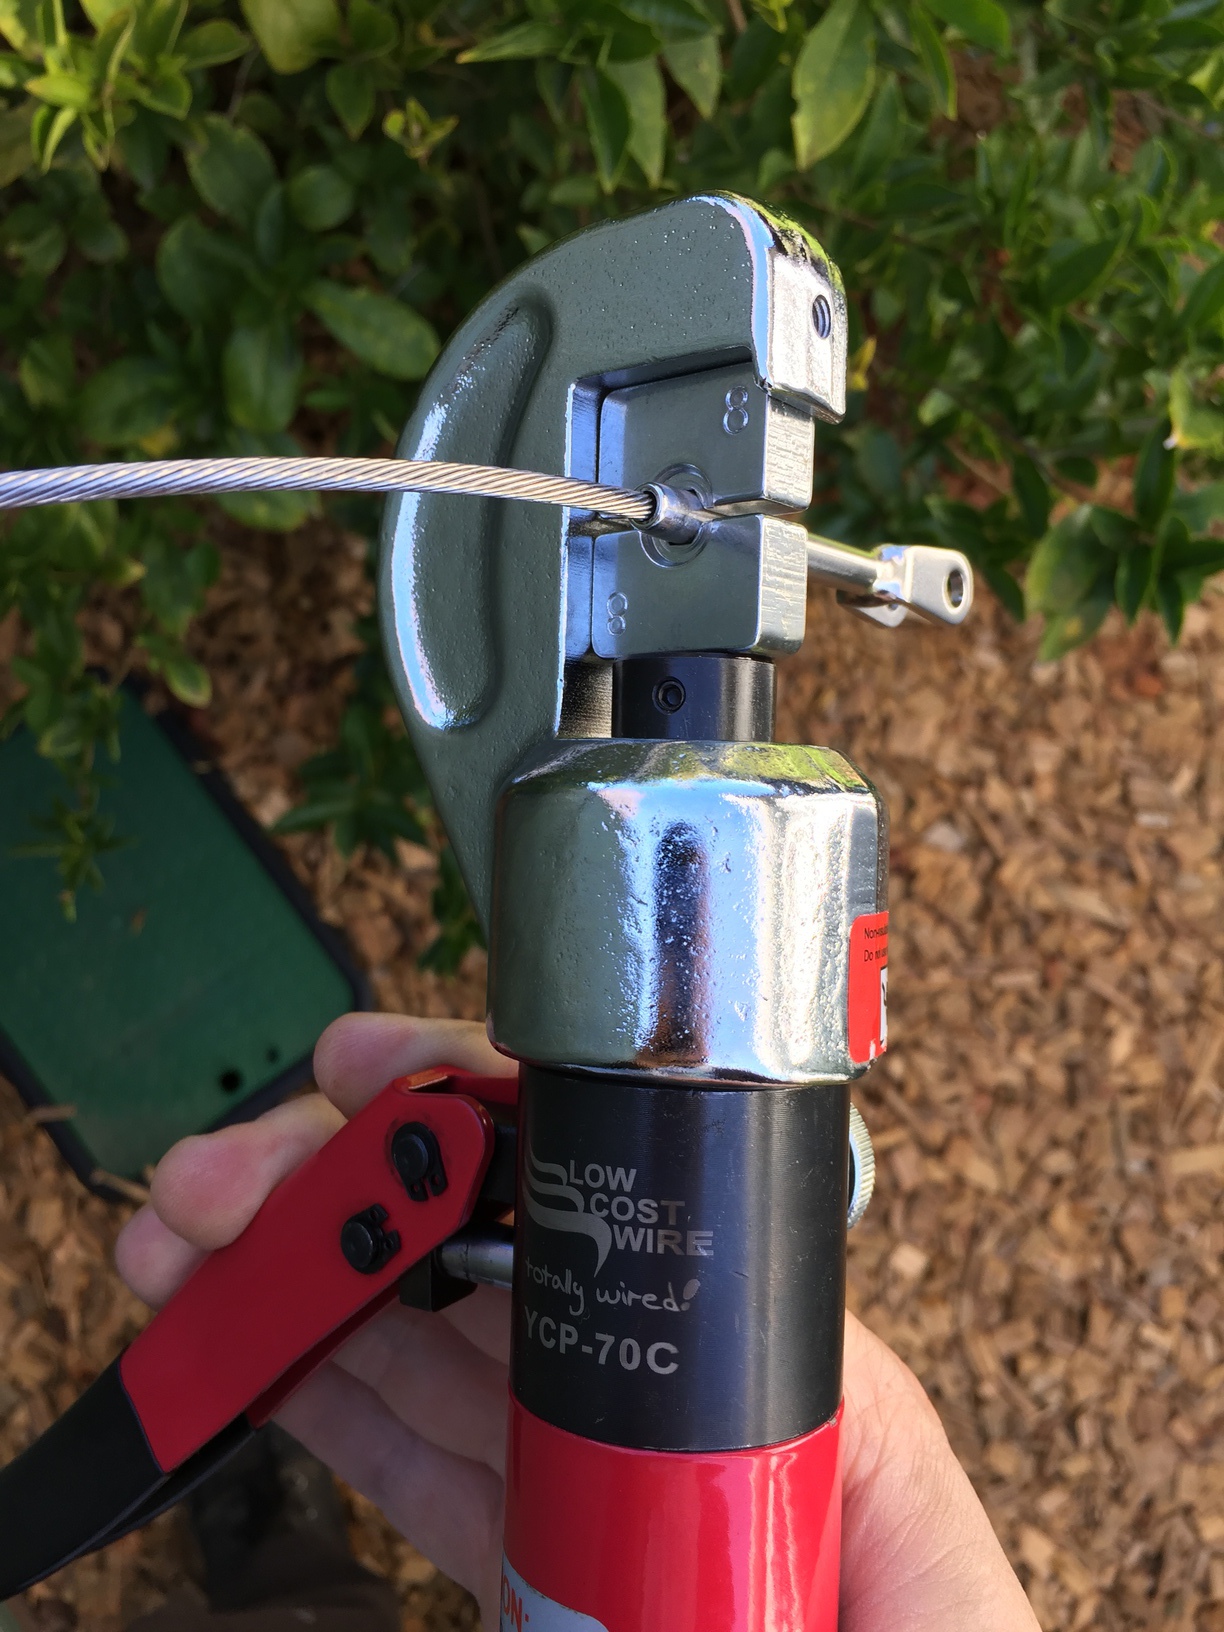
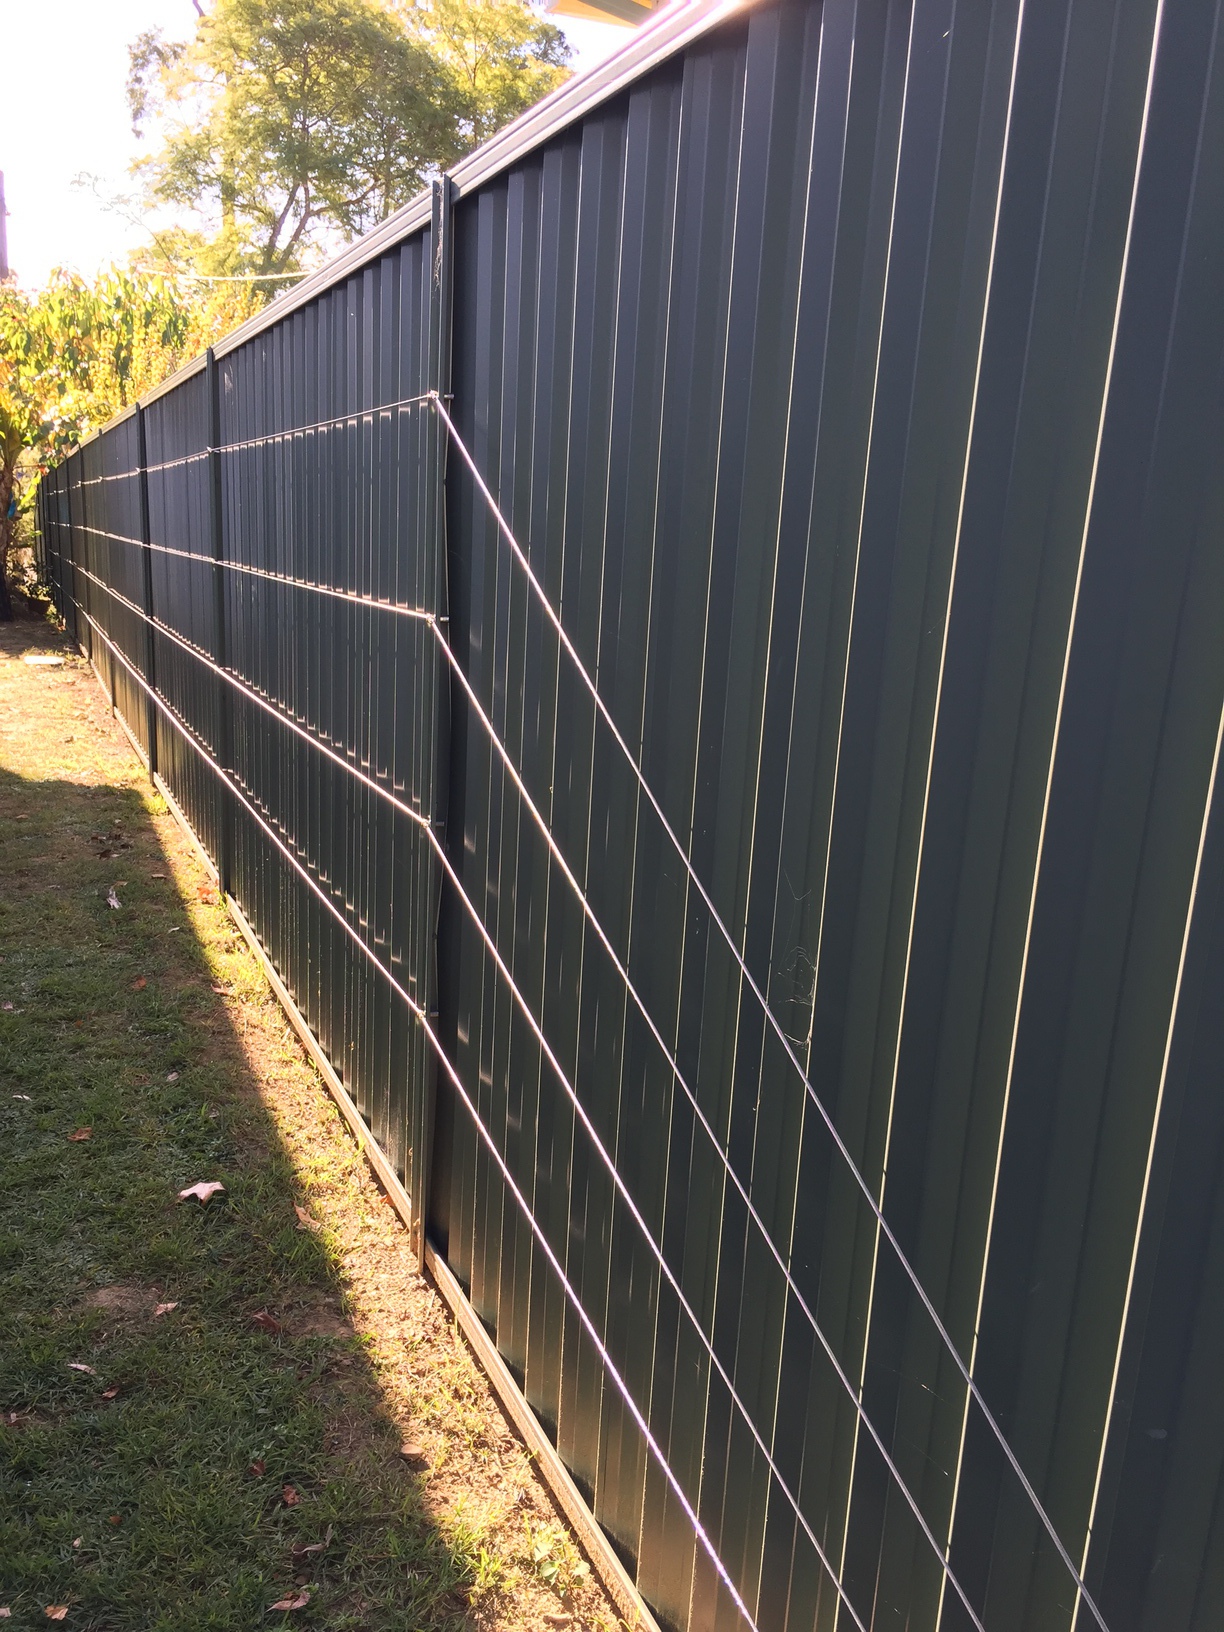
The Colorbond fence was a little more involved than the original wooden fence. For starters, I purchased all of the cables and connectors from Hammersmith again, almost a year after my initial purchase. I unfortunately assumed that the connectors were the same type as the ones I had before - the Quicklok system, which does not require any special equipment. Unfortuntately they no longer stock the Quicklok system, so the connectors I ended up purchasing require a hydraulic swaging tool! What the hell is a hydraulic swager!? Well, nowhere seemed to have one available for hire, and no one I know had one I could borrow. EBay to the rescue! I found one for $98 and it did the job beautifully. I am now that person who has a hyrdraulic swaging tool lying around if anyone ever needs to borrow one!
The tool is essentially a mighty crimping tool that uses hydraulics to create pressure. It’s a cross between a crimping tool and a bottle jack. Very effective. I did borrow a hand-held swaging tool, but that is for a different type of swaging and unless I had the stength of Superman (which unfortunately I do not possess), there is no way I would be able to generate enough force to even dent the stainless-steel fittings.
The other issue with the Colorbond fence is that the coach screws available are quite short, and I wanted them to stand out from the fence as much as possible to allow for my fruiting vines to have some space between the fence and the trellis lines. I used a stack of three metal washers on each screw to increase the distance slightly between the coach screw and the fence. Each coach screw is screwed into a fitting that goes on the other side of the Colorbond panel. You drill a hole, place the fitting behind, then screw the coach screw into the fitting. Placing the washers onto the coach screws meant I could tighten them up without them being almost flush with the fence.
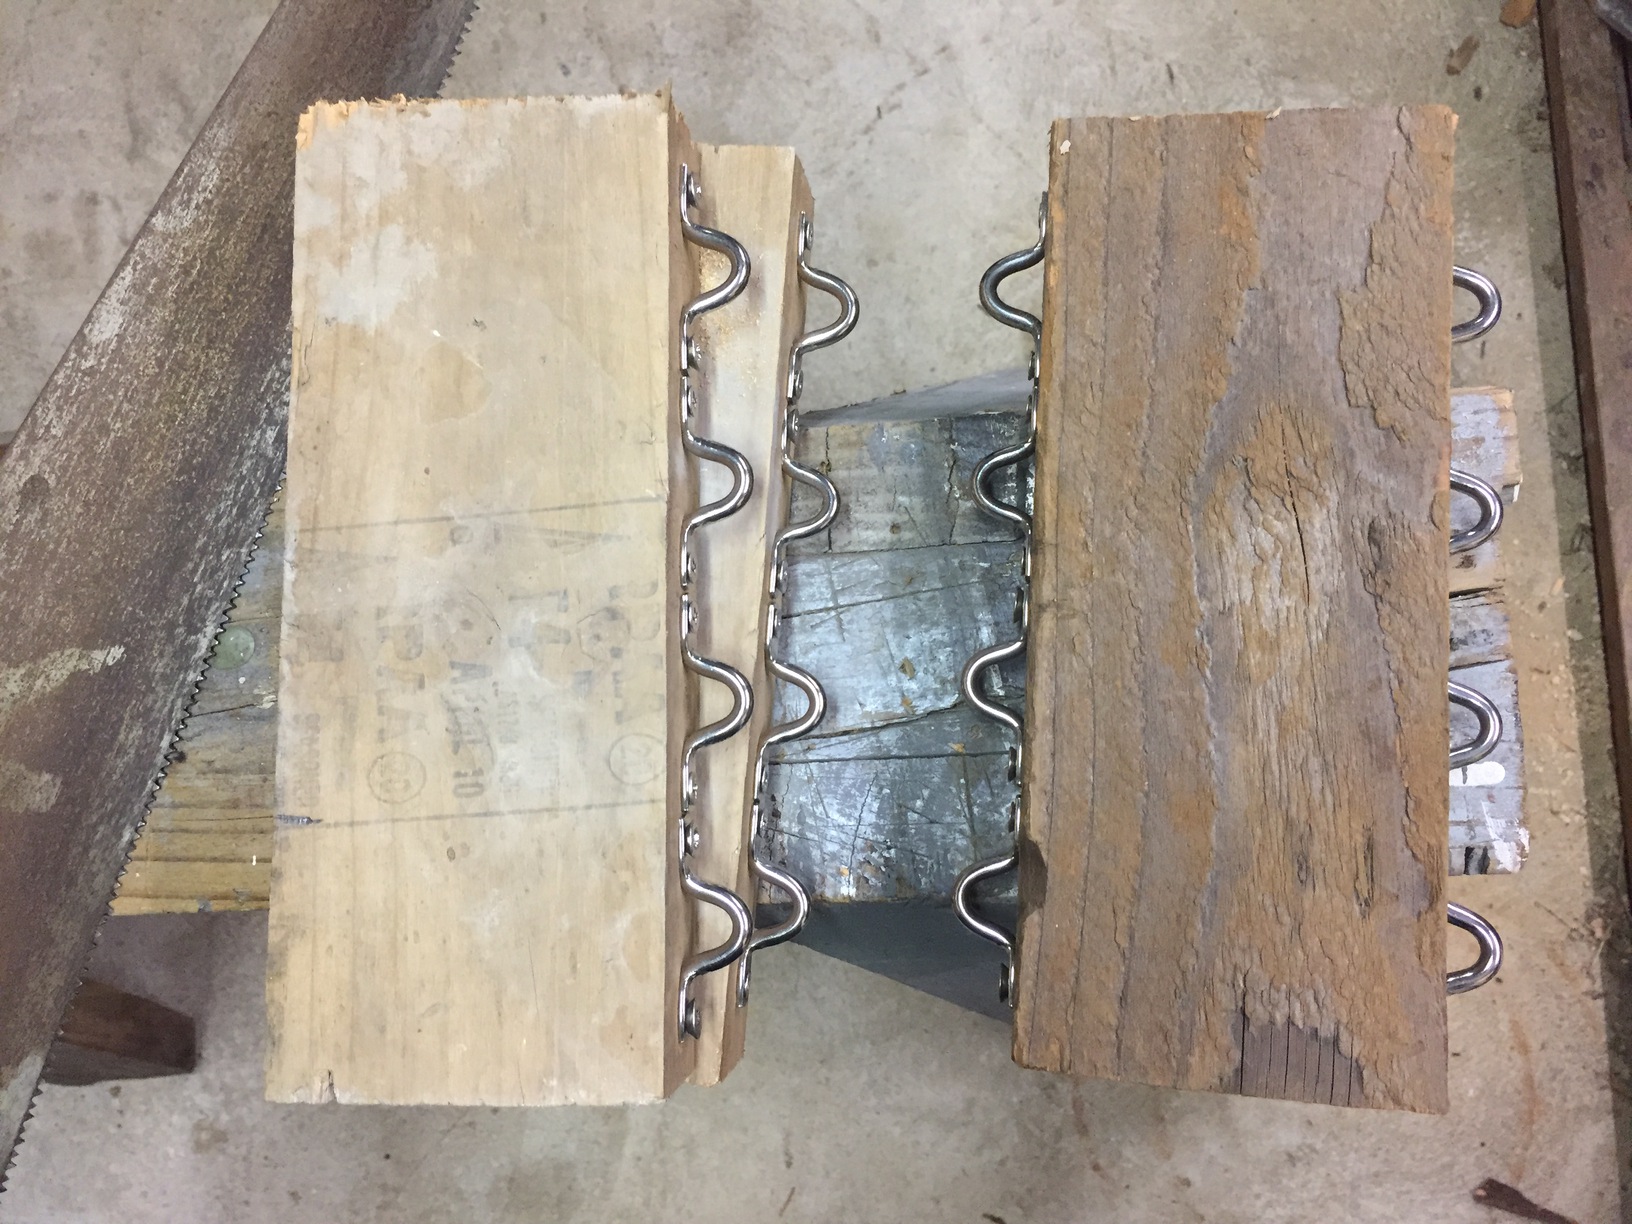
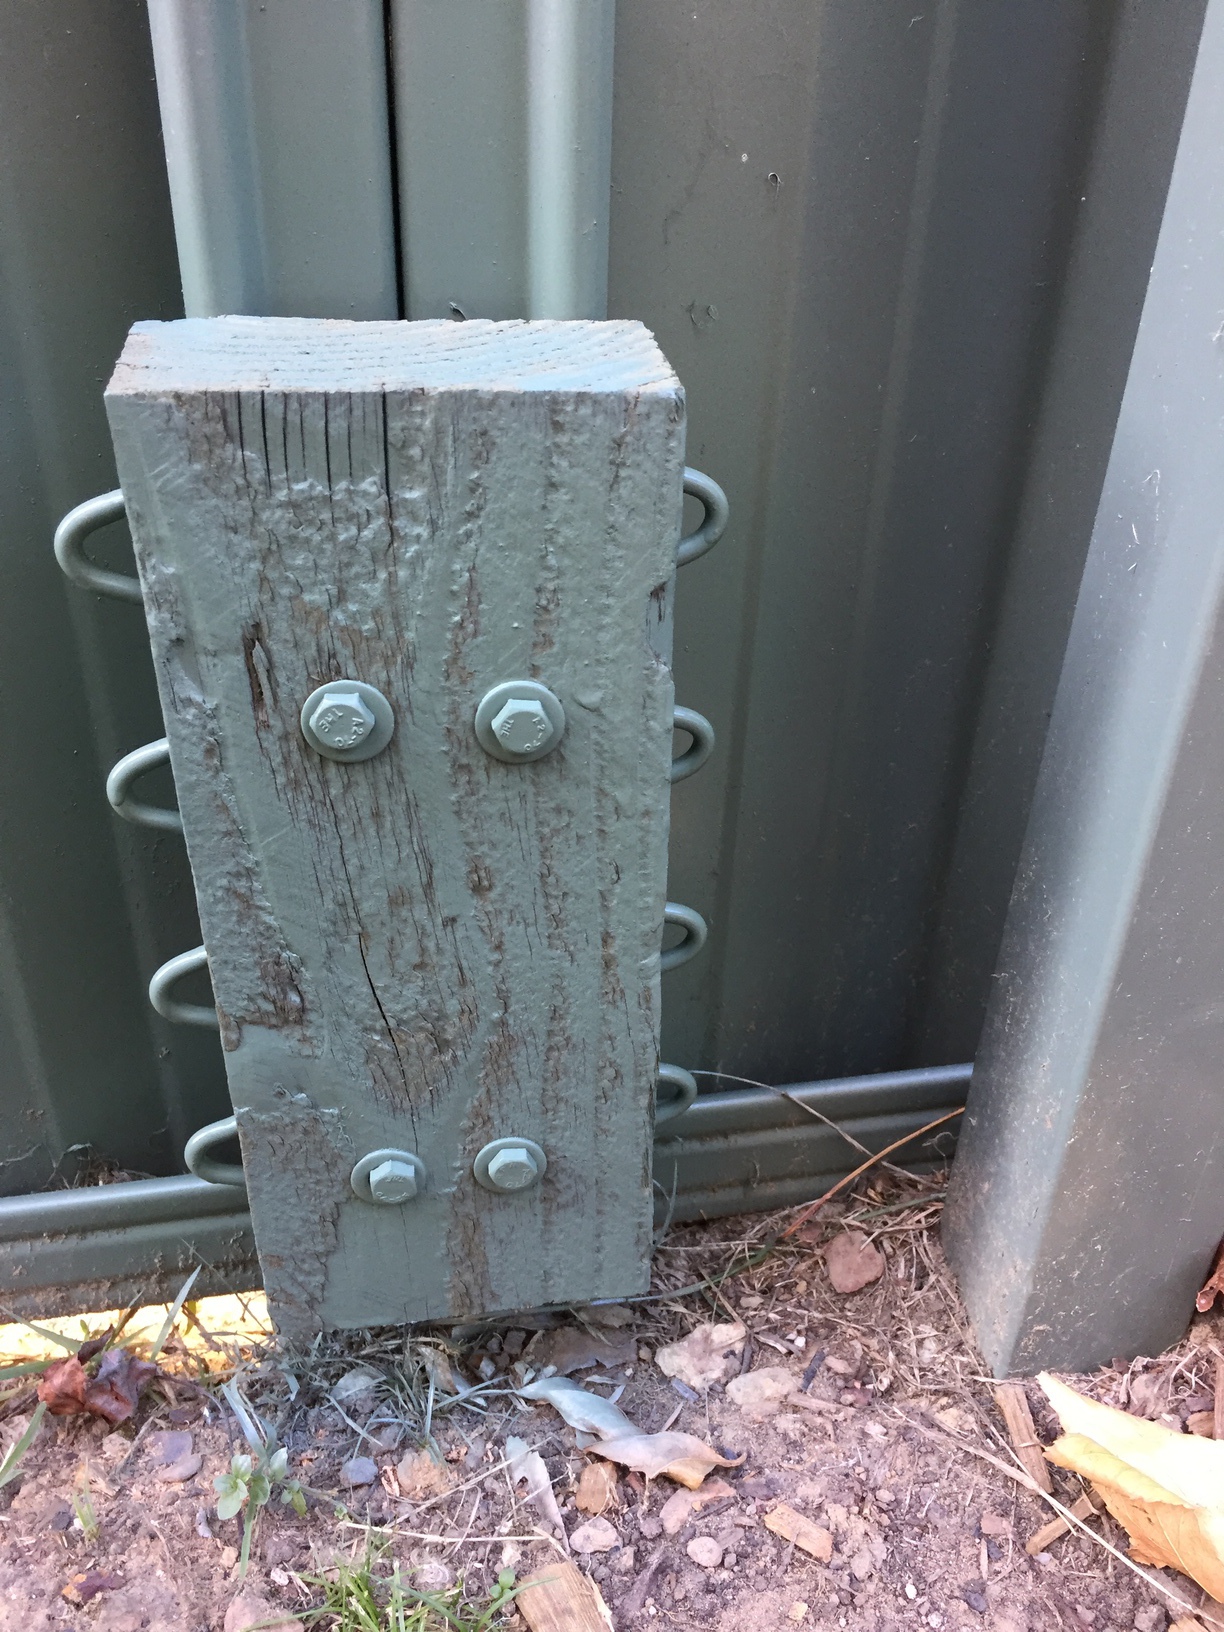
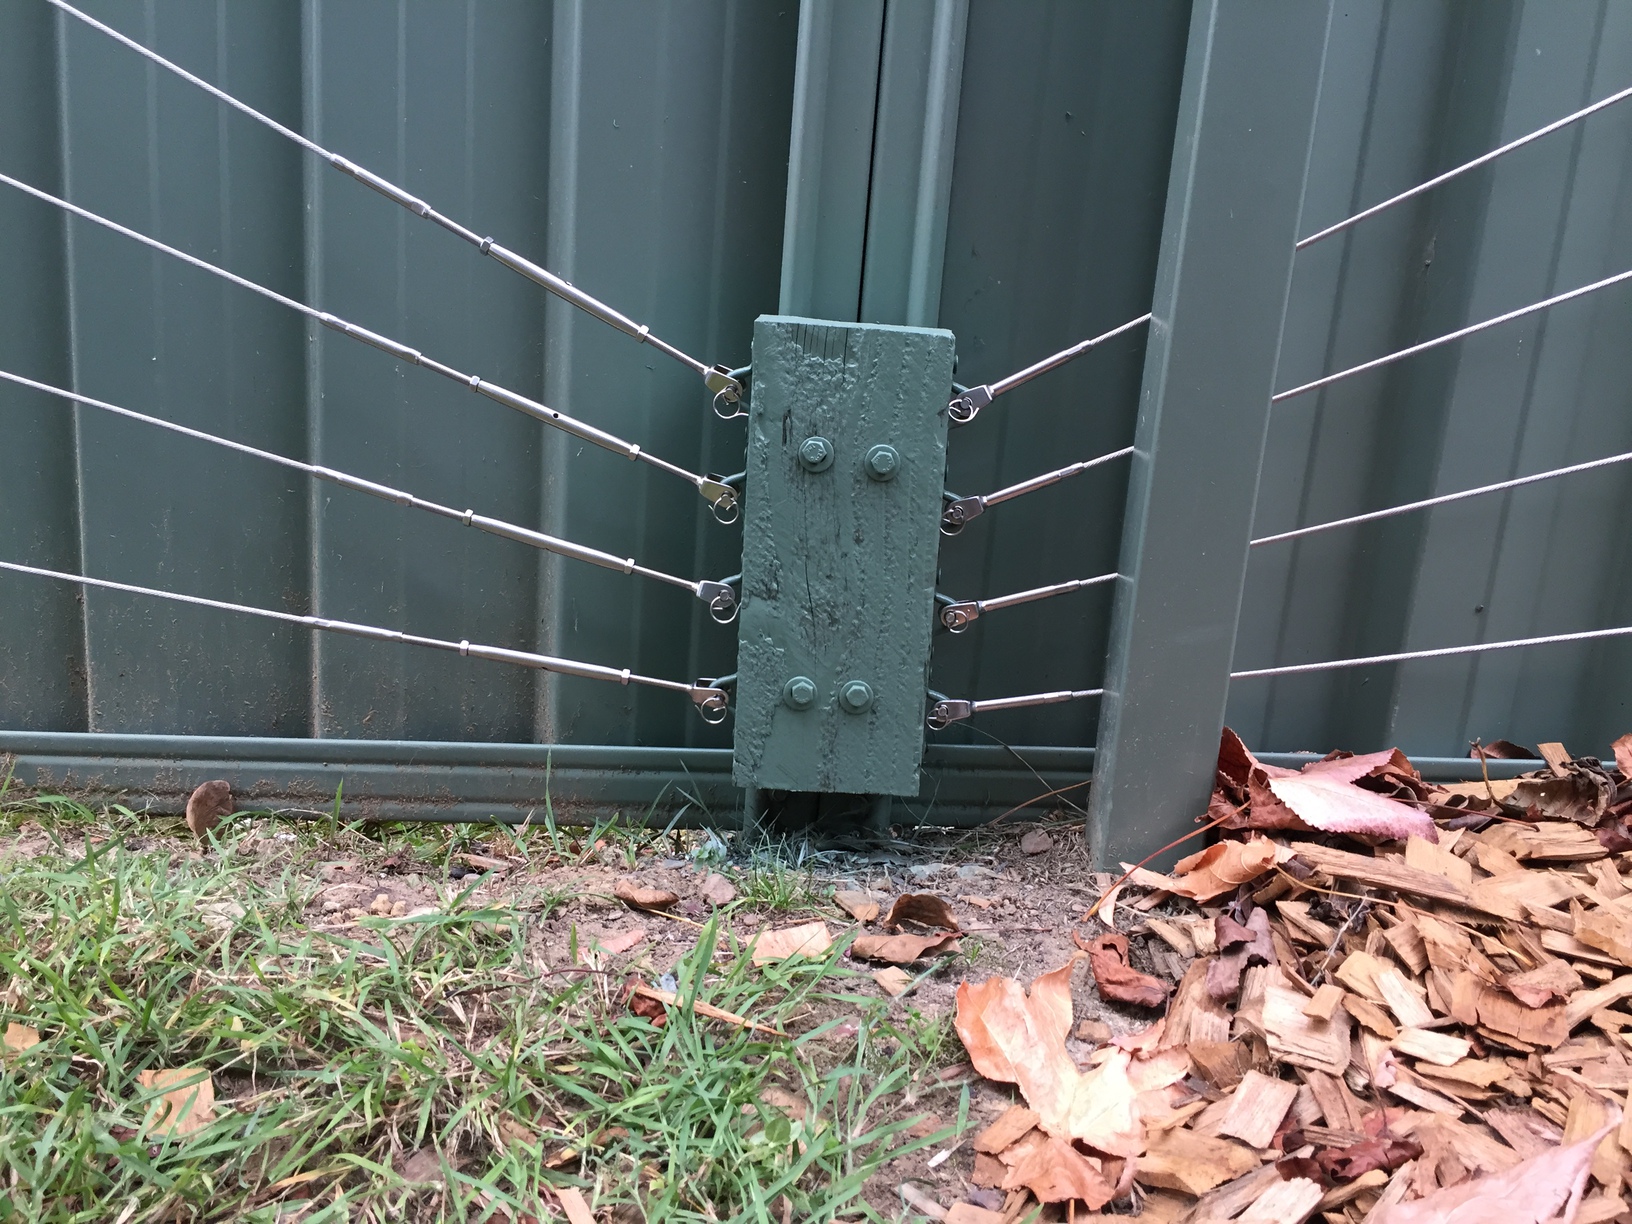
The final issue with the Colorbond fence is that unlike the wooden fence, where I screwed the saddles to the inside of the post, there is no place where you can do that. You cannot screw the saddles in and have the terminals turned 90 degrees, as there is no space in the saddle for them to turn. You have to have the lines running directly out from the saddles. I had to screw the saddles into some wooden blocks, which I attached to the fence with some long bolts, then attached the trellis lines to the saddles, attached to the wood, attached to the fence!
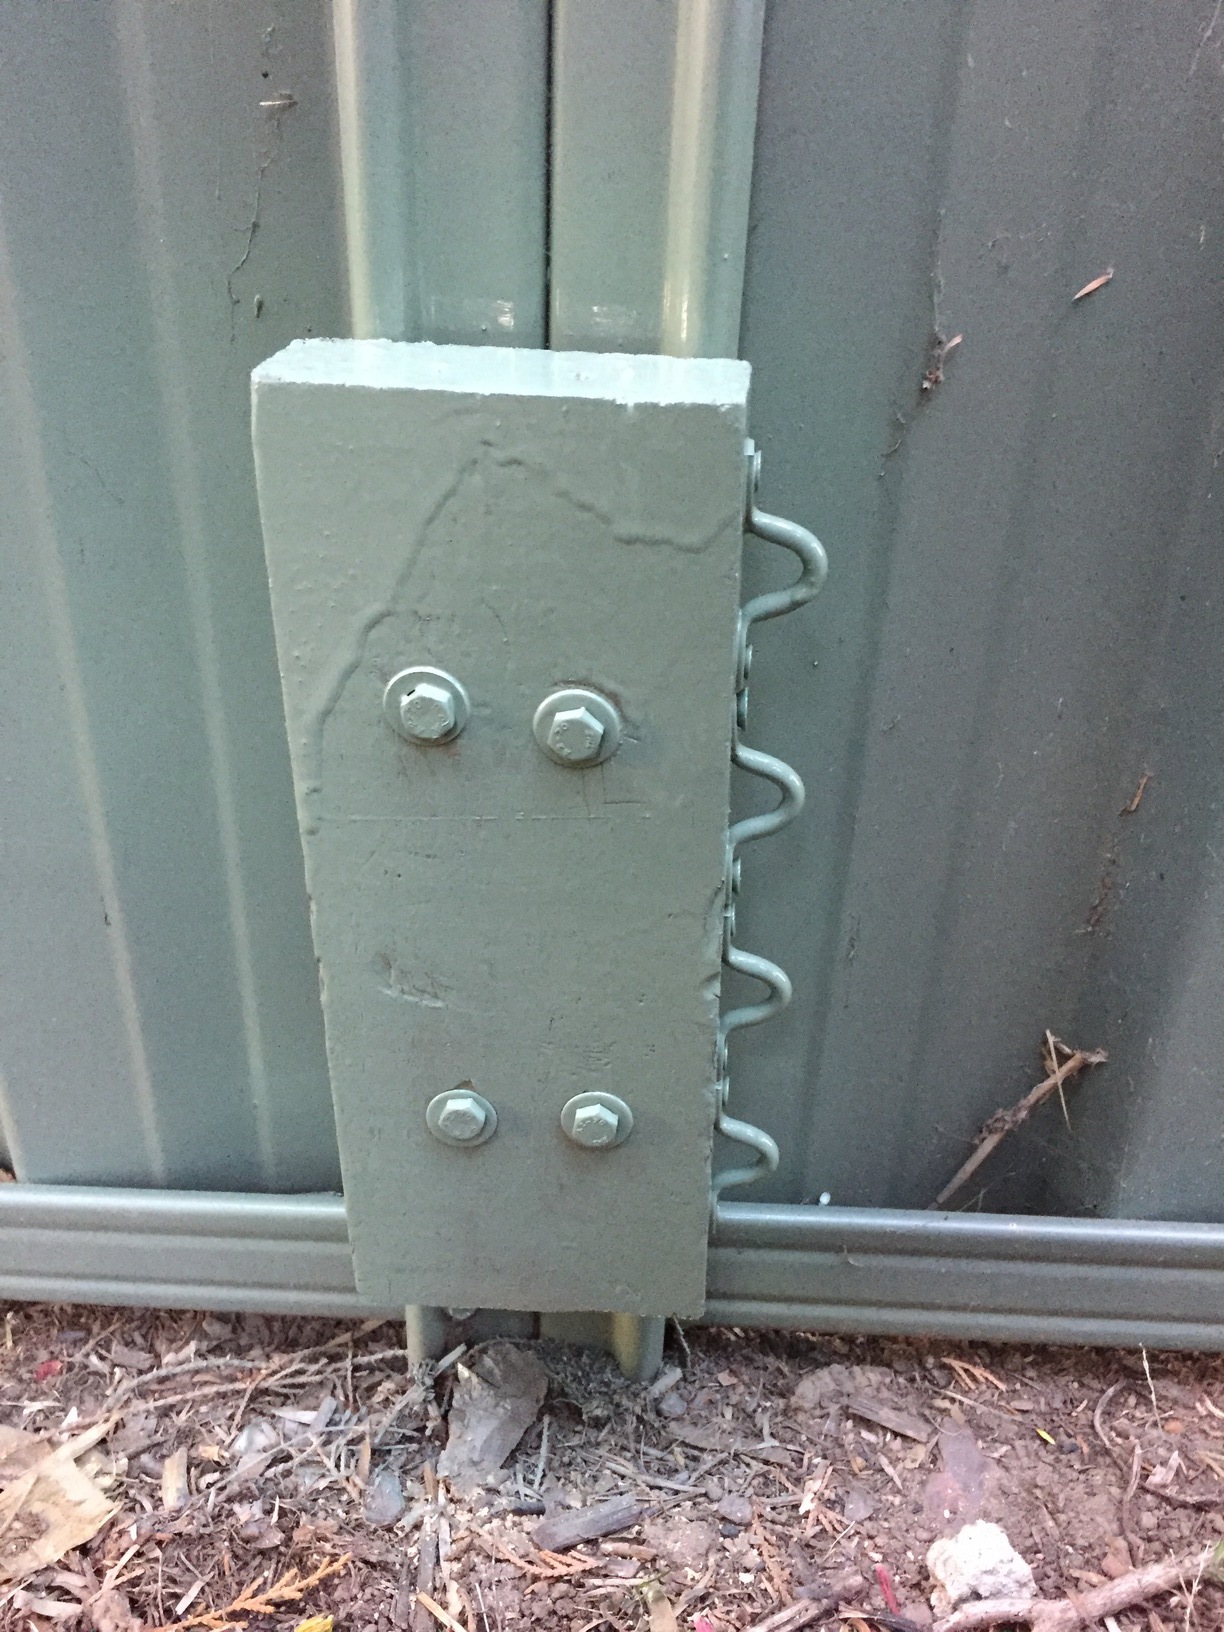
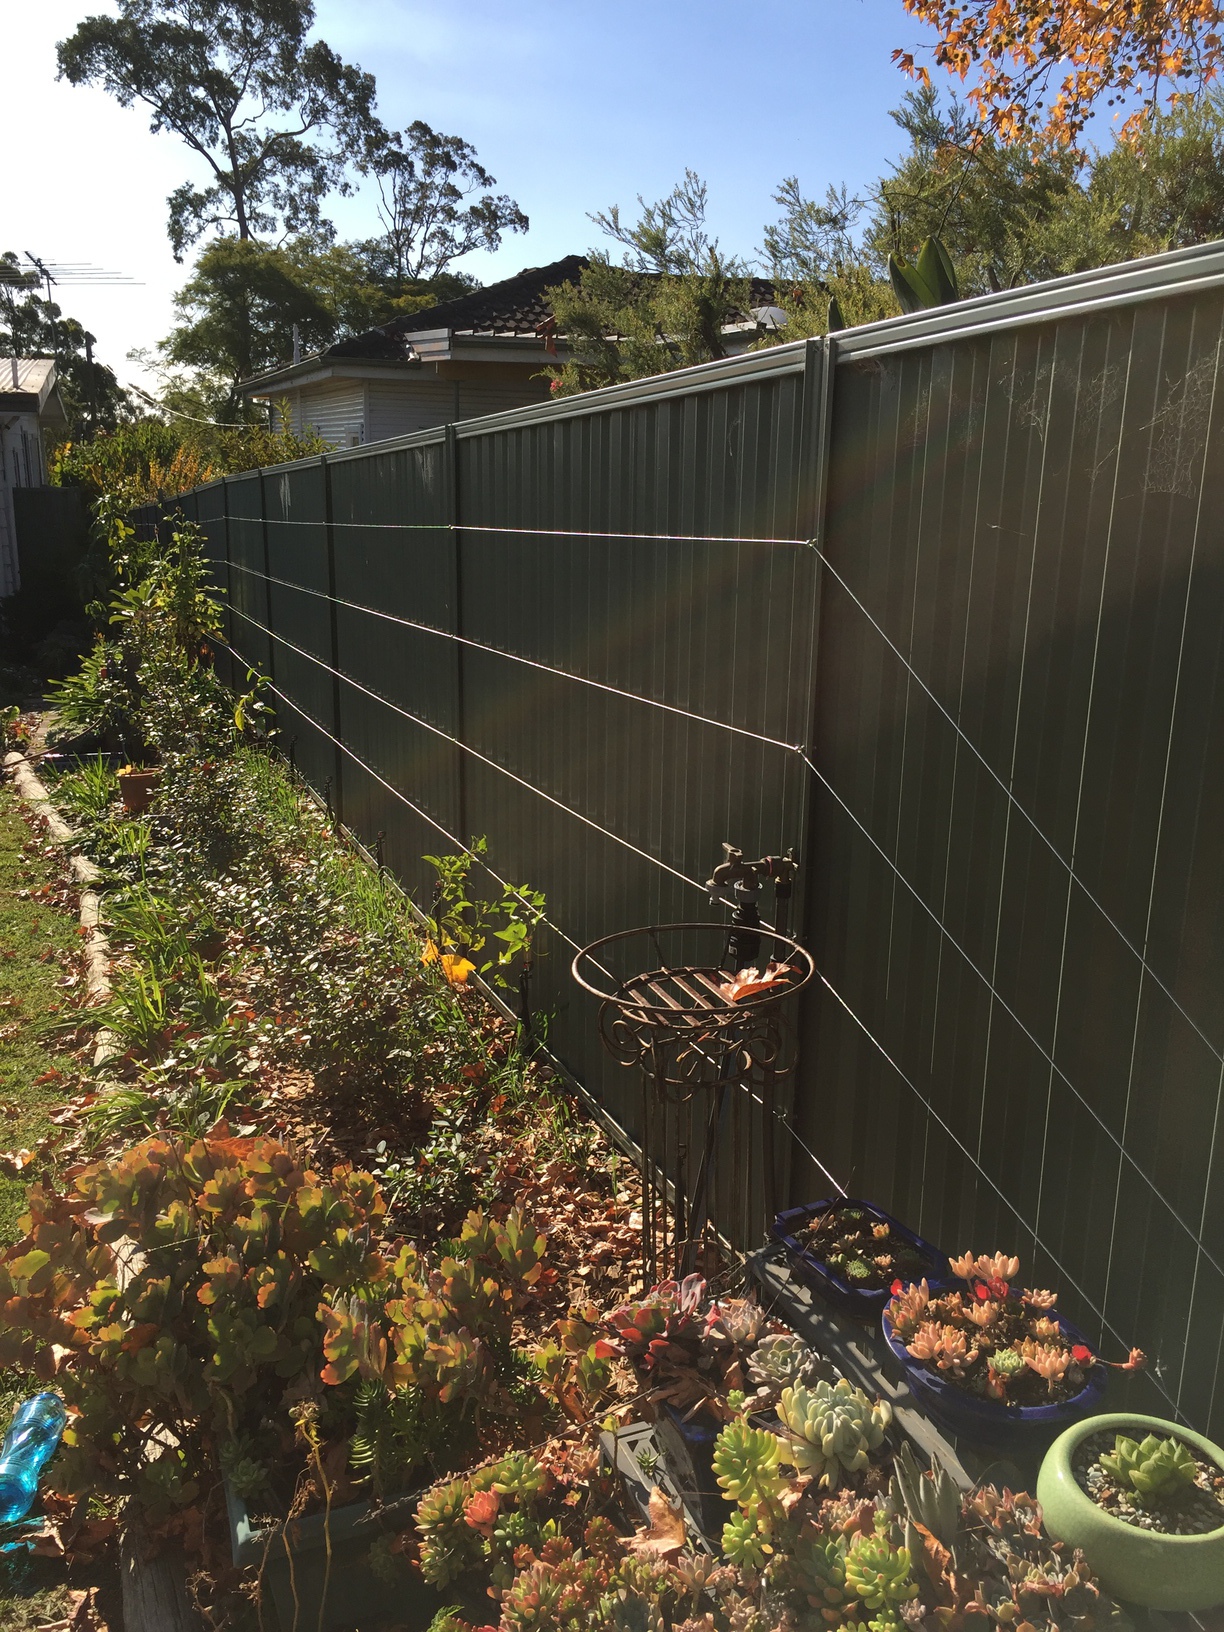
The run of the Colorbond fence is also beyond the maximum length recommended for each run of the stainless-steel cable, so I had two separate runs, one covering the back-yard fence, and one covering the front-yard fence. The front and back yard runs both join to a common piece of wood with saddles screwed into both side.
Luckily I also still had a spray-can of touch-up paint for the Colorbond fence, which I used to make the blocks of wood a little less obvious.
Three wooden blocks, two for the ends with saddles screwed into a single side, and one for the middle, with saddles screwed into both sides
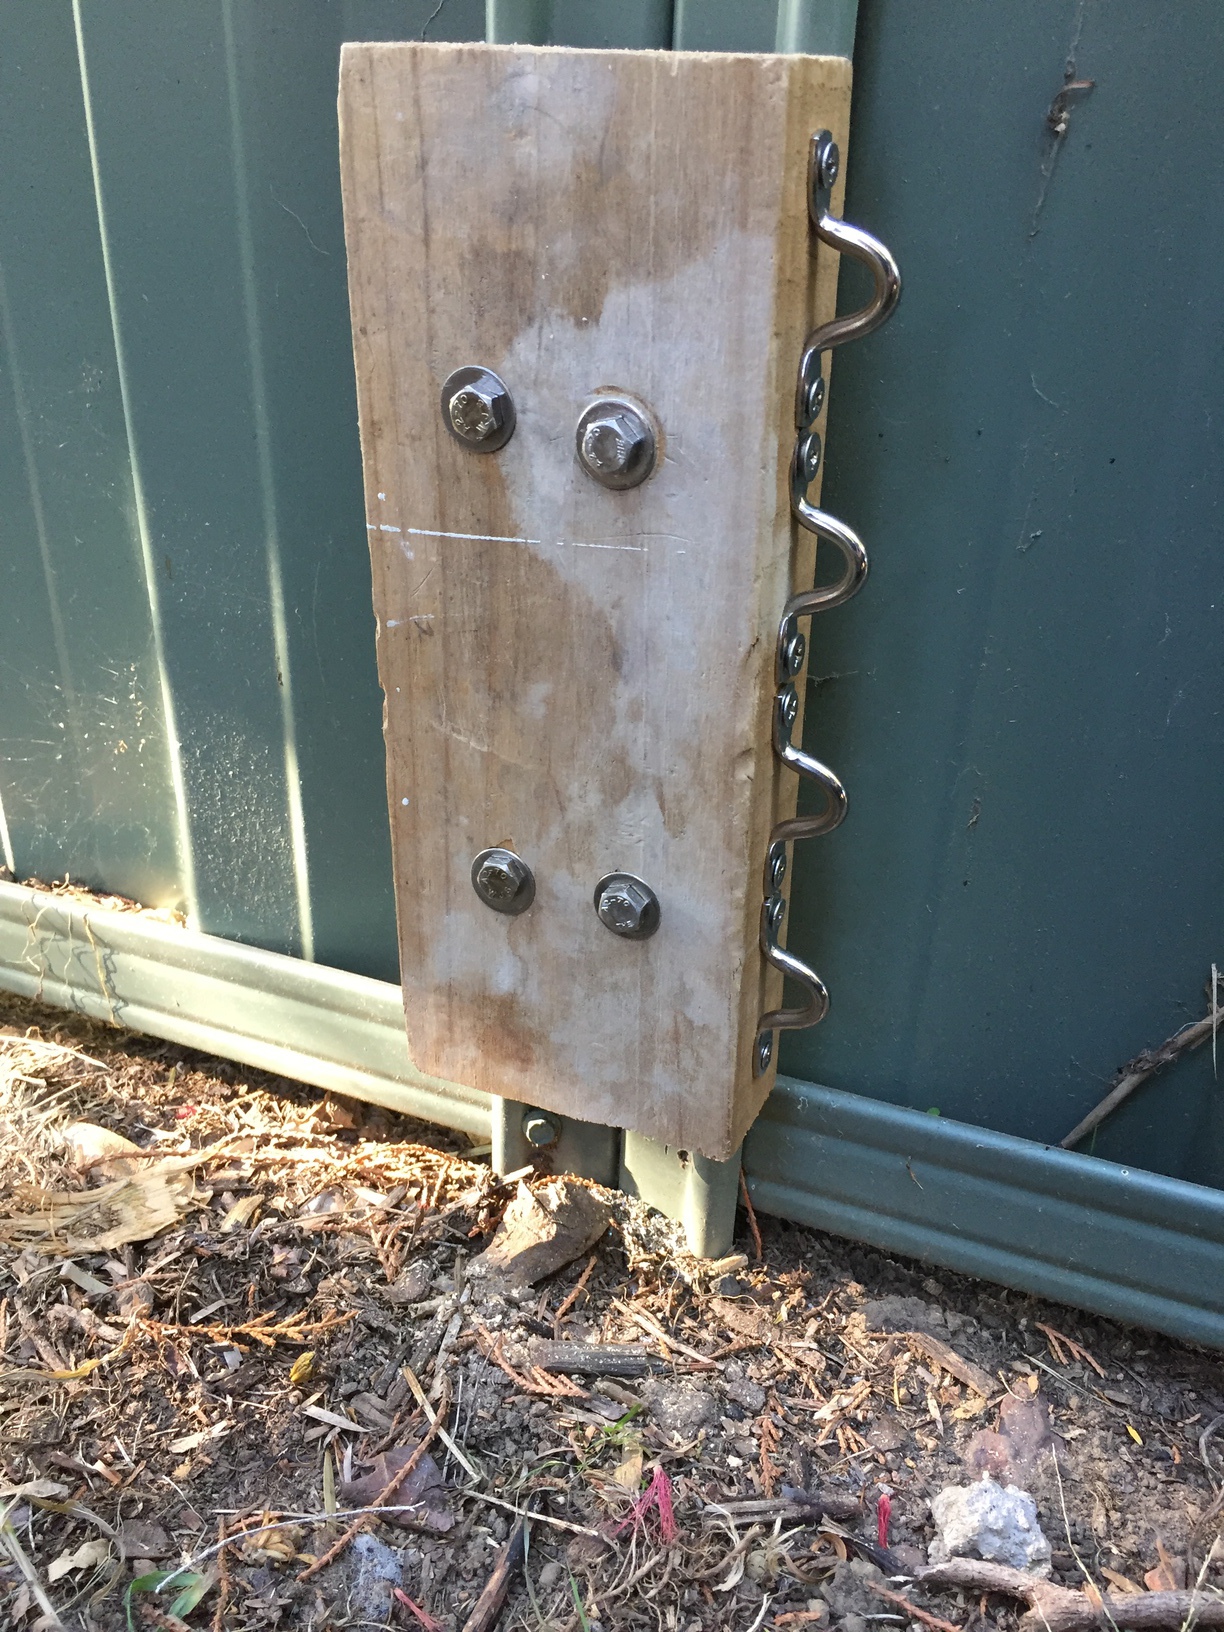
The end wooden block in the front-yard, attached to the fence, prior to spray-painting
The middle wooden block, attached to the fence, after the first coat of spray paint
The end wooden block in the front-yard, attached to the fence, afer two coats of spray-paint
The eye-bolts (or coach screws) installed on the fence. If you look closely, you can see three washers under each coach screw to lift them slightly from the fence.
This is the hydraulic swaging tool with a fork terminal in its jaws, ready to crimp
The tool has interchangeable bits for different shaped/sized crimps.
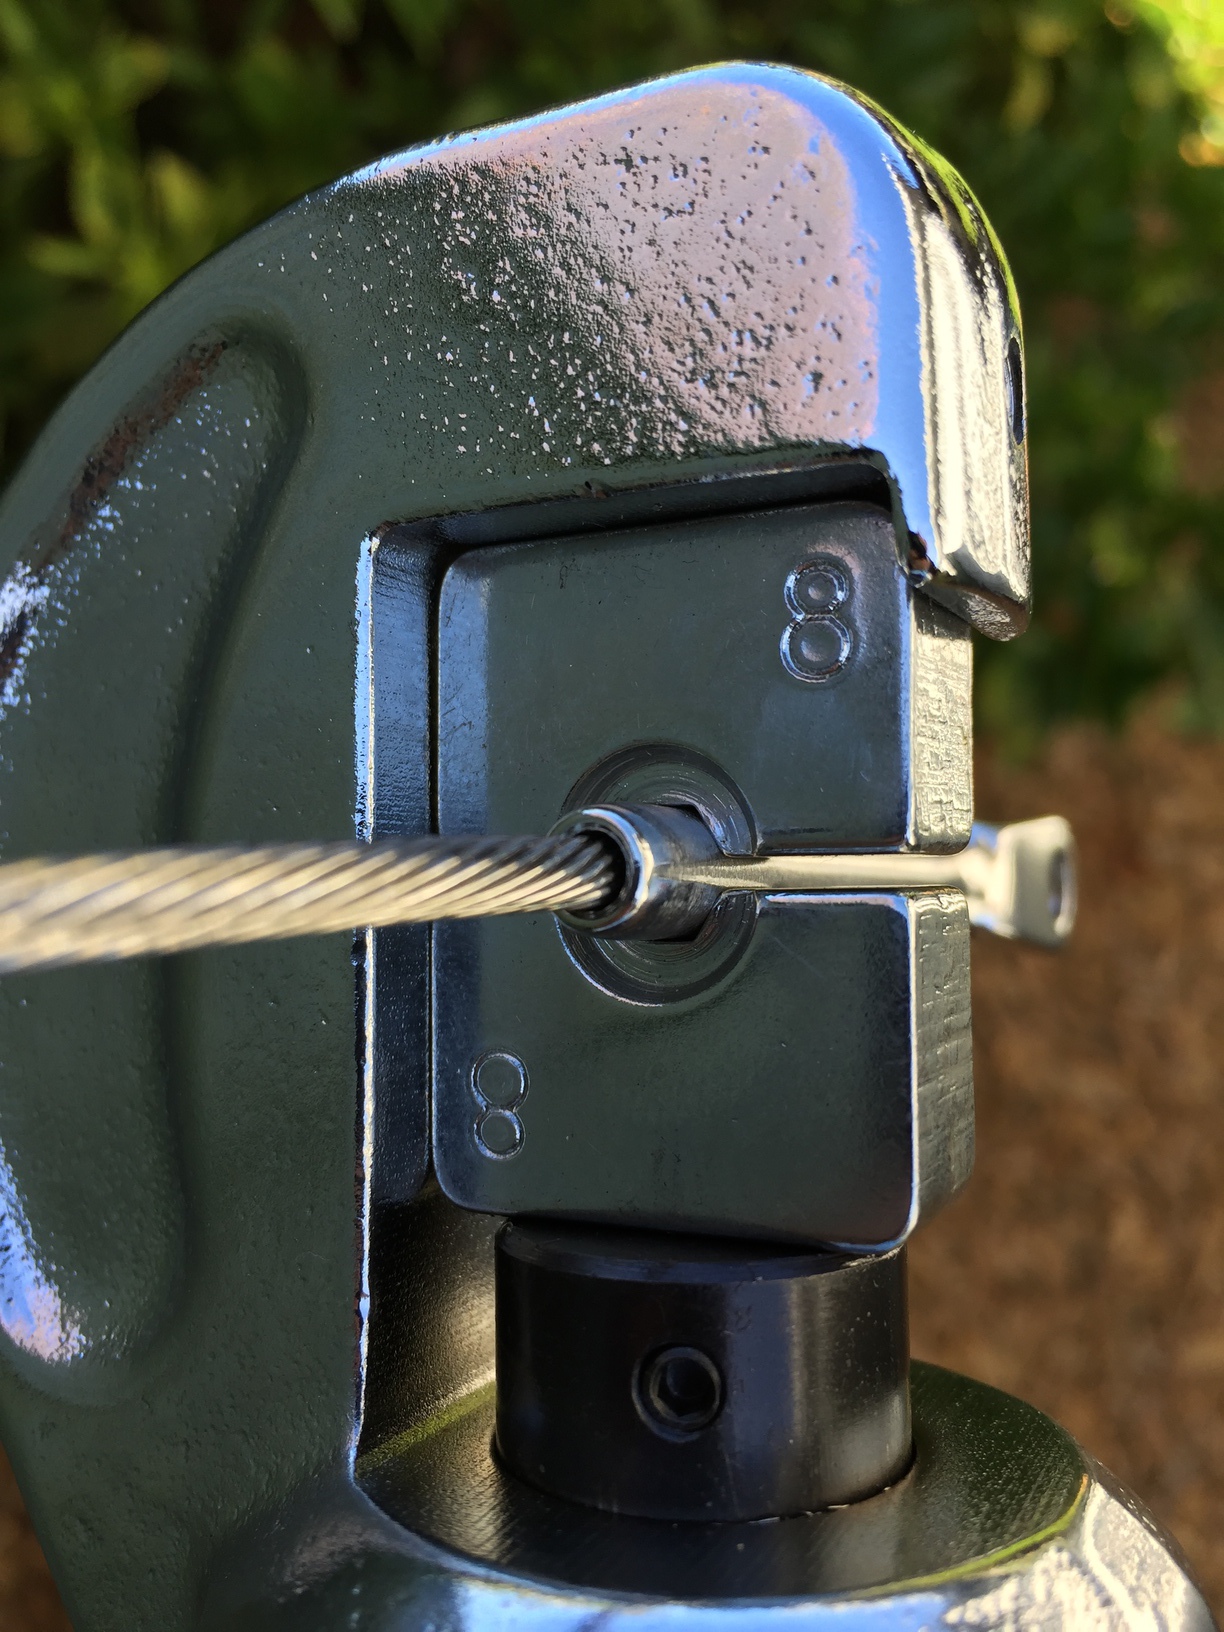
You can see the hexagonal shape of the tool, which crimps the stainless-steel tube around the stainless-steel cable
One crimped fork-terminal
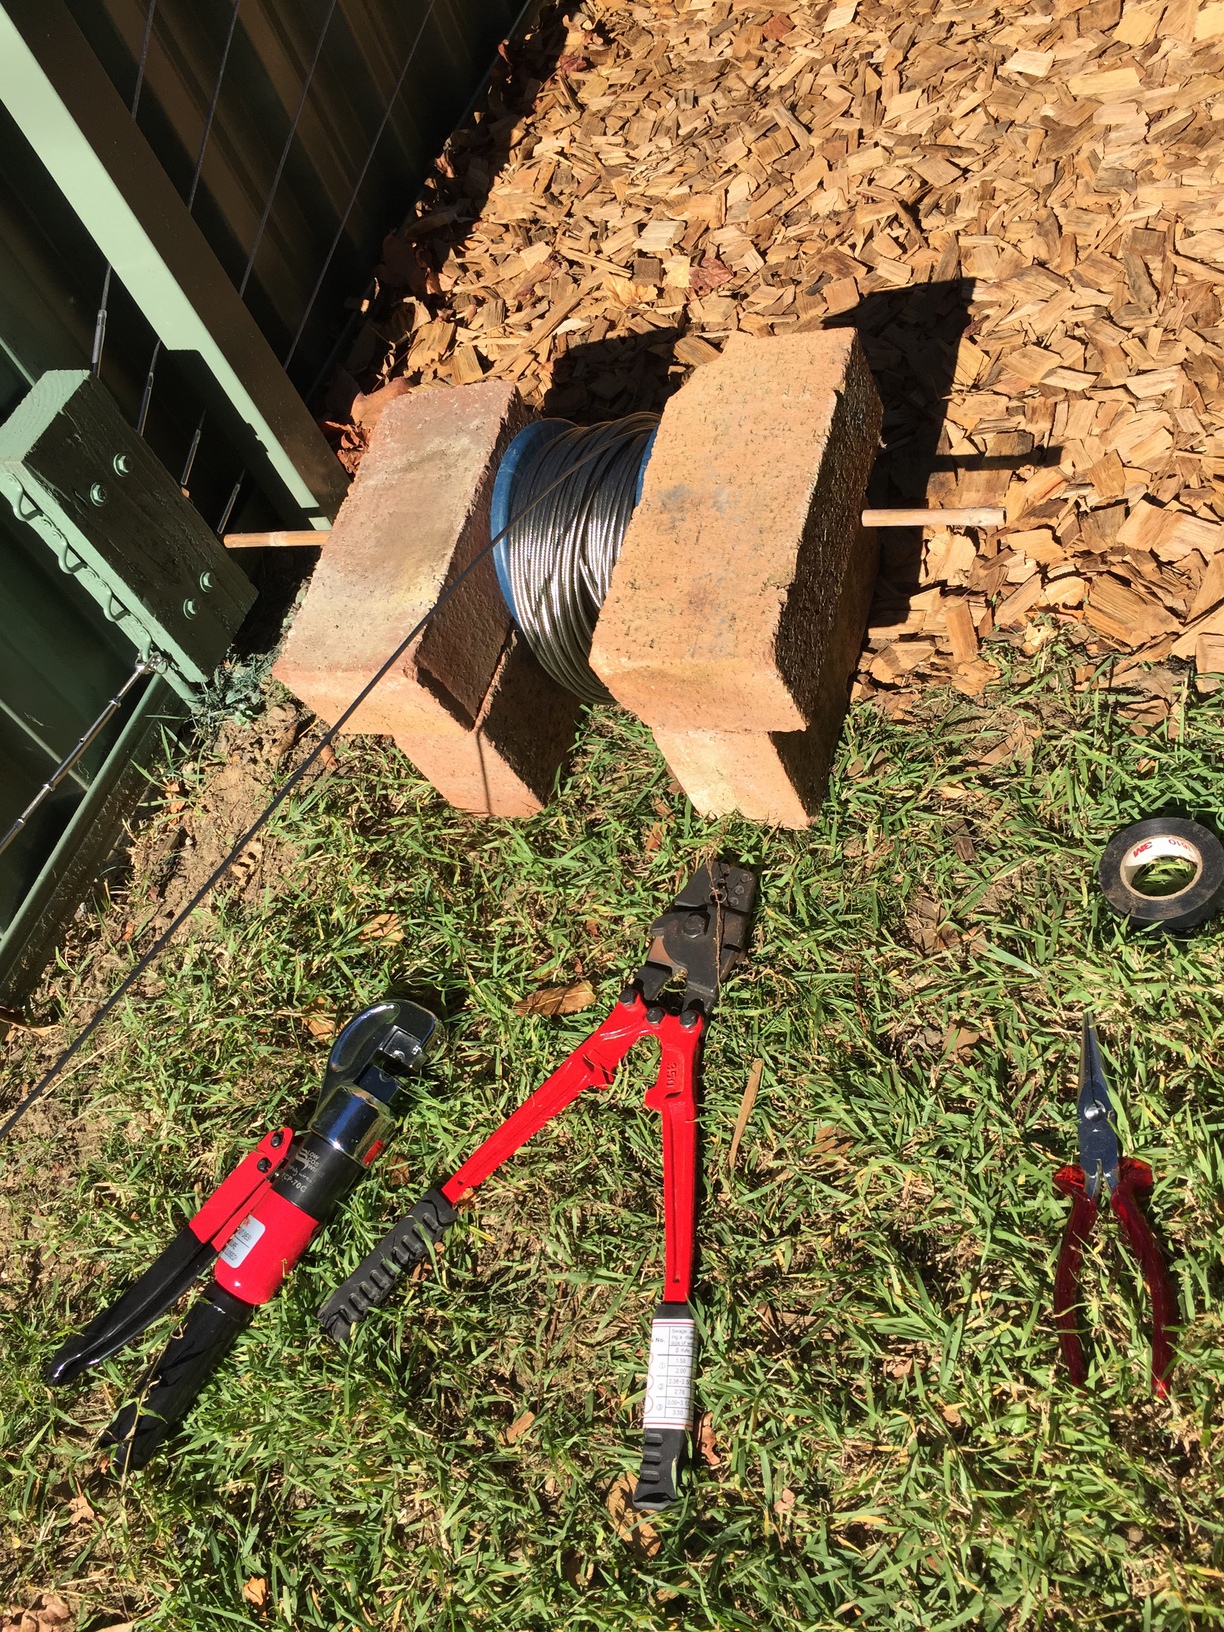
My make-shift roller-rig with the roll of stainless-steel cable, the hydraulic swaging tool, the borrowed manual swaging tool (which came in quite handy, as it had a heavy-duty cutter), long-nosed pliers and some electrical tape. A trick I picked up from YouTube is that when you need to cut stainless-steel cable (which is a bunch of individual strands twisted together), is that you wrap a few rounds of electrical tape around where you are going to cut, then cut through the electrical tape. This stops the cable from fraying out at the ends and makes it easier to get into the terminals.
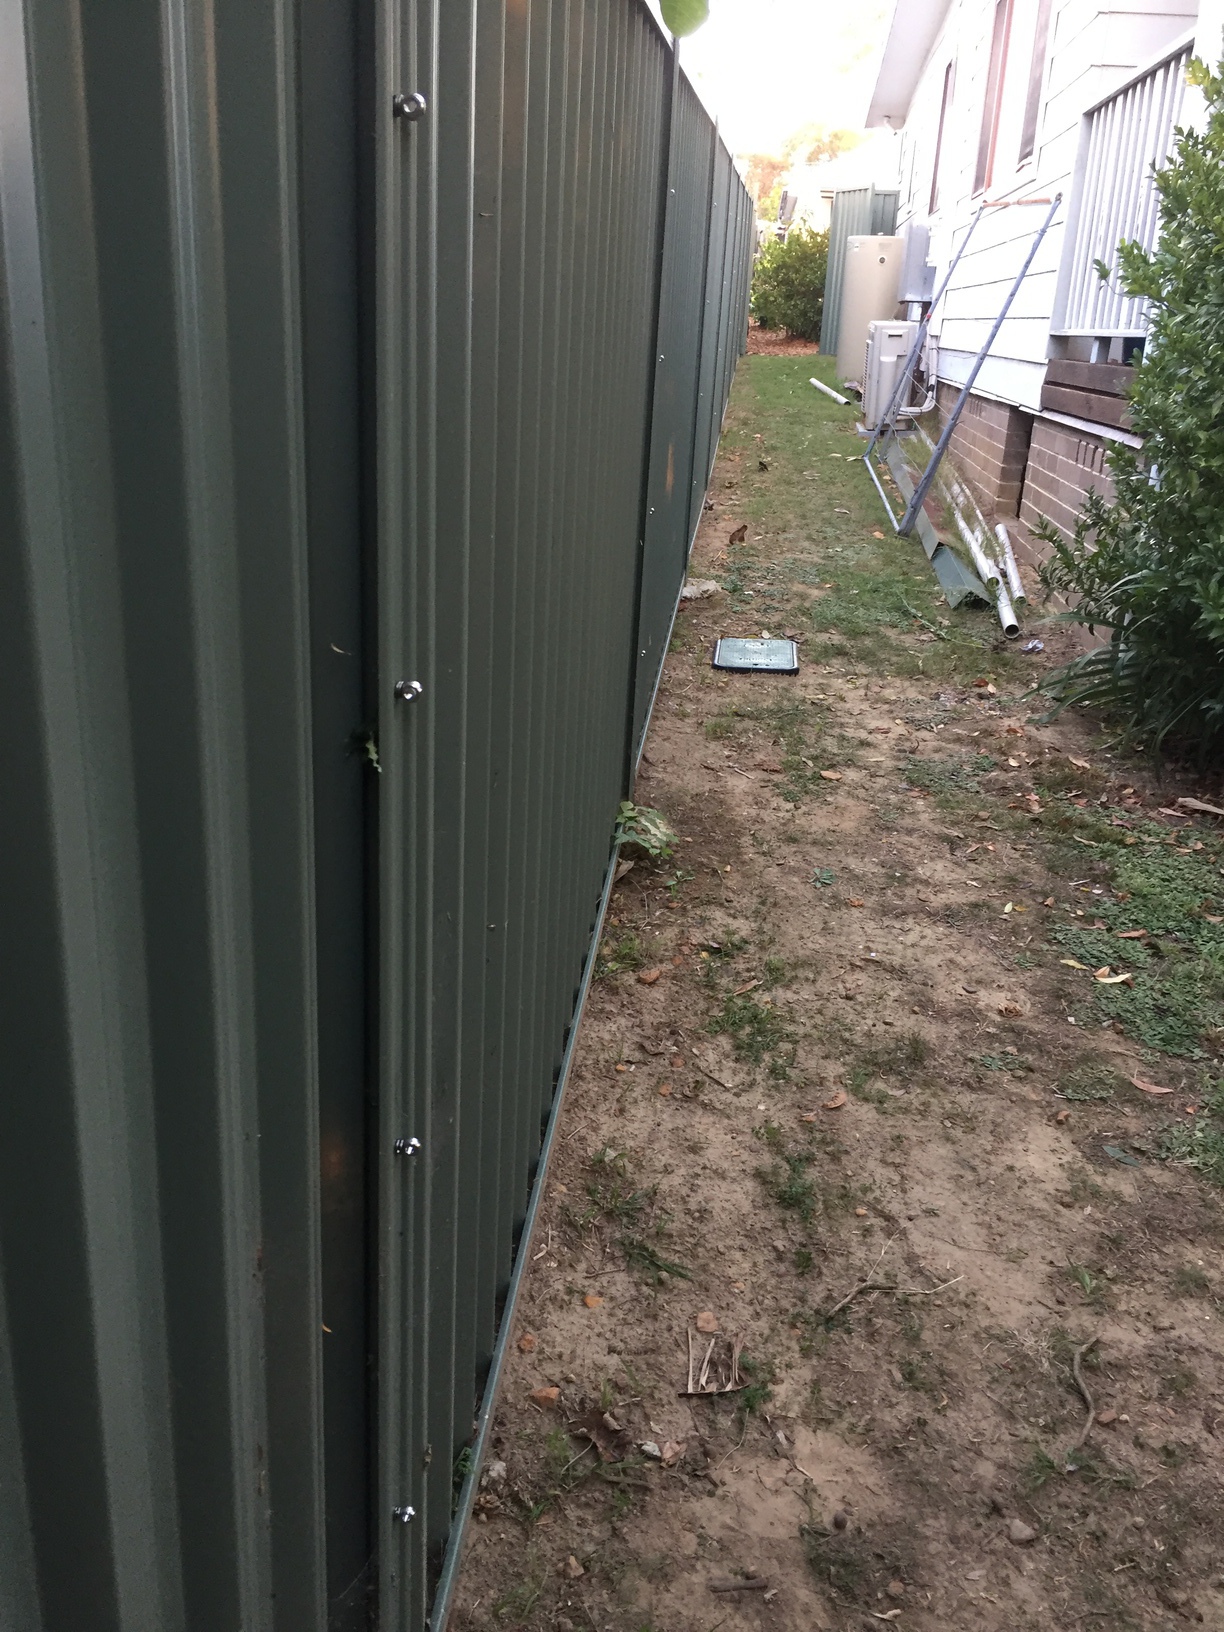
Shiny new trellis lines going down beside the house to the front-yard.
...and the ones in the back-yard
This is the middle block of wood, with saddles on both sides and the trellis wires connected. Pretty happy with the result
Grapes
One of my main motiviations for putting up a trellis was to be able to grow grapes along it. Going to the Hunter Valley for the first time many years ago and seeing the grape vines, heavy with grapes, growing in neat rows is what really picqued my interest in growing grapes at home…. and yes, I have a had a quick look at how involved it is to make wine… and it looks a little too involved for my liking, so I have stuck to table varieties.
I bought three types of grapes:
Black Muscat
Red flame seedless
Sultana seedless
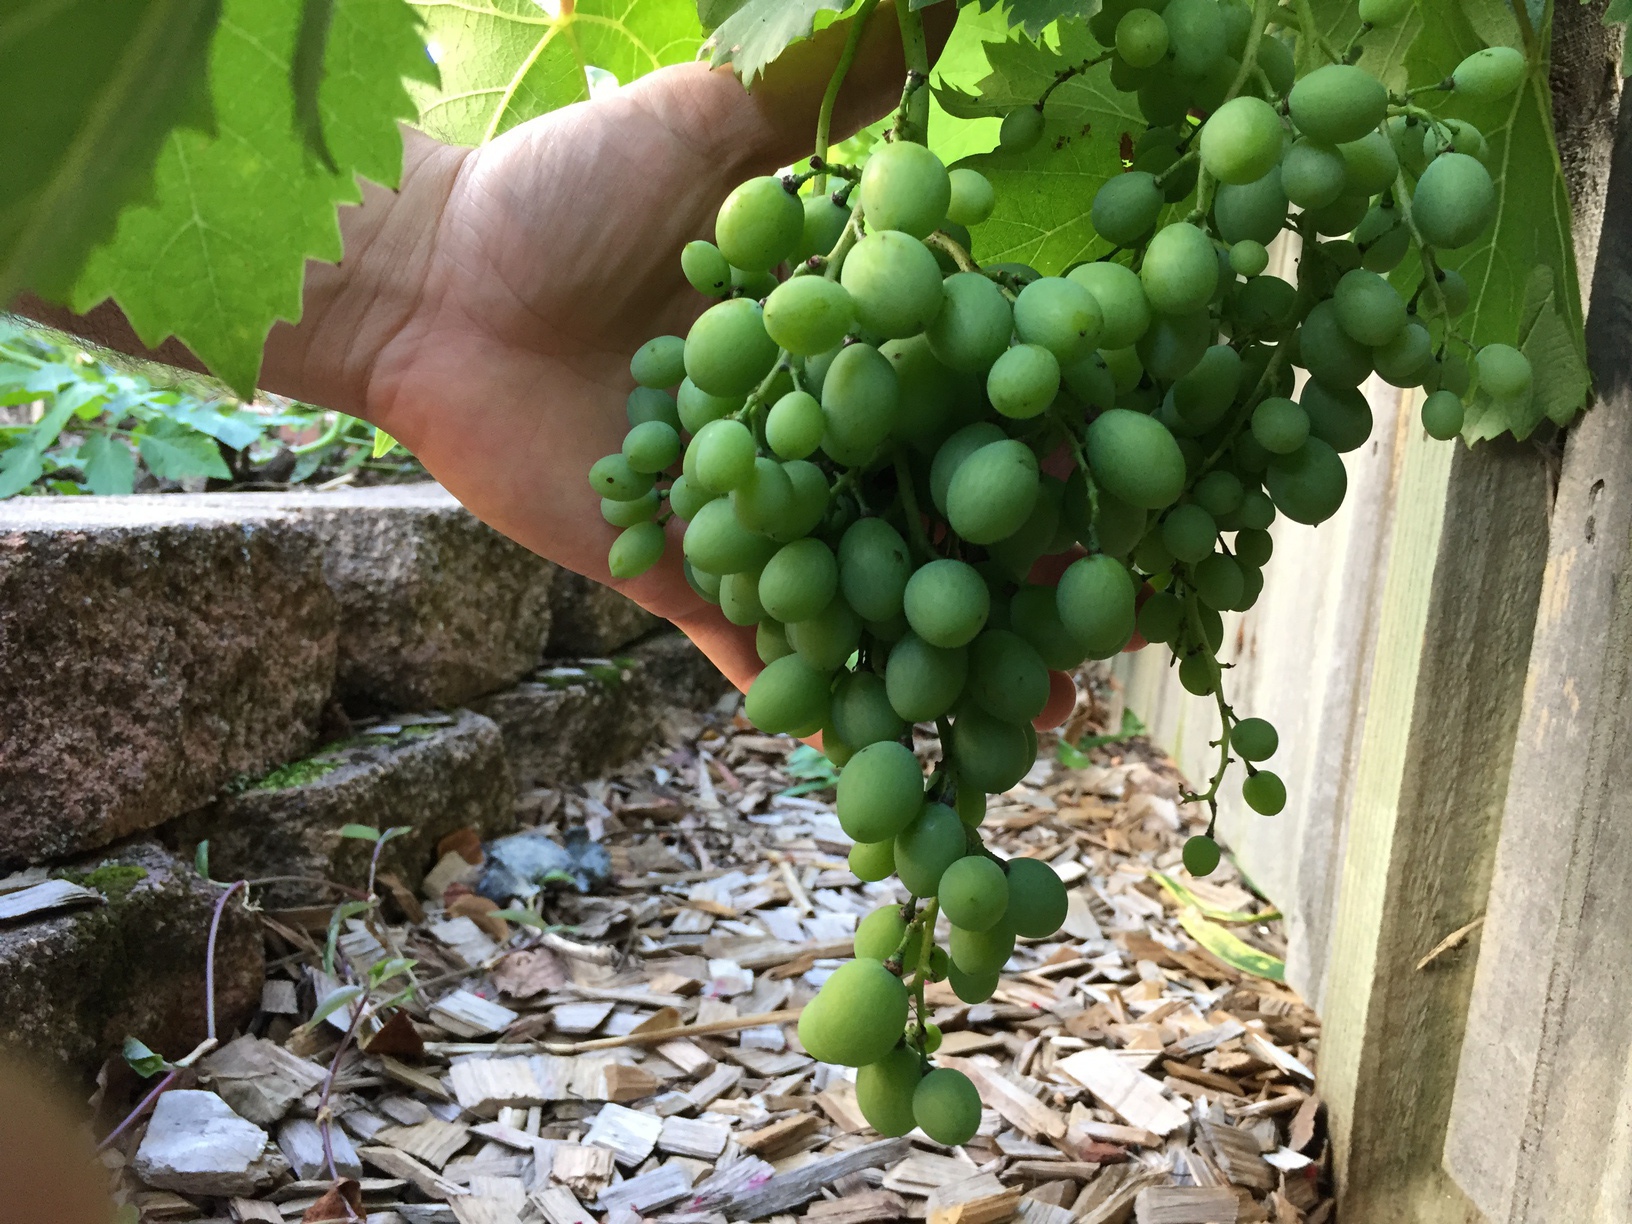
Sadly, the red flame seedless grape didn’t make it past the first season. It went dormant over winter and never came back. The black muscat was the first grape that I bought, so it has been in the ground for a full year longer than the sultana. The black muscat has gone crazy since putting up the trellis. I gave it a good pruning last autumn, cutting off any branches that were not running along the trellis. Spring saw a huge explosion of leaves, accompanied by a huge number of tiny grape bunches forming. I can’t wait until these are ripe. It should be an great crop of grapes.
The sultana is growing nicely, but is looking like it will only start producing next season. So far, no flowers forming on it, just new growth. This will give me a chance to train it along the trellis early. I had to retrofit the black muscat onto the trellis. Previously I had it trained up a couple of stakes as temporary measure.
The black muscat grape growing along the trellis
A decent bunch of green black muscat grapes
Passionfruit
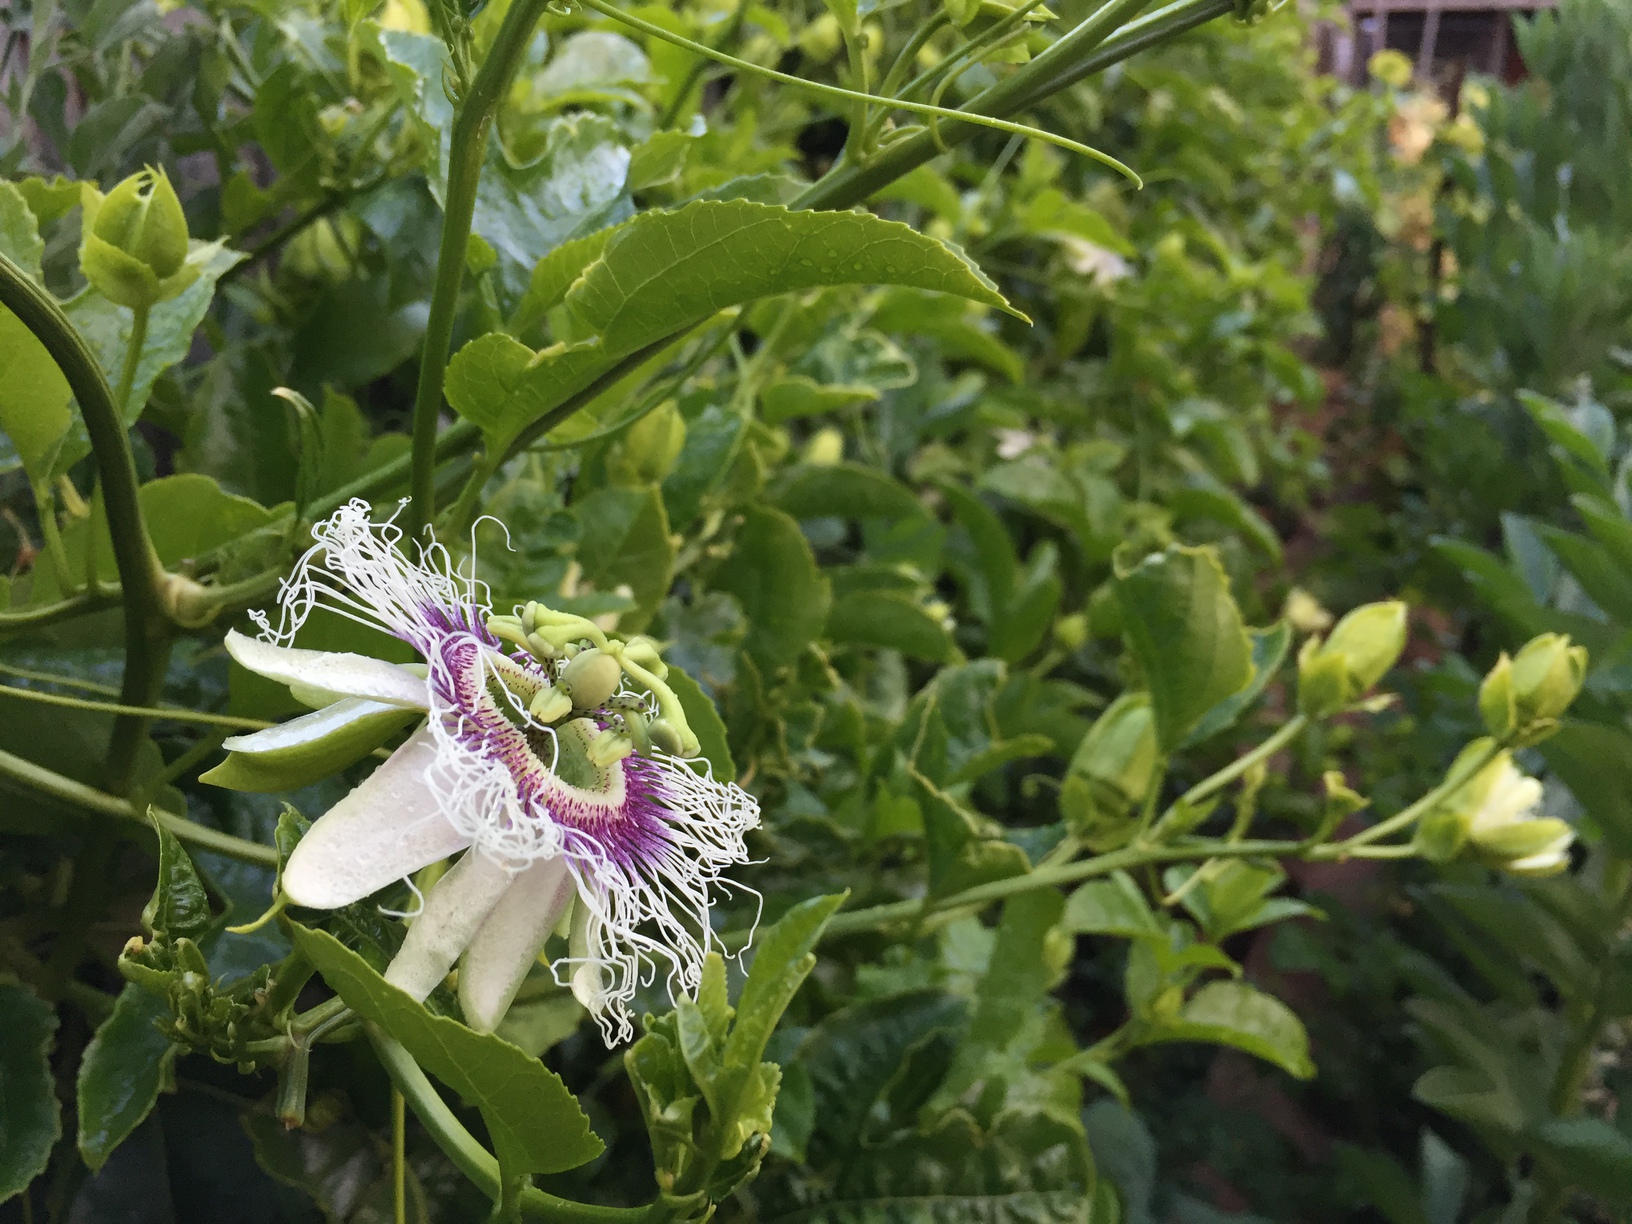
My main motiviation for putting up the trellis may have been grapes, but my wife was secretly plotting to overtake as much of the trellis with passionfruit vines as possible! She LOVES passionfruit… and given the cost of these at the shops, sometime $2 per fruit, it won’t take long for the vines to pay for themselves… and for the trellis.
We had five vines in the ground, but sadly two of them have not made it. I’m not sure what the issue was with the two that died. Fungal issue most likely. They looked like they were growing well, then the leaves suddnely started to go limp and the plants slowly shrivelled up and died.
I have taken a few cuttings from the first passionfruit vine we planted, which is now in full flower and starting to set a good number of fruits. One of the cuttings has definitely taken and is looking healthy, so that will replace one of the ones that died. I’ll need to take a few more cuttings soon.
The passionfruit vine behind the garden beds. A little hard to see because of the broad-beans in the way, but you can make out a few of the flowers along the back fence
One of the many passionfruit flowers
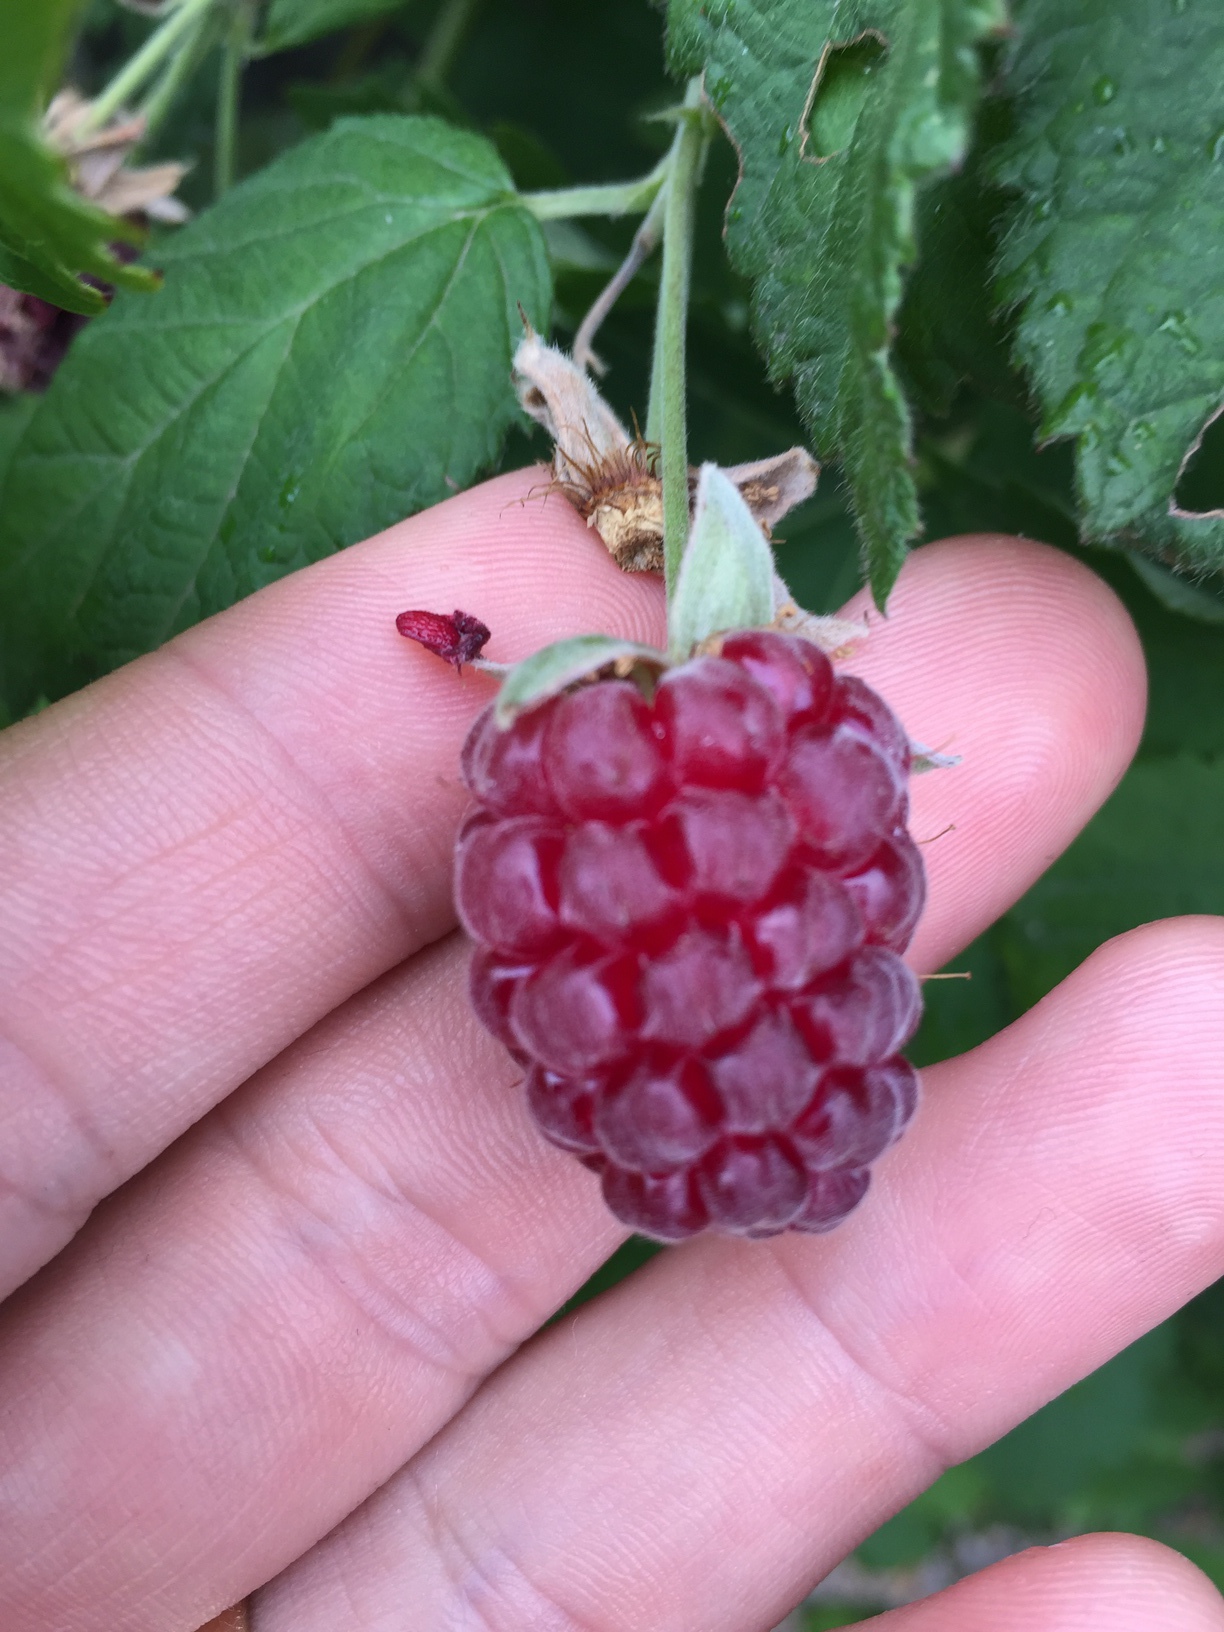
Blackberry and Loganberry
The blackberry gave us quite a few good blackberries towards the end of last season, although it is starting to get a bit crowded out by the passionfruit now. There are quite a few flowers and small fruits having set on it already.
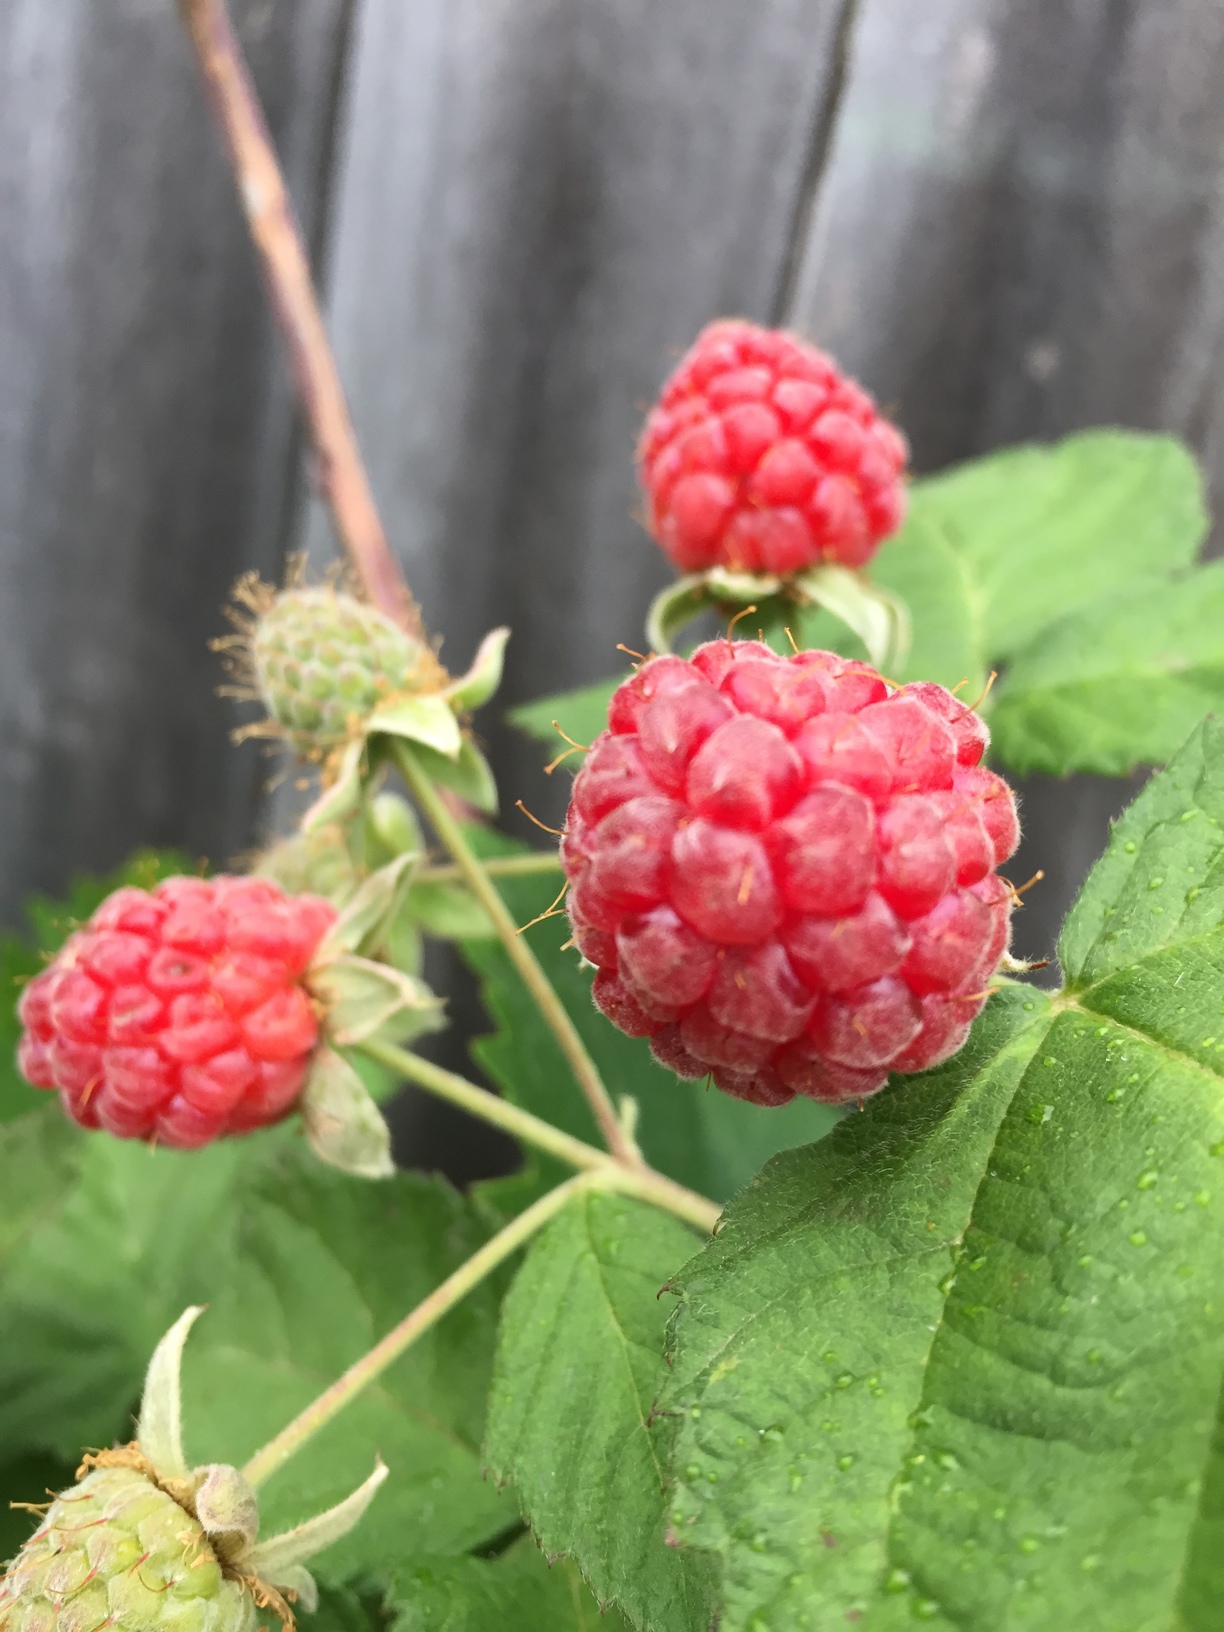
The loganberry struggled where it was last season, and only started really putting on growth once I had the irrigation system in. It has put on a good lot of new growth this season and has started flowering and setting fruit. I hadn’t tried a loganberry before, but it is apparently a cross between a blackberry and a raspberry. To me it tastes closer to a raspberry, possibly slightly more tart.
I opted to only grow thornless varieties of cane berries. I did have some raspberries in the ground a long time ago, but when I realised how virulent they are and tried to remove them and got thorns in my hands through the gloves I was wearing, I decided to dig all of it out and not plant any more thorny cane berries.